一盏小灯 前端自动化测试工具 Cypress 试用调研记录
Jerry li
·
2019年05月06日
·
最后由 yangjiaqiang 回复于 2024年04月18日
·
20945 次阅读
本帖已被设为精华帖!
前言
前段时间在论坛看到 cypress 的介绍,正好想了解一下前端测试框架,所以使用和调研了一下。以下是相关记录。
参考官网: https://www.cypress.io/
环境准备
1.工具:vs code;环境:node.js。
按网上教程安装即可。
2.安装 cypress
cd /your/project/path
npm install cypress --save-dev
3.安装插件:
npm install eslint-plugin-cypress --save-dev
npm install --save-dev eslint-plugin-chai-friendly
##4.配置:
在根目录下创建 package.json:
{
  "scripts": {
    "cypress:open": "cypress open"
  },
  "devDependencies": {
    "eslint-plugin-chai-friendly": "^0.4.1",
    "eslint-plugin-cypress": "^2.2.1"
  }
}
在 // my-project/cypress/ 目录下创建 .eslintrc.json:
{
    "plugins": [
      "cypress",
      "chai-friendly"
    ],
    "rules": {
      "no-unused-expressions": 0,
      "chai-friendly/no-unused-expressions": 2
    },
    "env": {
      "cypress/globals": true
    },

        "extends": [
          "plugin:cypress/recommended"
        ]

  }
5.启动命令:
npm run cypress:open
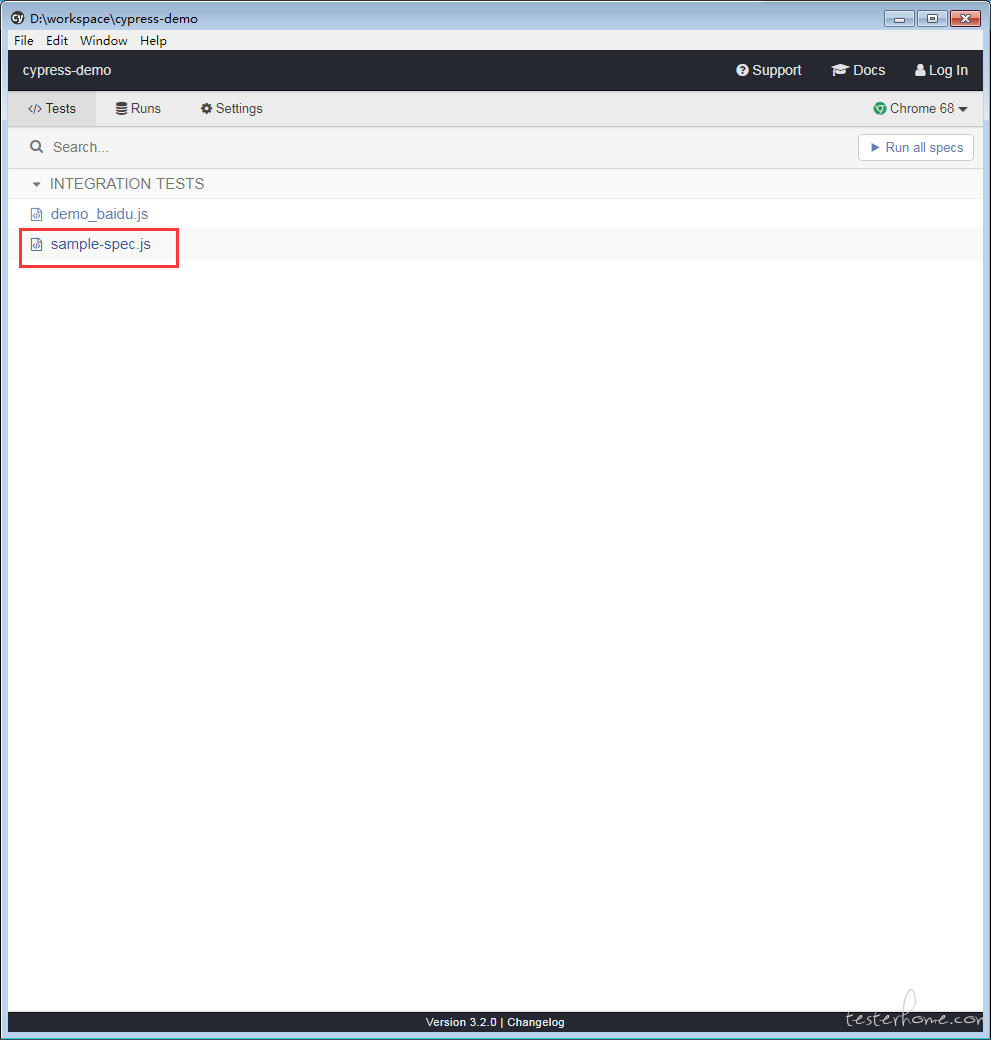
helloworld:
your-project/cypress/intgration 目录下新建 sample-spec.js
describe('My first test case for cypress',function(){
    it('Does not match!',function(){
        expect(true).to.equal(true)
    })
})
在 cypress 窗口点击当前用例执行:
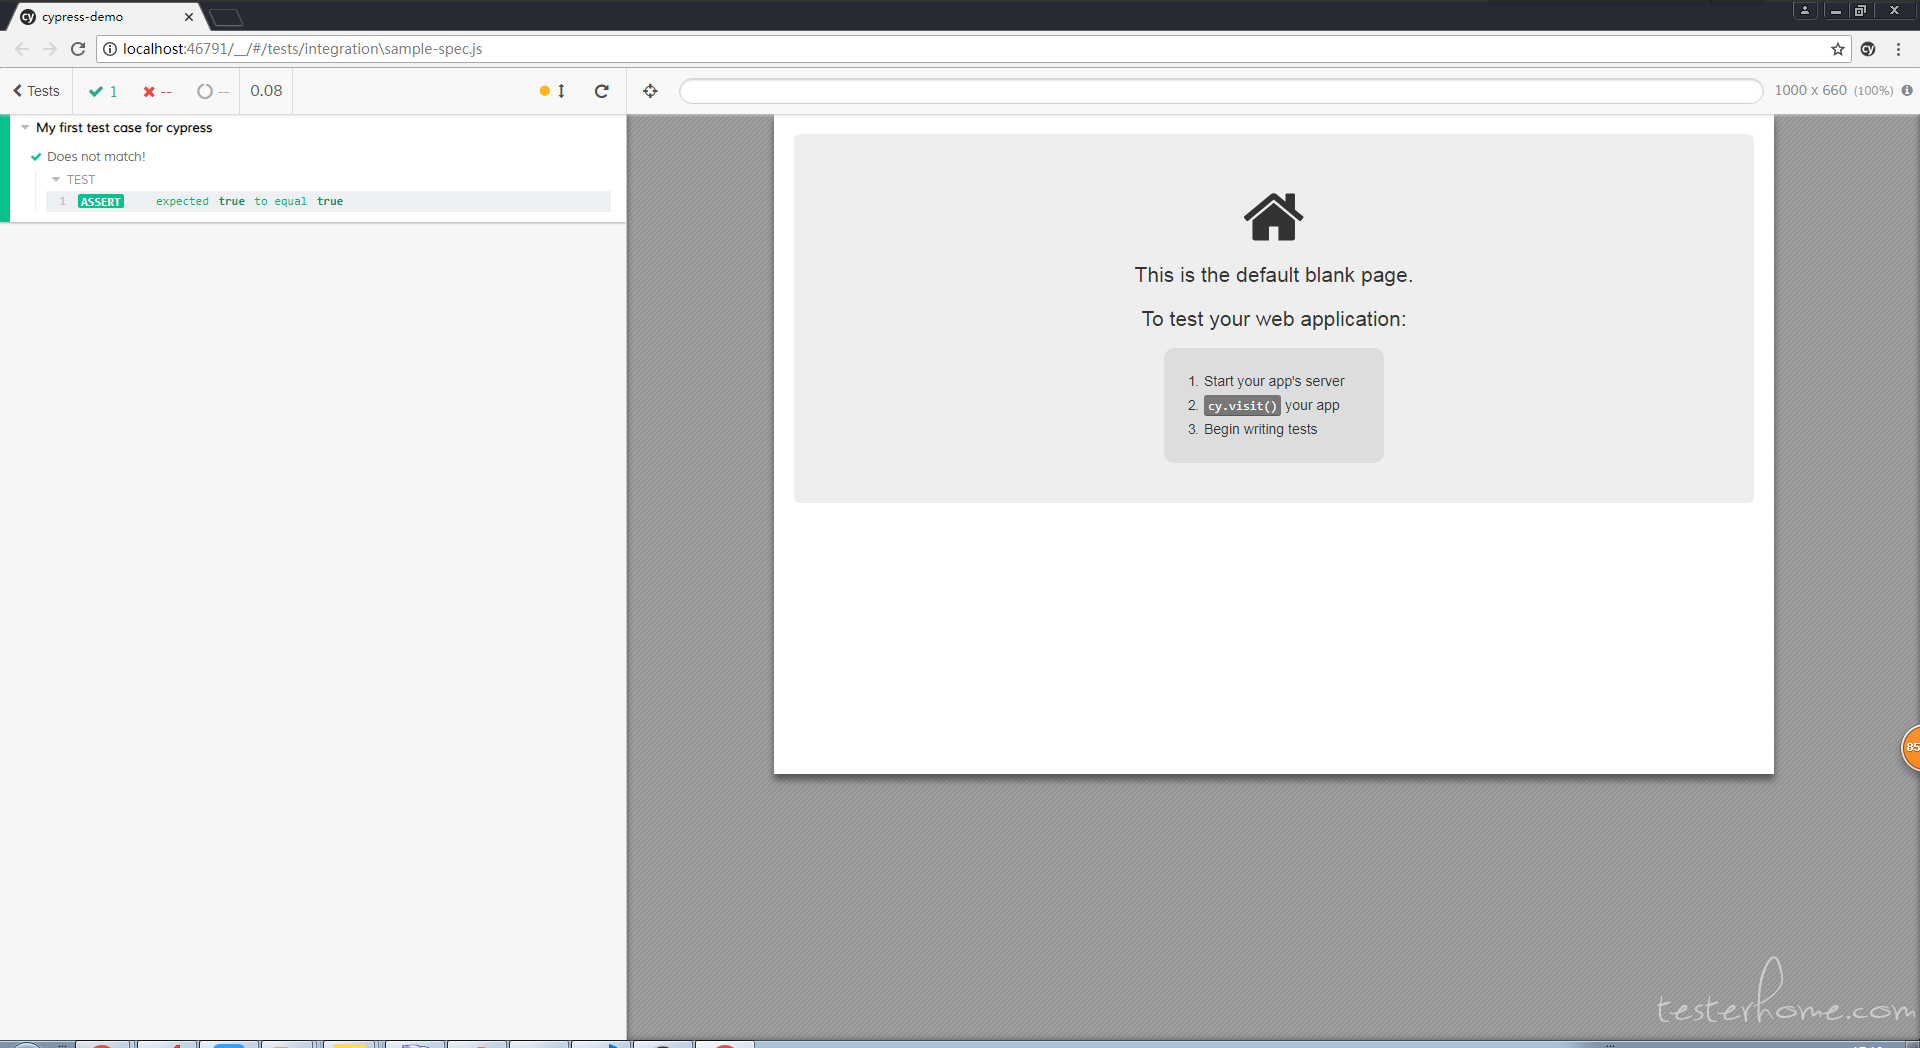
注意在编写用例时,每次保存会自动触发测试,对于调试来说是比较方便的。
第一个用例
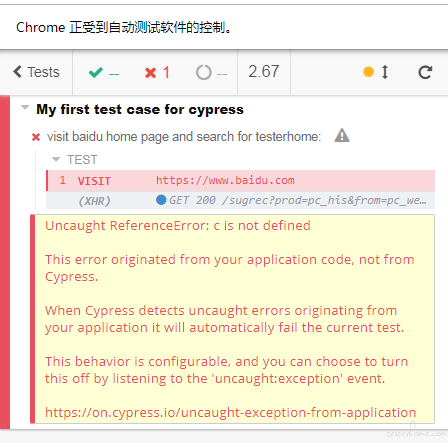
访问百度首页并搜索 testerhome:
describe('My first test case for cypress',function(){
    it('visit baidu home page and search for testerhome:',function(){
        cy.visit('http://www.baidu.com') //访问url
        cy.title().should('contain','百度一下,你就知道')   //验证页面 title 是否正确
        cy.get('#kw')      //根据 css 定位搜索输入框
        .type('testerhome')        //输入关键字
        .should('have.value','testerhome')  //验证关键字自动是否展示正确
        cy.get('#su').click()   //根据 css 定位搜索按钮并点击
        cy.url().should('include','wd=testerhome')     //验证目标url 是否正确包含关键字
        cy.title().should('contain','testerhome_百度搜索')  //验证页面 title 是否正确
        cy.get('[id="1"]')
        .should('contain','TesterHome')   // 验证第一个结果中是否包含TesterHome
        cy.screenshot()
    })
})
生成的截图:
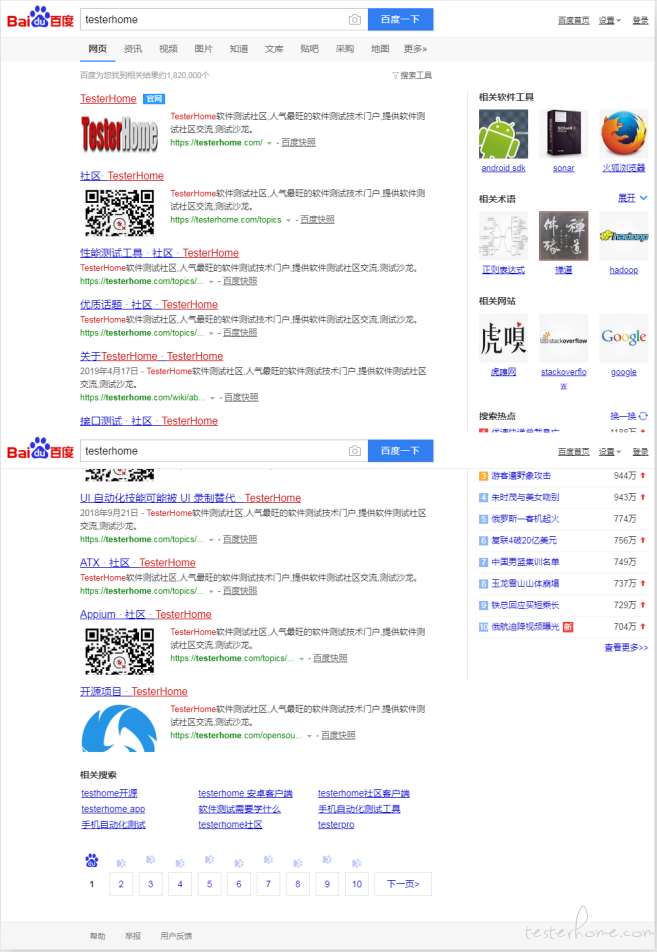
这里有一个比较特别的 snapshot 功能,可以记录下执行过程中的每一步,并可以查看当时的页面(真实的网页,不是图片)
元素定位方式
- get:按 css 或元素特定属性的方式定位元素
- contains:按特定字符串定位元素
使用 request 请求进行登录
cypress 推荐在每个用例的登录步骤,不调用 UI ,直接使用 request 登录。下面是一个例子:
describe('My first test case for cypress',function(){
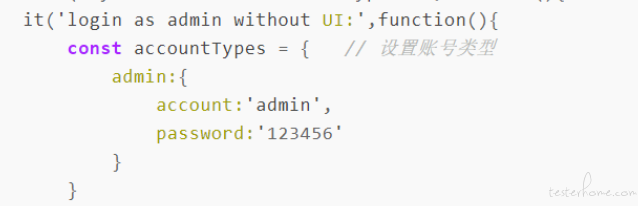
it('login as admin without UI:',function(){
const accountTypes = { // 设置账号类型
admin:{
account:'admin',
password:'123456'
}
}
cy.request({
url:'http://yourhost/login',
method:'POST',
form:true,
body:accountTypes['admin'] // 使用 admin 账号登录(跳过 UI 的登录)
})
cy.visit('/profile')
cy.url().should('include','profile') //验证目标url 是否正确
cy.get('#headerTitle')
.should('have.text','个人信息') // 验证是否包含标题 个人信息,
})
})
提取登录方法为公共方法
Cypress.Commands.add('login', (userType, options = {}) => {
        const accountTypes = {   // 设置账号类型
            admin:{
                account:'admin',
                password:'123456'
            }
        }

        cy.request({
            url:'http://yourhost/login',
            method:'POST',
            form:true,
            body:accountTypes[userType]      // 使用 admin 账号登录
        })
    })

describe('login with different account',function(){
    beforeEach(function() {
        cy.login('admin')
        cy.visit('/')
    })

    it('进入商品列表页面',function(){

        cy.contains('商品列表').click()
        cy.get('#headerTitle')
        .should('have.text','商品列表')   // 验证是否包含标题 商品列表
    })

    it('进入订单列表页面',function(){
        cy.contains('订单列表').click()
        cy.get('#headerTitle')
        .should('have.text','订单列表')   // 验证是否包含标题 订单列表
    })
})
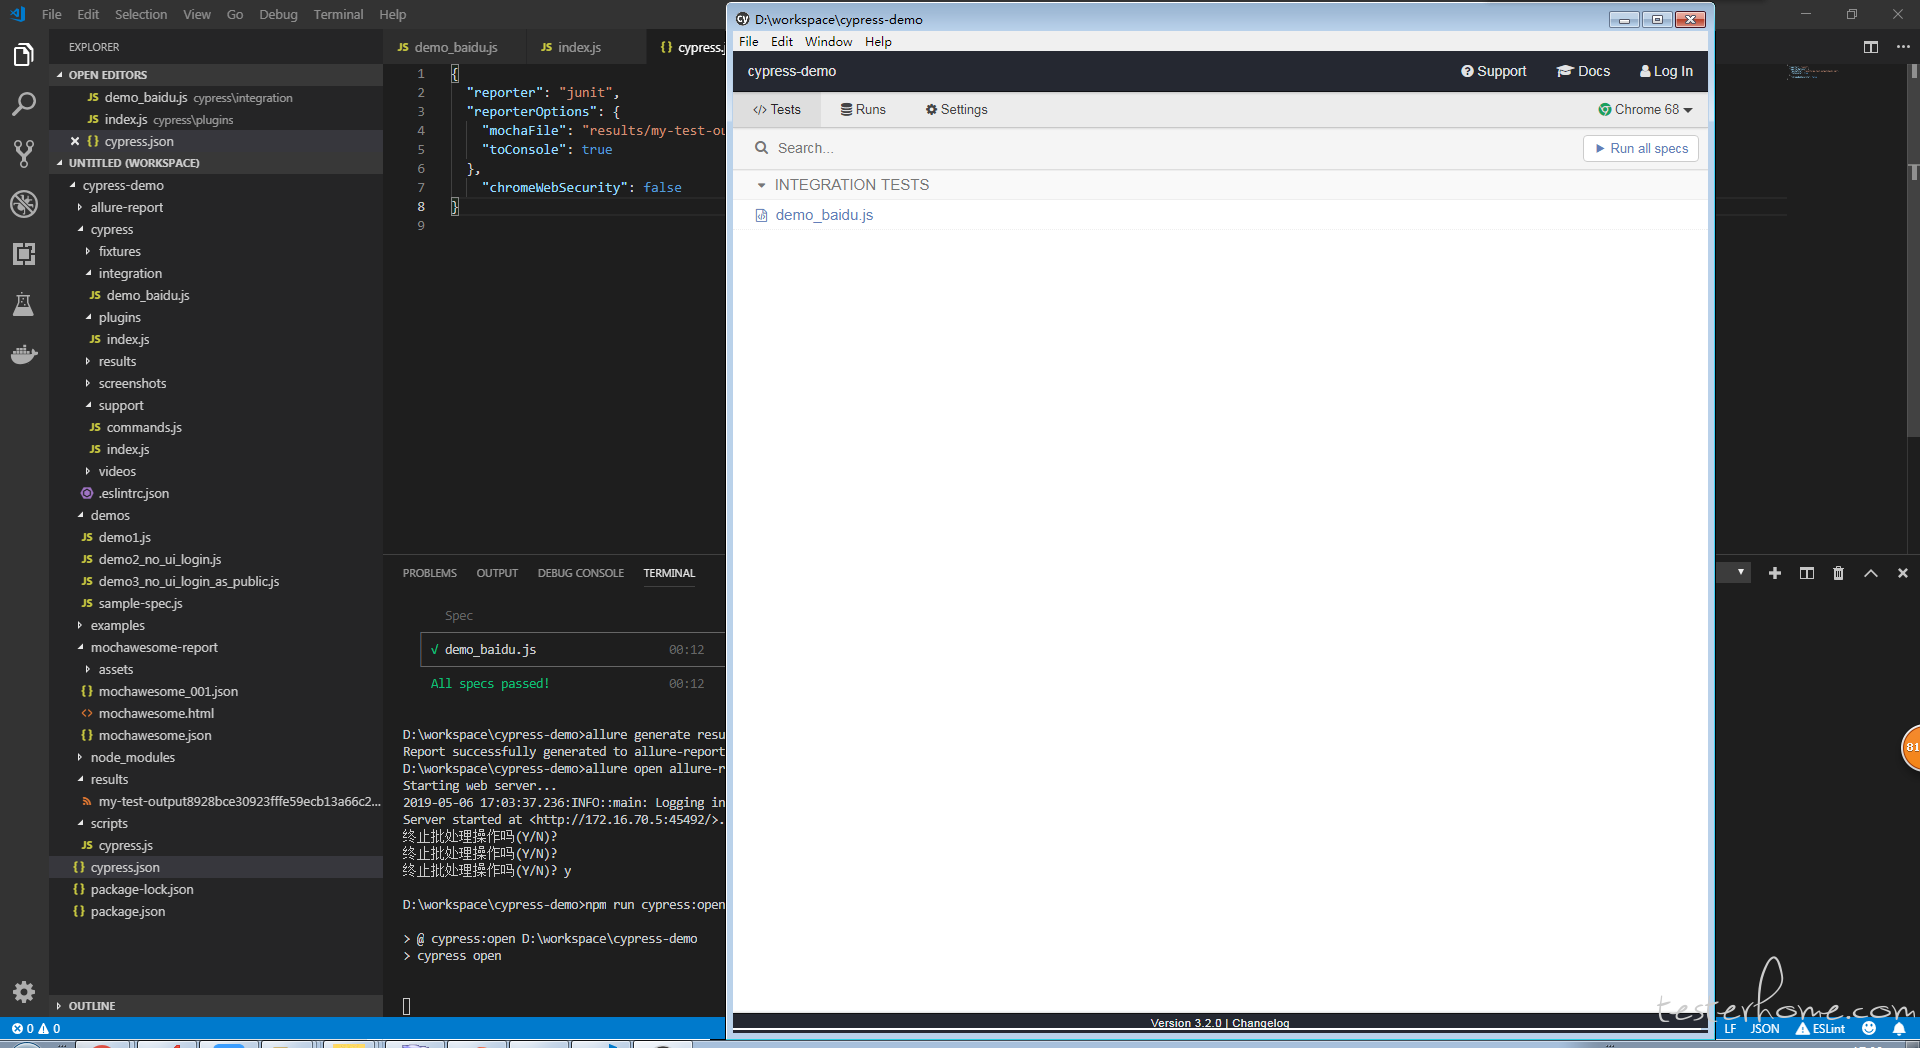
命令行执行所有用例
npm run cypress:run
具体运行参数可以在 package.json 下配置:
"scripts": {
   "cypress:run": "cypress run --browser chrome"
 }
解决 chrome 下的跨域问题:
在 cypress.json 中添加:
"chromeWebSecurity": false
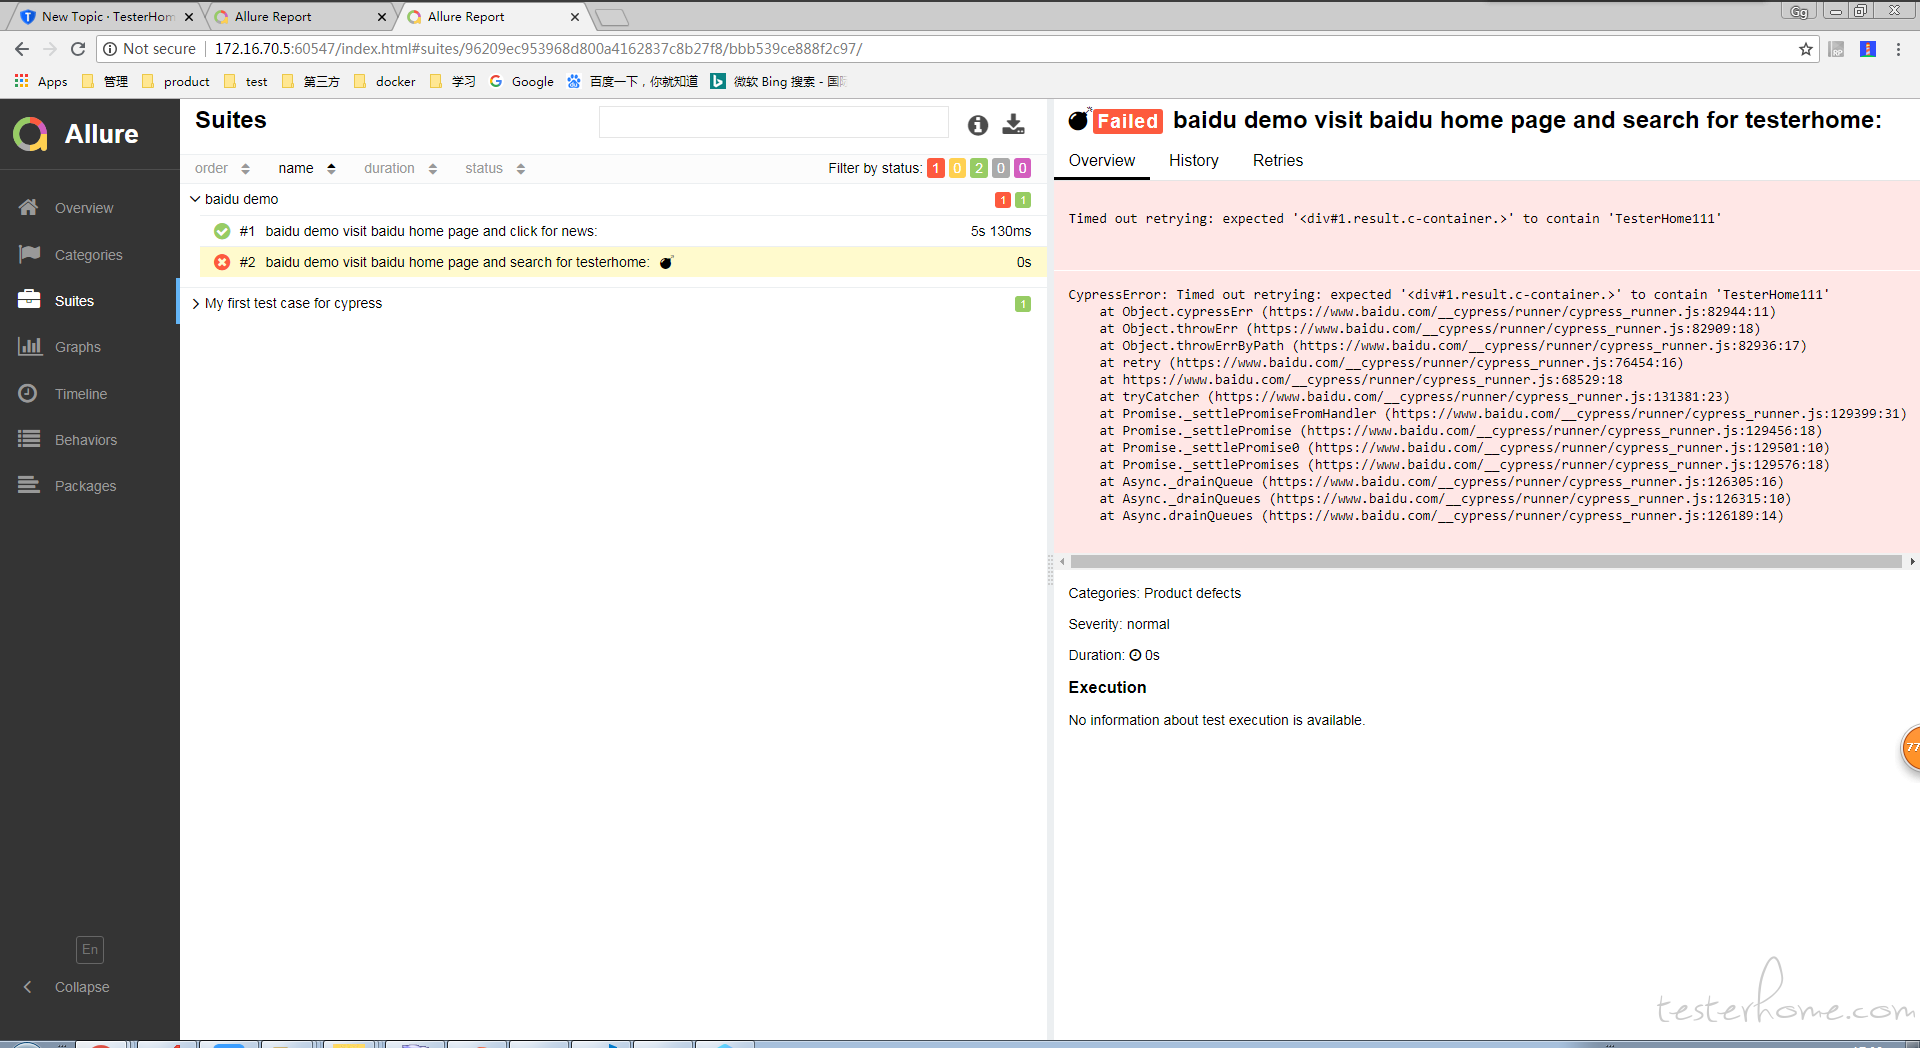
生成 Junit-allure 报表
在 cypress.json 中添加依赖:
"reporter": "junit",
"reporterOptions": {
  "mochaFile": "results/my-test-output[hash].xml",   // 通过hash 标签区分不同文件的用例结果
  "toConsole": true
}
执行 cypress run 的时候会自动生成 xml 文件
使用 allure 生成对应报告:
// 生成allure 报告
allure generate results --clean

// 打开报告
allure open allure-report
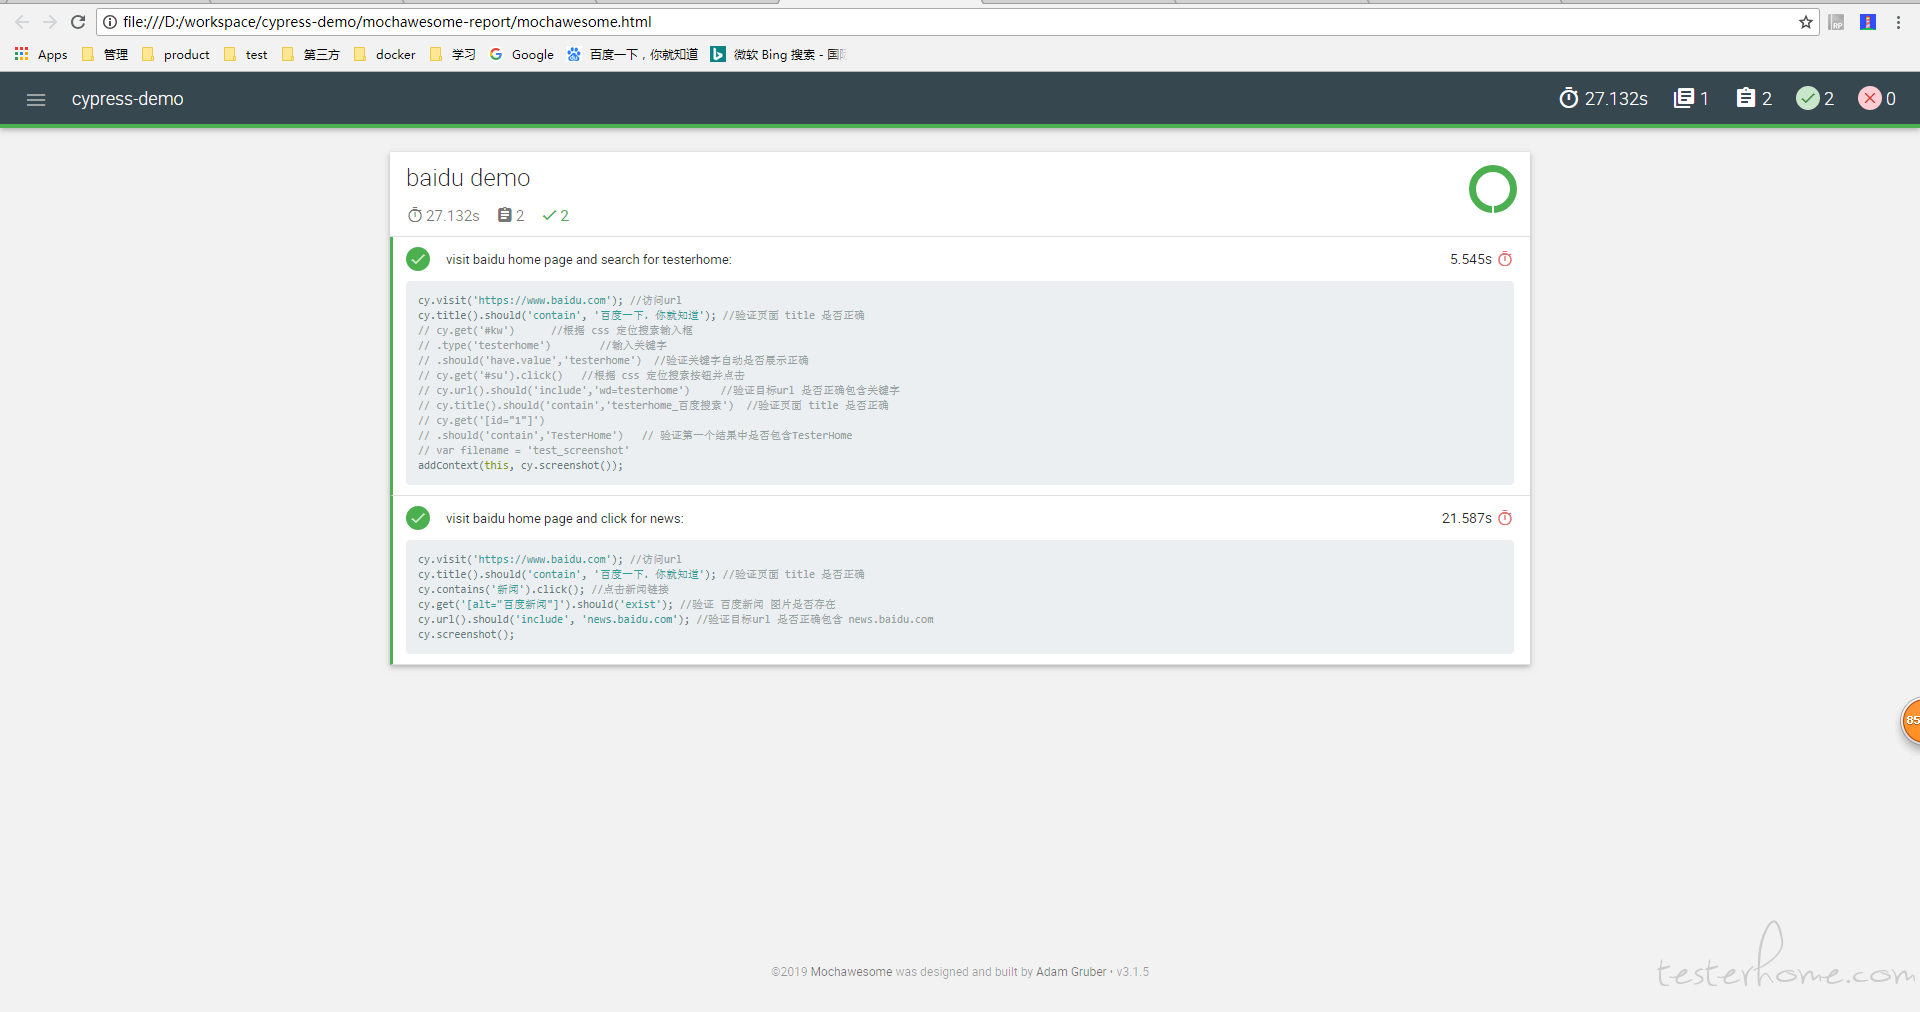
生成 mocha awsome 报告
安装对应模块:
注意: mocha 必须指定 5.2.0, 否则会报错
npm install --save-dev mocha@5.2.0 mochawesome mochawesome-merge mochawesome-report-generator
配置 cypress 对应报告信息 cypress.json:
"reporter": "mochawesome",
"reporterOptions": {
  "overwrite": false,
  "html": false,
  "json": true
},
编写执行测试和生成报告的脚本:
scripts\cypress.js
const cypress = require('cypress')
const fse = require('fs-extra')
const { merge } = require('mochawesome-merge')
const generator = require('mochawesome-report-generator')

async function runTests() {
  await fse.remove('mochawesome-report')
  const { totalFailed } = await cypress.run()
  const jsonReport = await merge()
  await generator.create(jsonReport)
  process.exit(totalFailed)
}

runTests()
在 package.json 文件添加对应启动脚本:
"scripts": {
   "cypress:open": "cypress open",
   "cy:run": "node scripts/cypress.js"
 }
启动执行:
npm run cy:run
查看报告:
mochawesome-report\mochawesome.html
总结
优点:
- 速度感觉上比 selenium 要快。
- 内置的 request 方法可以直接跳过 UI 层的登录,但要求是你能调用对应的登录接口。
- 某些步骤运行失败时自动重试。这样可以提高运行的稳定性。
- 运行失败时自动截图。
待研究:
- 可以使用 allure 或 mochawesome 生成报告, 但如何在报告里附上截图? 暂时没找到好的方法解决。
- 与 jenkins 的集成: 尝试使用 docker 来执行用例并生成报告,但目前卡在无法获取到 docker 中任务完成的退出节点。
- 用例能否并发运行?
转载文章时务必注明原作者及原始链接,并注明「发表于 TesterHome 」,并不得对作品进行修改。
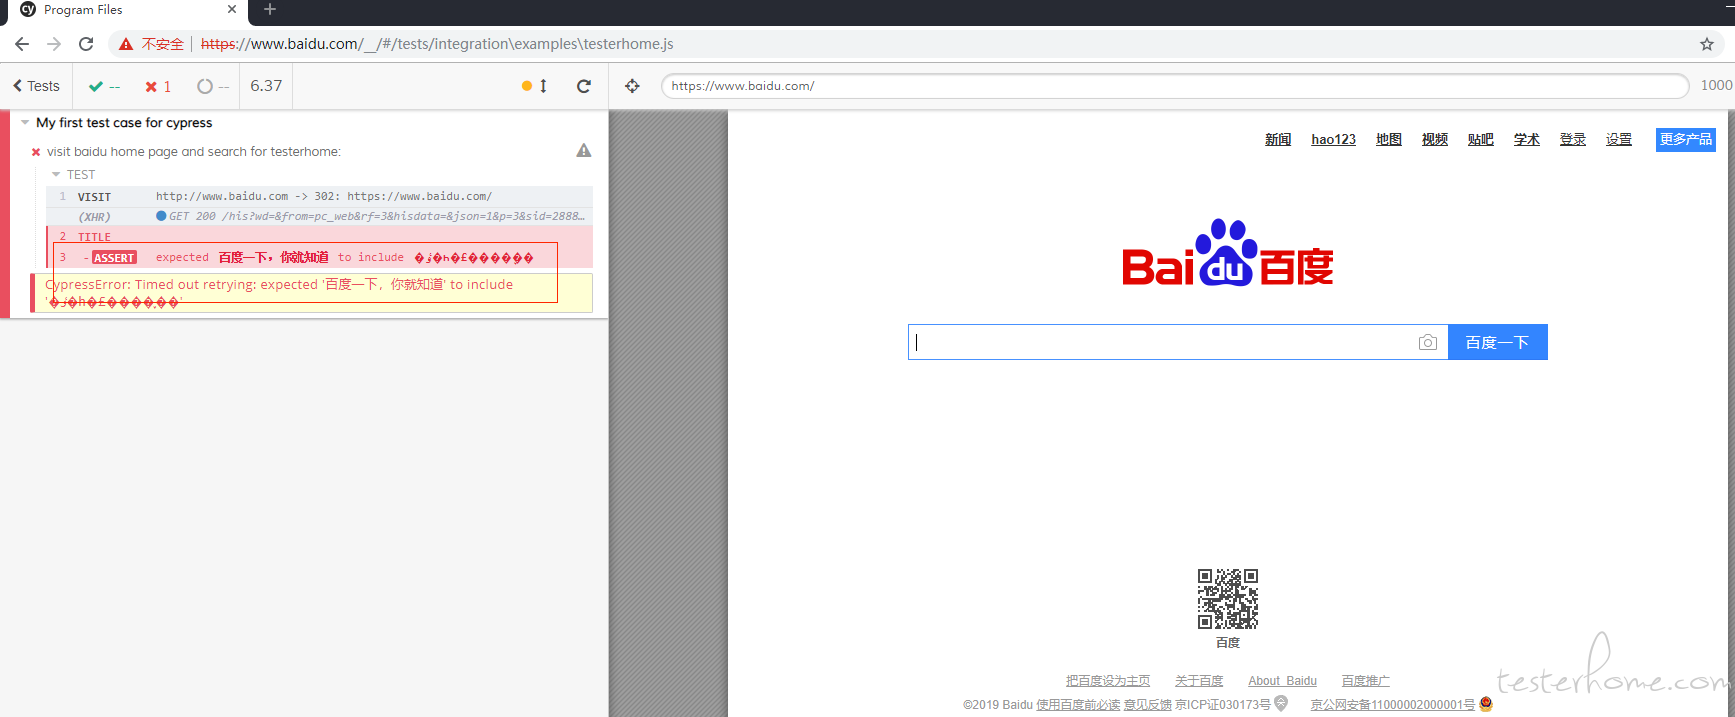 超时时间设置了 10000 都不行
 好吧 编码格式没转过来....
 好的
好的