为何写本文:
虽然过去有过多次抓包经验,但是长时间不做了,有些坑还是难以避免,比较浪费时间。所以沉淀一篇小白指南贴,节约时间。
如果要完成 Android https 的抓包和解析,需要完成两步:搭建代理服务和手机端配置。
1、代理服务
本文以 AnyProxy 为例。
AnyProxy 是完全可以灵活配置的代理服务器。它支持 https 明文代理 ,且提供了 Web 界面便于观测请求情况,同时支持二次开发,可以用 JavaScript 来控制代理的全部流程,搭建前端个性化调试环境。
(1)安装 Anyproxy
网上文章非常多,本文参考:代理服务器 AnyProxy
(2)配置 https
原理:AnyProxy 解析 Https 的原理是自制根证书 rootCA 在终端信任这份证书之后,再用它签发各个域名的二级证书,此时二级证书可以重新对各个页面进行解析。
A. 生成 rootCA
# 最新版本生成方法
$ anyproxy-ca
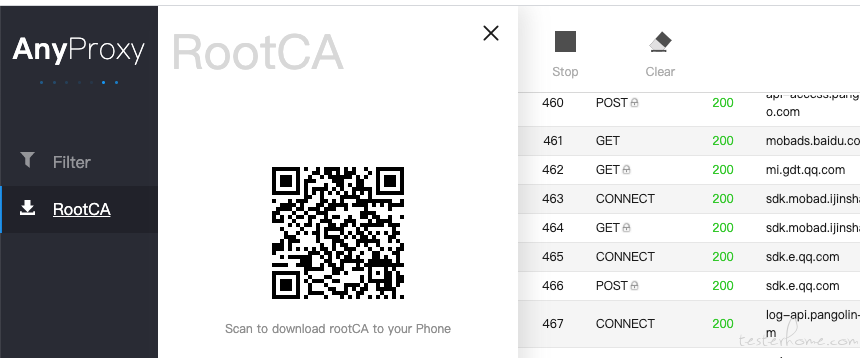
也可扫描 anyproxy web 页面下载
B. 打开并信任 rootCA.crt
生成命令执行后会弹出证书所在目录,或者根据提示找到该目录后,双击打开。
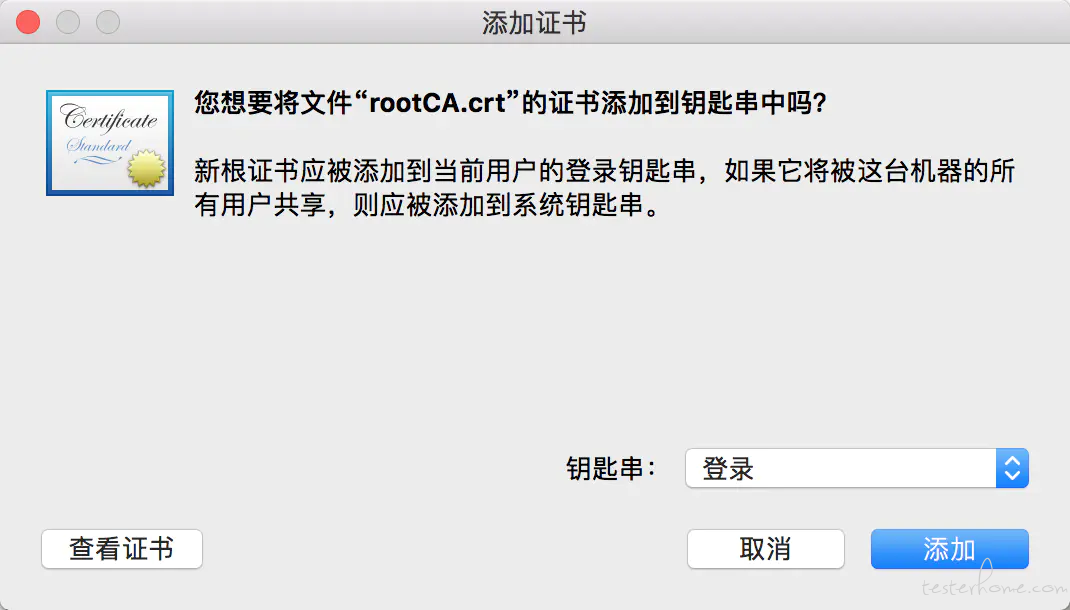
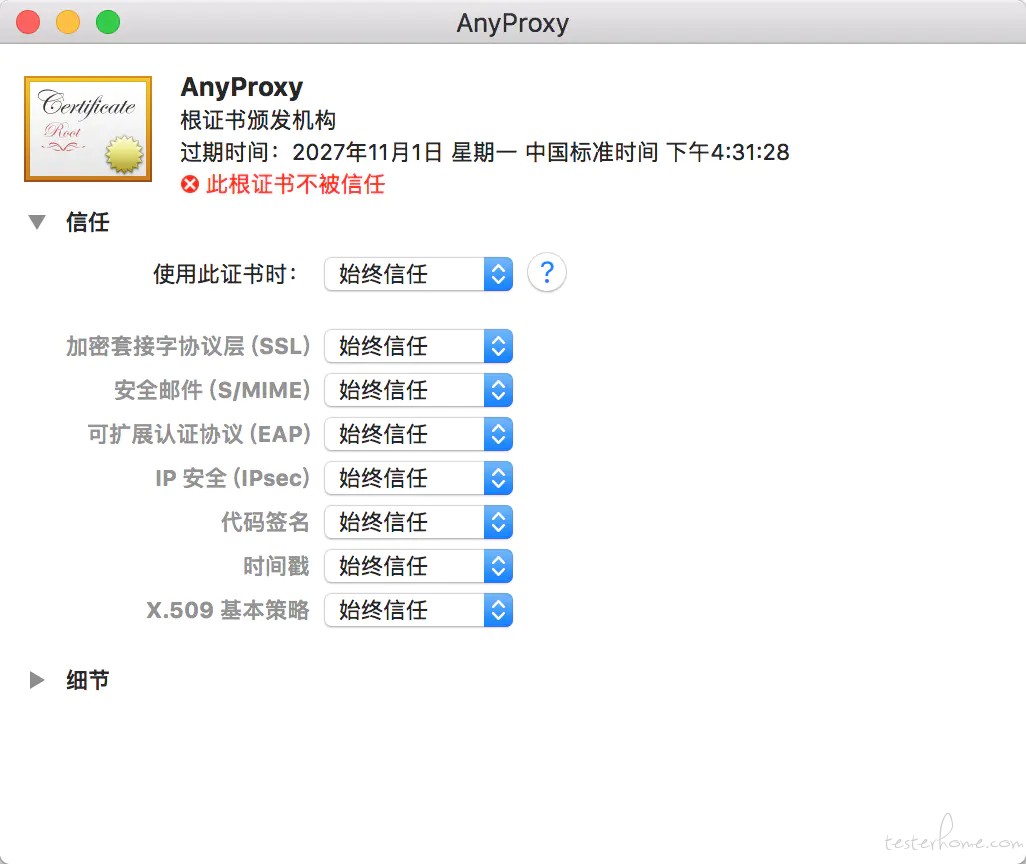
信任证书:
(3)以支持 https 方式启动 anyproxy
$ anyproxy --intercept
# 简写
$ anyproxy -i
2、手机端
(1)安装.crt 证书
正确的安装方法有 2 个:
A. 设置——WiFi——高级设置——安装证书
B. 设置——更多设置——系统安全——从 SD 卡安装里
(2)手机设置代理
A. Wi-Fi 中设置

B. adb 设置(亲测有效)
# 设置全局命令
adb shell settings put global http_proxy 代理IP地址:端口号

# 移除代理信息
adb shell settings delete global http_proxy
adb shell settings delete global global_http_proxy_host
adb shell settings delete global global_http_proxy_port
adb reboot
C. 通过第三方 app 设置代理(暂时不建议,亲测安卓实体机配置失败)
源码地址
下载 apk 后,安装到手机
设置代理:
# 通过执行以下命令设置代理
adb shell am start -n tk.elevenk.proxysetter/.MainActivity
# 参数说明
-e host <host>  # The host ip or address for the proxy
-e port <port>  # The port for the proxy
-e ssid <ssid>  # The SSID of the wifi network to set proxy on(optional, will apply on the first one if empty)
-e key <shared key>  # The password/key for the wifi network
-e bypass <bypass string>  # The bypass string to use for proxy settings
-e reset-wifi <boolean>  # Whether or not to reset the wifi settings. This flag will tell
                         # the tool to forget all connected networks, make a new
                         # network config with the SSID and key given, and then
                         # attempt to connect to the wifi network. If no key is given,
                         # the wifi network is assumed to be unprotected/open
-e clear <boolean>  # A flag that will clear the proxy settings for the given SSID
常用命令:
# 在开放的 wifi 网络上设置代理,重置 wifi(reset-wifi true)
adb shell am start -n tk.elevenk.proxysetter/.MainActivity -e host <Proxy IP> -e port <Proxy Port> -e ssid <Wifi Name> -e reset-wifi true

# 用密码设置 wifi 网络代理
adb shell am start -n tk.elevenk.proxysetter/.MainActivity -e host <Proxy IP> -e port <Proxy Port> -e ssid <Wifi Name> -e key <Wifi pwd>

# 清除代理服务器的 SSID
adb shell am start -n tk.elevenk.proxysetter/.MainActivity -e ssid <ssid> -e clear true
「原创声明:保留所有权利,禁止转载」
如果觉得我的文章对您有用,请随意打赏。您的支持将鼓励我继续创作!
暫無回覆。