前言
在开发类似 AgileTC 的用例管理平台过程中,涉及到了导入 xmind 的功能,使用 python 的 xmind 库能将 xmind 文件转换成 python 内置对象完成大部分需求。但后续需要读取 xmind 中的图片文件时,这个库并没有提供解析附件图片的功能,所以后续在查看源码和分析了 xmind 文件的结构后,改写 xmind 库源码达到了目的。下面分享下自己的经验。
Xmind 文件解析
由于该库只支持解析 xmind8 文件,所以以下内容全部基于 xmind8 实现。
目录结构
解压 xmind 文件,即可看到其目录结构:
meta.xml 文件声明了 xmind 的版本、创建人、创建时间等信息。
content.xml 文件存放了 xmind 树的信息,是解析 xmind 的关键。
styles.xml 文件规定了 xmind 树的格式,类似于 html 里的 css 文件。
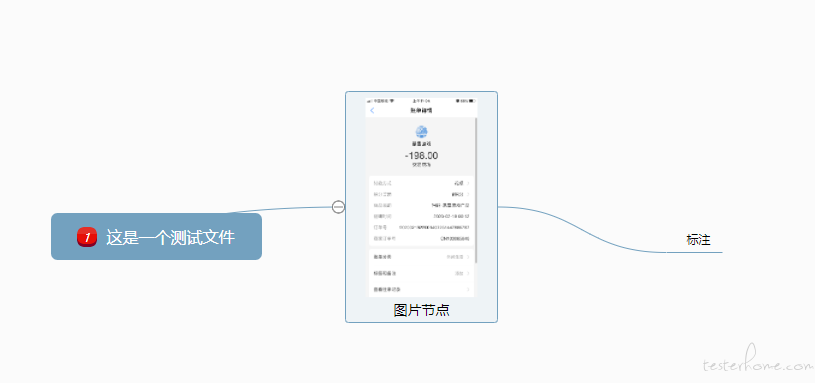
attachments 文件夹中存放的是脑图中的附件。
Thumbnails 文件夹中放的是脑图 png 缩略图。
Revisions 中存放的应该是每个 sheet 的历史记录。
META-INF 文件夹中只有 manifest.xml 文件,这个文件包含其他所有文件的相对路径以及文件类型。
content.xml 结构
由于最重要的目的是提取出 xmind 文件中的树,所以重点解析 content.xml 文件。
<xmap-content xmlns="urn:xmind:xmap:xmlns:content:2.0" xmlns:fo="http://www.w3.org/1999/XSL/Format" xmlns:svg="http://www.w3.org/2000/svg" xmlns:xhtml="http://www.w3.org/1999/xhtml" xmlns:xlink="http://www.w3.org/1999/xlink" timestamp="1622166783210" version="2.0">
    <sheet id="19c5677ddefc2cced19fa58fd7">
        <title>测试表1</title>
        <topic id="17u2brpg0c6gp480uc9louqble">
            <title>根节点名称</title>
            <marker-refs>
                <marker-ref marker-id="priority-1"/>
            </marker-refs>
            <children>
                <topic id="f9fcf932c36851786af916e734">
                    <title>子节点1名称</title>
                    <xhtml:img svg:height="168" svg:width="300" xhtml:src="xap:attachments/图片名" />
                    <notes><html><xhtml:p>asfasfaf</xhtml:p></html><plain>asfasfaf</plain></notes>
                    <marker-refs>
                        <marker-ref marker-id="flag-red"/>
                    </marker-refs>
                    <children>
                        <topic id="4ldv595dac15teqbt9n1b3kfsh">
                            <title>孙节点名称</title>
                        </topic>
                    </children>
                </topic>
                <topic id="1u0vl9kt31gi5iq3fc847v4ijb">
                    <title>子节点2名称</title>
                </topic>
            </children>
        </topic>
    </sheet>
    <sheet>...</sheet>
</xmap-content>
上面是一个 content.xml 的部分结构,根元素为 xmap-content,它的属性声明了 xml 的命名空间。子元素包含多个 sheet 元素,sheet 中包含 topic 元素,topic 是主题/节点,因为 topic 中可以嵌套 topic,所以 sheet 中包含的可以理解为树,最外层的 topic 是树的根节点。下面重点分析下 topic 的结构。
topic 的子元素:
title:主题/节点的内容。
marker-refs:标记集合,其中包含 marker-ref 元素,该元素的 marker-id 属性指名标记,例如 “priority-1” 代表优先级 1,“flag-red” 代表红旗。
xhtml:img:附件图片,该元素没有内容,只有属性,svg:height 是图片高,svg:width 是图片宽,xhtml:src 指定了图片的相对路径,一般为 attachments 下。
notes:备注,元素中的是点击备注后,右边弹出的编辑框中的内容,中是鼠标移动到备注图标上时显示的内容。
children:子主题,包含子 topic 元素。
更多的元素及其属性请看https://github.com/zhuifengshen/xmind/blob/master/xmind/core/const.py
Python Xmind 库解析
读取 xmind
通过 WorkbookLoader 类读取 xmind 文件,实例方法所需参数为 xmind 文件路径 (str),读取代码如下:
with utils.extract(self._input_source) as input_stream: # 解压文件,zipfile.ZipFile(path, "r")
    for stream in input_stream.namelist():
        if stream == const.CONTENT_XML: # 读取content.xml
                self._content_stream = utils.parse_dom_string(input_stream.read(stream))
        elif stream == const.STYLES_XML: # 读取styles.xml
                self._styles_stream = utils.parse_dom_string(input_stream.read(stream))
实例化后通过 get_workbook( ) 方法能获取 xmind 转化成的 WorkbookDocument 实例
WorkbookDocument 部分代码
class WorkbookDocument(Document):
    def __init__(self, node=None, path=None, stylesbook=None, commentsbook=None):
        ......
        # 获取content.xml中xmap-content元素内容
        _workbook_element = self.getFirstChildNodeByTagName(const.TAG_WORKBOOK)
        # 将上面获取的xmap-content元素转换成WorkbookElement
        self._workbook_element = WorkbookElement(_workbook_element, self)
        ......
    def getData(self):
        """
        Get workbook's content in the form of a dictionary.
        """
        data = []
        for sheet in self.getSheets():
            data.append(sheet.getData())
        return data
xmap-content 元素中子元素只有 sheet 元素,WorkbookElement 类通过 getSheets 方法获取 WorkbookElement 中的 sheet,返回 SheetElement
class WorkbookElement(WorkbookMixinElement):
    def getSheets(self):
        sheets = self.getChildNodesByTagName(const.TAG_SHEET)
        owner_workbook = self.getOwnerWorkbook()
        sheets = [SheetElement(sheet, owner_workbook) for sheet in sheets]

        return sheets
以此类推,每种元素都有其对应的类。以下列举部分类的 getData:
SheetElement
def getData(self):
    """
    Get sheet's main content in the form of a dictionary.
    """
    root_topic = self.getRootTopic() # TopicElement
    data = {
        'id': self.getAttribute(const.ATTR_ID), # 获取sheet的id属性
        'title': self.getTitle(), # 获取title元素内容
        'topic': root_topic.getData() # 获取topic元素内容
    }
    return data
TopicElement
def getTitle(self):
    title = self._get_title() # 获取title元素数据
    if title:
        title = TitleElement(title, self.getOwnerWorkbook()) # 转换成TitleElement对象
        return title.getTextContent() # getTextContent可以获取元素的内容
def getNotes(self):
    """
    Get notes content. One topic can set one note right now.
    """
    _notes = self._get_notes()
    if not _notes:
      return None
    tmp = NotesElement(_notes, self)
    # Only support plain text notes right now
    content = tmp.getContent(const.PLAIN_FORMAT_NOTE) # 只获取notes中plain的内容
    return content

def getData(self):
    """ Get topic's main content in the form of a dictionary.
    if subtopic exist, recursively get the subtopics content.
    """
    data = {
        'id': self.getAttribute(const.ATTR_ID), # 获取topic的id属性
        'link': self.getAttribute(const.ATTR_HREF), # 获取topic的xlink:href属性
        'title': self.getTitle(), # 获取topic的子元素title的内容
        'note': self.getNotes(), # 获取topic的子元素notes的内容
        'label': self.getLabels(), # 获取topic的子元素labels的内容
        'markers': [marker.getMarkerId().name for marker in self.getMarkers() if marker], # 获取标记
    }
        # 获取children中的topic
    if self.getSubTopics(topics_type=const.TOPIC_ATTACHED):
            data['topics'] = []
    for sub_topic in self.getSubTopics(topics_type=const.TOPIC_ATTACHED):
            data['topics'].append(sub_topic.getData())

    return data
使用 xmind 库读取 xmind 并转换成 python 内置对象
import xmind

# xmind.load(xmind_path) 即 WorkbookLoader(path).get_workbook()
workbook = xmind.load(xmind_path)
# workbook的getData获取的是sheet列表
sheets = workbook.getData()
"""
sheets的结构:
[
    {
        'id': '19c5677ddefc2cced19fa58fd7',
        'title': '测试表1'
        'topic': [
            {
                'id': '17u2brpg0c6gp480uc9louqble'
                'title': '根节点名称',
                'link': None,
                'note': None,
                'label': None,
                'markers': ['priority-1'],
                'topics': [
                    {
                        'id': 'f9fcf932c36851786af916e734',
                        'title': '子节点名称',
                        ......
                    }
                ]
            }
        ]
    }
    ......
]
"""
增加读取和增加 xhtml:img 元素功能
增加 xhtml:img 类
marker-ref 元素和 xhtml:img 元素比较像,没有内容,只有属性,所以下面模仿 marker-ref 的 MarkerRefElement 类增加一个 XHtmlImgElement 类。
MarkerRefElement 类
class MarkerRefElement(WorkbookMixinElement):
    TAG_NAME = const.TAG_MARKERREF

    def __init__(self, node=None, ownerWorkbook=None):
        super(MarkerRefElement, self).__init__(node, ownerWorkbook)

    def getMarkerId(self):
        '''获取marker-ref中的marker-id元素'''
        return MarkerId(self.getAttribute(const.ATTR_MARKERID))

    def setMarkerId(self, val):
        '''设置marker-ref中的marker-id元素'''
        self.setAttribute(const.ATTR_MARKERID, str(val))
XHtmlImgElement 类
class ImageElement(WorkbookMixinElement):
    TAG_NAME = const.IMAGE

    def __init__(self, node=None, ownerWorkbook=None):
        super(ImageElement, self).__init__(node, ownerWorkbook)

    def getXhtmlSrc(self):
        '''取消前缀,只留图片名称,后续直接在attachments文件夹下找该图片'''
        return self.getAttribute(const.IMAGE_SRC).replace('xap:attachments/', '')

    def getImageHeight(self):
        return self.getAttribute(const.IMAGE_HEIGHT)

    def getImageWidth(self):
        return self.getAttribute(const.IMAGE_WIDTH)

    def setXhtmlSrc(self, src):
        return self.setAttribute(const.IMAGE_SRC, f"xap:attachments/{src}")

    def setImageHeight(self, height):
        return self.setAttribute(const.IMAGE_HEIGHT, height)

    def setImageWidth(self, width):
        return self.setAttribute(const.IMAGE_WIDTH, width)
修改 TopicElement 类
增加 get 和 set 方法
def _get_image(self):
    return self.getFirstChildNodeByTagName(const.IMAGE)

def getImage(self):
    image = self._get_image()
    if image:
        image = ImageElement(image, self.getOwnerWorkbook())
        return {
            'src': image.getXhtmlSrc(),
            'height': image.getImageHeight(),
            'width': image.getImageWidth()
        }

def setImage(self, src, height, width):
    image = self._get_image()
    if not image:
        image = ImageElement(None, self.getOwnerWorkbook())
        self.appendChild(image)
    else:
        image = ImageElement(image, self.getOwnerWorkbook())
    image.setXhtmlSrc(src)
    image.setImageHeight(height)
    image.setImageWidth(width)
修改 getData 方法
def getData(self):
    """ Get topic's main content in the form of a dictionary.
        if subtopic exist, recursively get the subtopics content.
    """
    data = {
        'id': self.getAttribute(const.ATTR_ID),
        'link': self.getAttribute(const.ATTR_HREF),
        'image': self.getImage(), # 增加image字段
        'title': self.getTitle(),
        'note': self.getNotes(),
        'label': self.getLabels(),
        'markers': [marker.getMarkerId().name for marker in self.getMarkers() if marker],
    }

    if self.getSubTopics(topics_type=const.TOPIC_ATTACHED):
        data['topics'] = []
        for sub_topic in self.getSubTopics(topics_type=const.TOPIC_ATTACHED):
            data['topics'].append(sub_topic.getData())

    return data
这样 topic 中增加了 image 字段,包含图片文件名和图片宽高,但图片还在 attachments 中,需要读取。
image_path = topic['image']['src']
zFile = zipfile.ZipFile(xmind_path, 'r')
image_data = zFile.read(f'attachments/{image_path}')
增加图片并重新将 workbook 打包成 xmind
基础 workbook 的操作参考README.md
TopicElement 增加 img 示例代码
MANIFEST_TEMPLATE = """
<?xml version="1.0" encoding="UTF-8" standalone="no"?>
<manifest xmlns="urn:xmind:xmap:xmlns:manifest:1.0" password-hint="">
<file-entry full-path="attachments/" media-type=""/>
{}
<file-entry full-path="content.xml" media-type="text/xml"/>
<file-entry full-path="META-INF/" media-type=""/>
<file-entry full-path="META-INF/manifest.xml" media-type="text/xml"/>
<file-entry full-path="comments.xml" media-type="text/xml"/>
<file-entry full-path="styles.xml" media-type="text/xml"/>
</manifest>
"""
image_name = '图片名称.png'
image_data = b'文件byte数据'
height = 300
width = 300


xmind_file_path = f"{str(uuid.uuid4())}.xmind"
workbook = xmind.load(xmind_file_path)
sheet = workbook.getPrimarySheet()
sheet.setTitle(tree['data']['text'])  # 设置画布名称
root_topic = sheet.getRootTopic()
root_topic.setTitle(tree['data']['text'])  # 设置主题名称
sub_topic = root_topic.addSubTopic() # 新增child主题
sub_topic.setImage(img_name, height, width) # 设置图片
xmind.save(workbook, path=xmind_file_path) # 先保存

azip = zipfile.ZipFile(xmind_file_path, 'a') # 用zip打开保存后的xmind
manifest_img = "" # xhtml:img的src属性xap需要将图片路径声明在META-INF/manifest.xml文件中,否则xmind中图片不会显示
for img_name, img_data in image_map.items():
    azip.writestr(f'attachments/{img_name}', data=img_data) # 将图片写入attachments中
    manifest_img += f'<file-entry full-path="attachments/{img_name}" media-type="image/{img_name.split(".")[-1]}"/>'
azip.writestr(f'META-INF/manifest.xml', data=MANIFEST_TEMPLATE.format(manifest_img)) # 写入META-INF/manifest.xml文件
azip.close()
结语
结合改动过的百度脑图前端和将图片上传到图床,即可实现上传到百度脑图中的 xmind 也包含图片的功能。
最大的问题是在执行 workbook 保存方法时,没有将 attachments 中的文件和 META-INF/manifest.xml 自动添加到 xmind 文件中。
