公司有落地的测试平台,光会使用可不够,于是想着自己来从头搭建一套测试平台,小白迈出第一步。
技术选型:springboot+vue element ui
springboot 框架搭建
打开 IDEA,选择 springboot 快速启动,添加 mysql、mybatis 依赖。
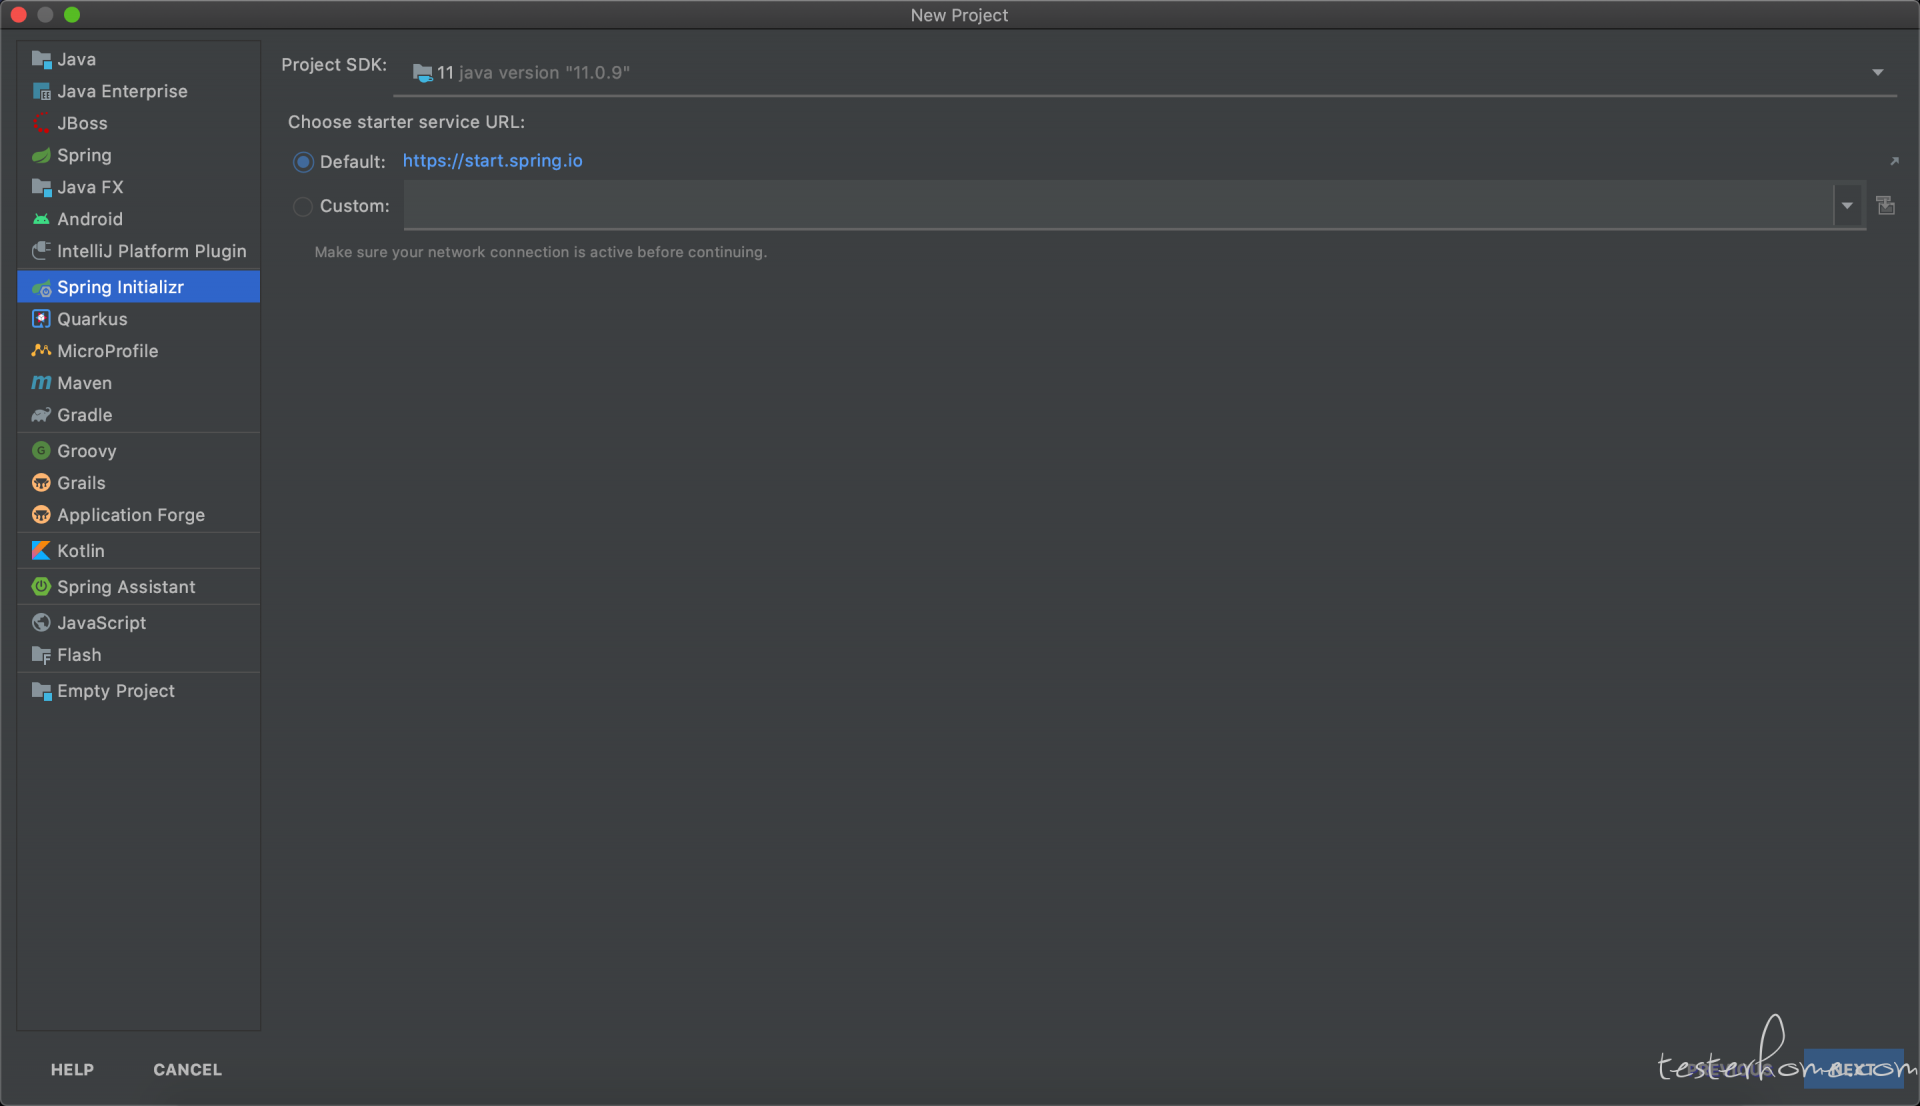
PS:2 种方式快速创建一个 springboot 项目
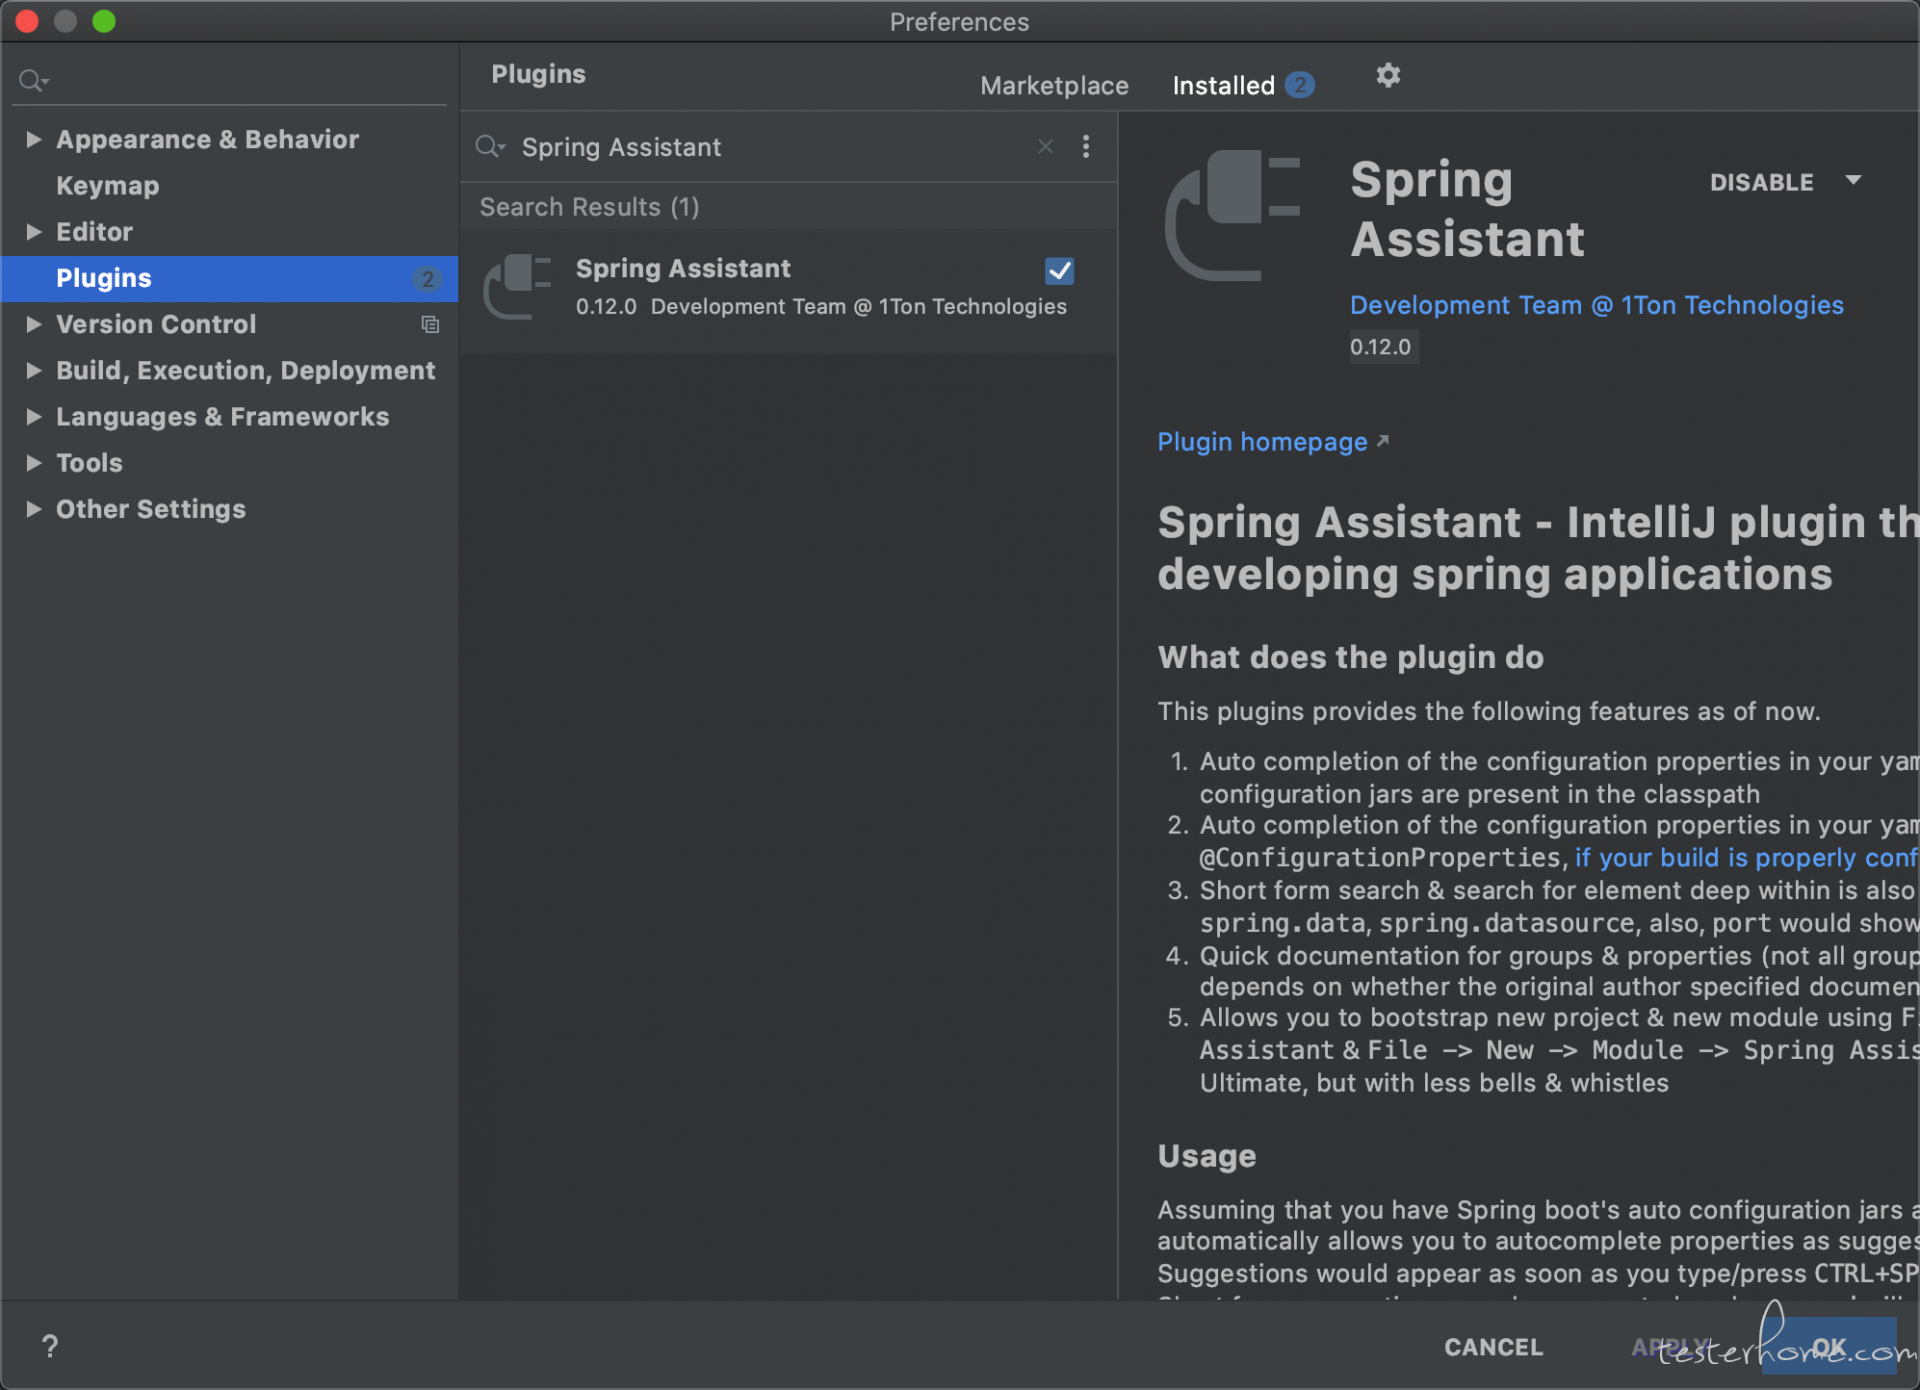
(1) 在偏好里的 plugins 选项中,安装 Spring Assistant 插件,下次创建项目时可以通过 Spring Assistant 选项创建
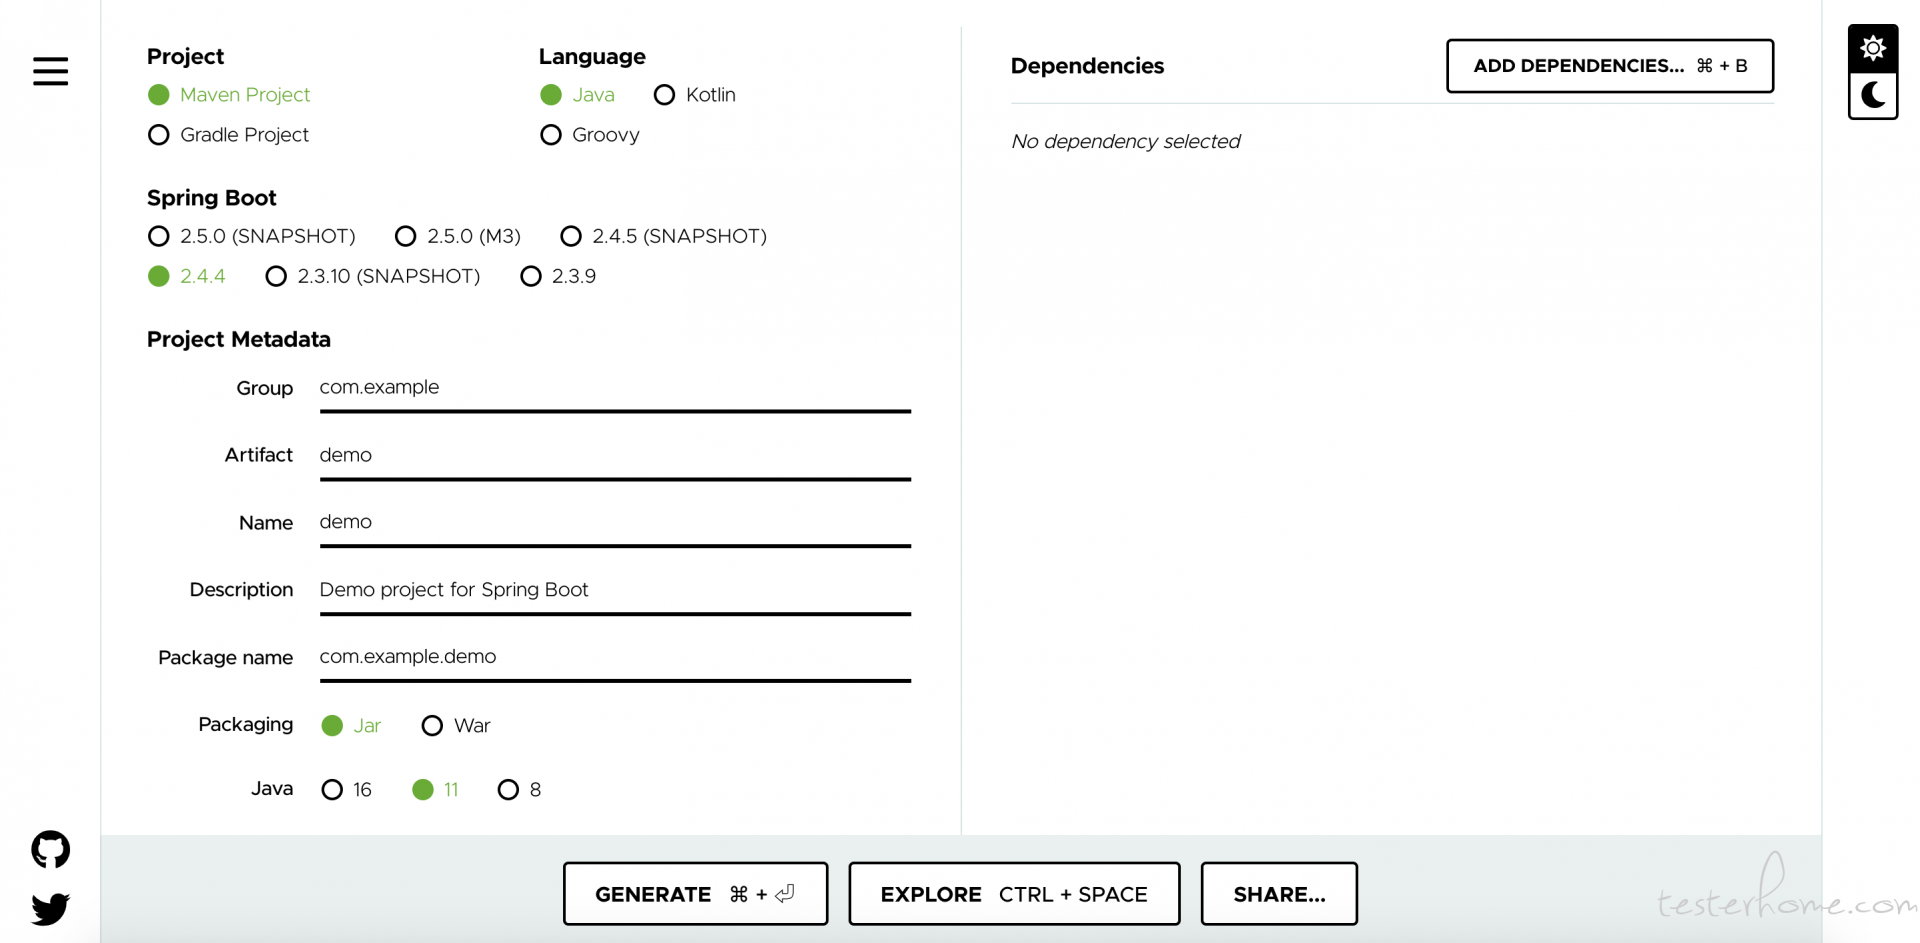
(2) 网站上配置创建好项目,再用 IDEA 打开 https://start.spring.io/
1.在 pom.xml 中添加的依赖如下
<dependency>
    <groupId>org.mybatis.spring.boot</groupId>
    <artifactId>mybatis-spring-boot-starter</artifactId>
    <version>2.1.4</version>
</dependency>

<dependency>
    <groupId>mysql</groupId>
    <artifactId>mysql-connector-java</artifactId>
    <scope>runtime</scope>
</dependency>

<dependency>
    <groupId>org.springframework.boot</groupId>
    <artifactId>spring-boot-starter-web</artifactId>
</dependency>
2.在 application.properties 中添加数据库连接信息
server.port=8081
spring.datasource.driver-class-name=com.mysql.cj.jdbc.Driver
spring.datasource.url=jdbc:mysql://127.0.0.1:3306/test?useUnicode=true&characterEncoding=utf8&serverTimezone=GMT
spring.datasource.username=root
spring.datasource.password=123456
3.在 mysql 数据库创建 user 表
 -- ----------------------------
-- Table structure for `user`
-- ----------------------------
DROP TABLE IF EXISTS `user`;
CREATE TABLE `user` (
`id` int(11) NOT NULL AUTO_INCREMENT,
`username` varchar(50) DEFAULT NULL,
`password` varchar(50) DEFAULT NULL,
`name` varchar(50) DEFAULT NULL,
PRIMARY KEY (`id`)
) ENGINE=InnoDB AUTO_INCREMENT=10 DEFAULT CHARSET=utf8;
-- ----------------------------
-- Records of user
-- ----------------------------
INSERT INTO `user` VALUES ('1', 'zhangsan', '123', '张三');
INSERT INTO `user` VALUES ('2', 'lisi', '123', '李四');
4.创建实体 Bean
User.java
package com.syy.testPlatform.bean;

public class User {
    //主键
    private Long id;
    //用户名
    private String userName;
    //密码
    private String password;
    //姓名
    private String name;

    public Long getId() {
        return id;
    }

    public void setId(Long id) {
        this.id = id;
    }

    public String getUserName() {
        return userName;
    }

    public void setUserName(String userName) {
        this.userName = userName;
    }

    public String getPassword() {
        return password;
    }

    public void setPassword(String password) {
        this.password = password;
    }

    public String getName() {
        return name;
    }

    public void setName(String name) {
        this.name = name;
    }
}
5.编写 mapper
UserDao.java
package com.syy.testPlatform.dao;

import com.syy.testPlatform.bean.User;
import org.apache.ibatis.annotations.Mapper;

import java.util.List;

@Mapper
public interface UserDao {
    public List<User> queryUserList();
}
注意:@Mapper标记该类是一个 mybatis 的 mapper 接口,可以被 spring boot 自动扫描到 spring 上下文中
6.配置 mapper 映射文件
UserMapper.xml
<?xml version="1.0" encoding="utf-8" ?>
<!DOCTYPE mapper PUBLIC "-//mybatis.org//DTD Mapper 3.0//EN"
        "http://mybatis.org/dtd/mybatis-3-mapper.dtd" >
<mapper namespace="com.syy.testPlatform.dao.UserDao">
    <select id="queryUserList" resultType="com.syy.testPlatform.bean.User">
      select * from user
    </select>
</mapper>
7.在 application.properties 中添加 mybatis 的信息
mybatis.type-aliases-package=com.syy.testPlatform.bean
mybatis.mapper-locations=classpath:mapper/*Mapper.xml
8.编些 service 层
在 service 目录下新建 impl 目录,在 impl 目录,新建 UserServiceImpl.java,实现 UserService 接口,controller 调用 service 层,UserServiceImpl.java 代码如下
UserService.java
package com.syy.testPlatform.service;

import com.syy.testPlatform.bean.User;
import java.util.List;

public interface UserService {
    List<User> queryUserList();
}
UserServiceImpl.java
package com.syy.testPlatform.service.impl;


import com.syy.testPlatform.bean.User;
import com.syy.testPlatform.dao.UserDao;
import com.syy.testPlatform.service.UserService;
import org.springframework.beans.factory.annotation.Autowired;
import org.springframework.stereotype.Service;

import java.util.List;

@Service
public class UserServiceImpl implements UserService {
    @Autowired
    private UserDao userDao;

    @Override
    public List<User> queryUserList() {
        return userDao.queryUserList();
    }
}
9.编写测试 Controller
UserController
package com.syy.testPlatform.controller;

import com.syy.testPlatform.bean.User;
import com.syy.testPlatform.service.UserService;
import org.springframework.beans.factory.annotation.Autowired;
import org.springframework.web.bind.annotation.RequestMapping;
import org.springframework.web.bind.annotation.ResponseBody;
import org.springframework.web.bind.annotation.RestController;

import java.util.List;

@RestController
public class UserController {
    @Autowired
    private UserService userService;

    @RequestMapping("/queryUser")
    @ResponseBody
    public List<User> queryUser(){
        List<User> userList = userService.queryUserList();
        return userList;
    }
}
10.测试接口
启动项目,访问测试接口
http://localhost:8081/queryUser,访问成功

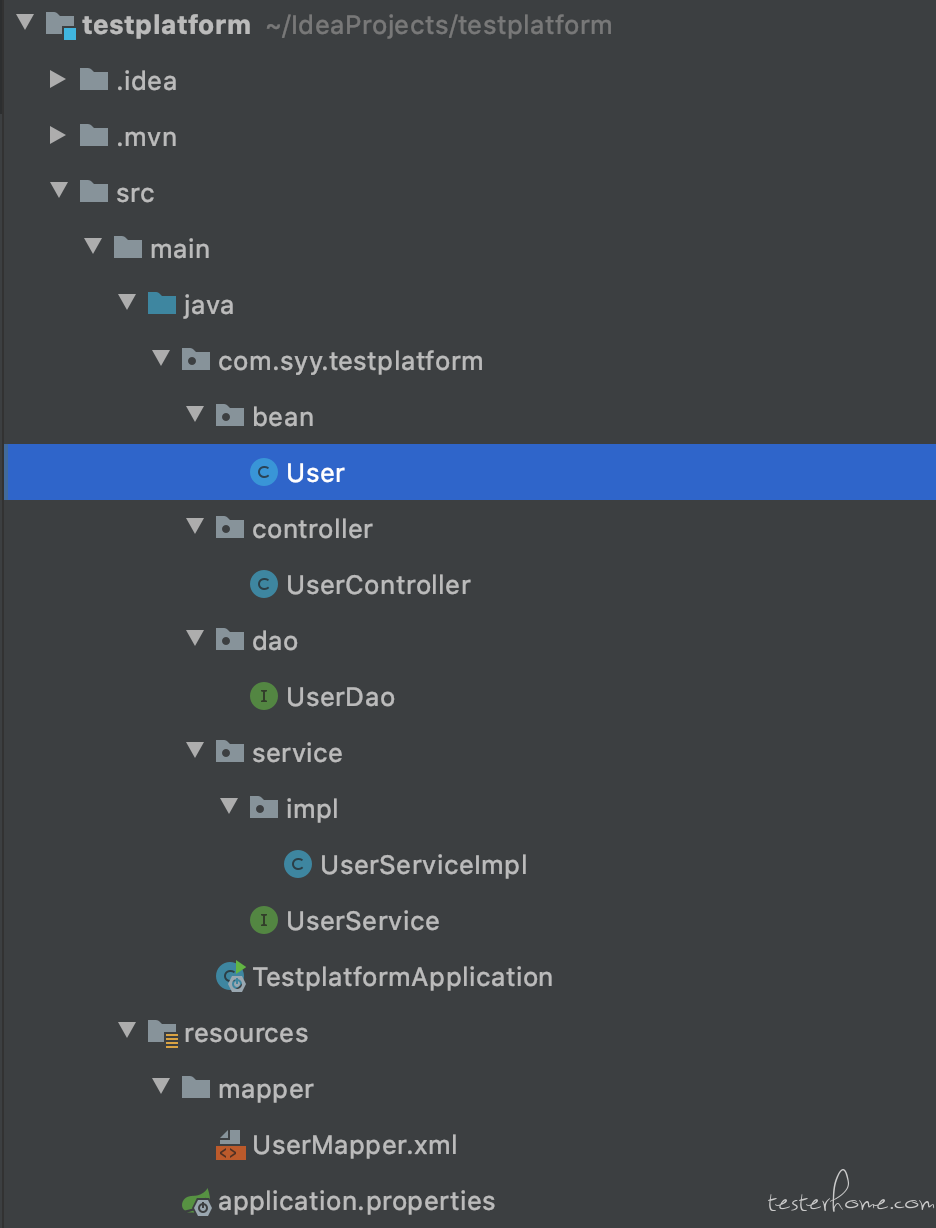
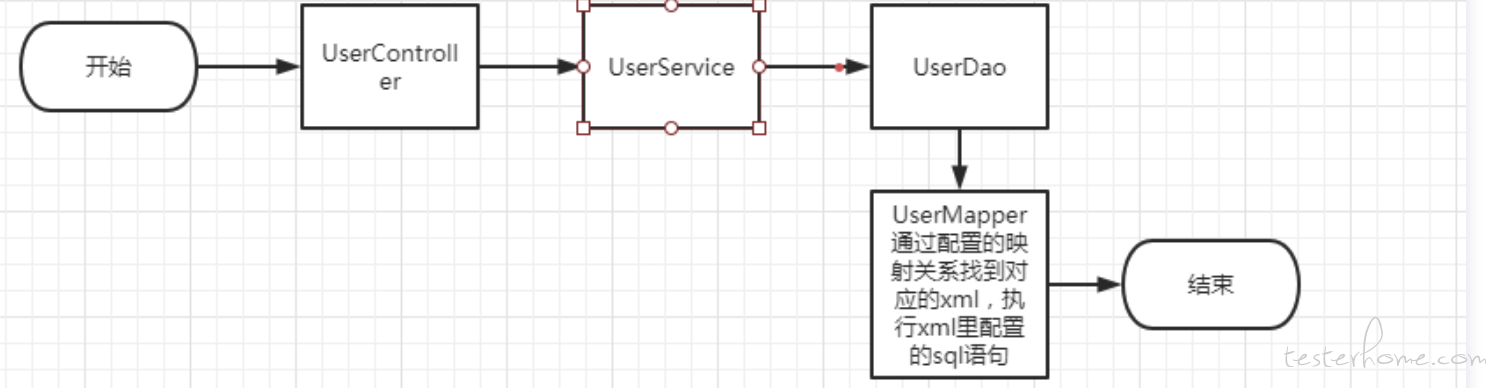
最后:整体代码目录、调用流程如下
这里只是小白级别的入门
更加全面详细的教程,可以学习这位大神的项目:
https://panjiachen.github.io/vue-element-admin-site/zh/guide/
https://github.com/macrozheng/mall
https://github.com/macrozheng/mall-admin-web

