这篇文章简单介绍我们做接口自动化测试的一个思路(GitHub 地址: https://github.com/Hualiner/Api-Auto-Test)
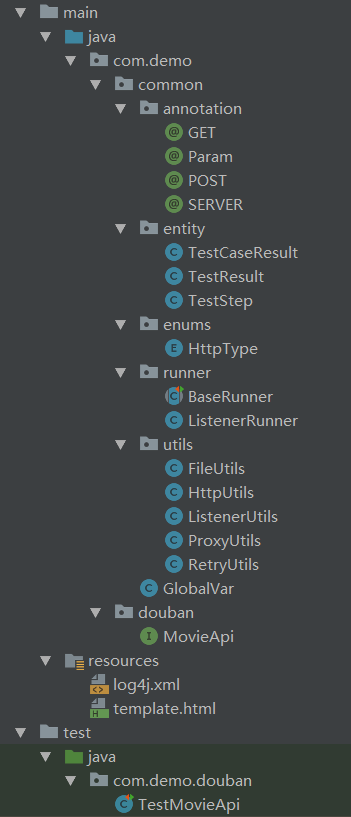
我们的接口自动化测试工程结构如下图所示(从我们的项目中抽离出最基础的部分,以豆瓣电影举例),main 文件下面放置的是公共类(commom)、接口类(如 douban),test 文件下面方式的测试类(如 douban),通过这样的工程接口,开展接口自动化测试需要三步:编写接口、编写接口测试用例、执行测试用例。
1、编写接口
基于这样的工程结构,我们在测试某个服务某个接口类的时候,接口部分的编写如下(如 MovieApi):
@SERVER(GlobalVar.DOUBAN_MOVIE_SERVER)
public interface MovieApi {

    /**
     * @param start
     */
    @GET(path = "/top250", description = "豆瓣电影 top 250")
    Response top250(@Param("start") Integer start,
                    @Param("count") Integer count);
}
2、编写测试用例
在完成接口类的编写后,就开始编写我们的某个接口类(如 TestMovieApi)的接口测试用例(我的思路是在某个接口对应的测试方法里根据需要的测试数据构造多个测试点,下面代码随便写了两个点就当是该接口的测试点):
public class TestMovieApi extends BaseRunner {

    private MovieApi movieApi = ProxyUtils.create(MovieApi.class);

    @Before
    public void before() throws Exception {
    }

    @After
    public void after() throws Exception {
    }

    /**
     *
     */
    @Test
    public void testTop250() throws Exception {
        response = movieApi.top250(0, 1);
        response.then().body("subjects[0].title", equalTo("肖申克的救赎"));

        response = movieApi.top250(0, 2);
        response.then().body("subjects[1].title", equalTo("霸王别姬"));
    }
}
3、执行测试用例
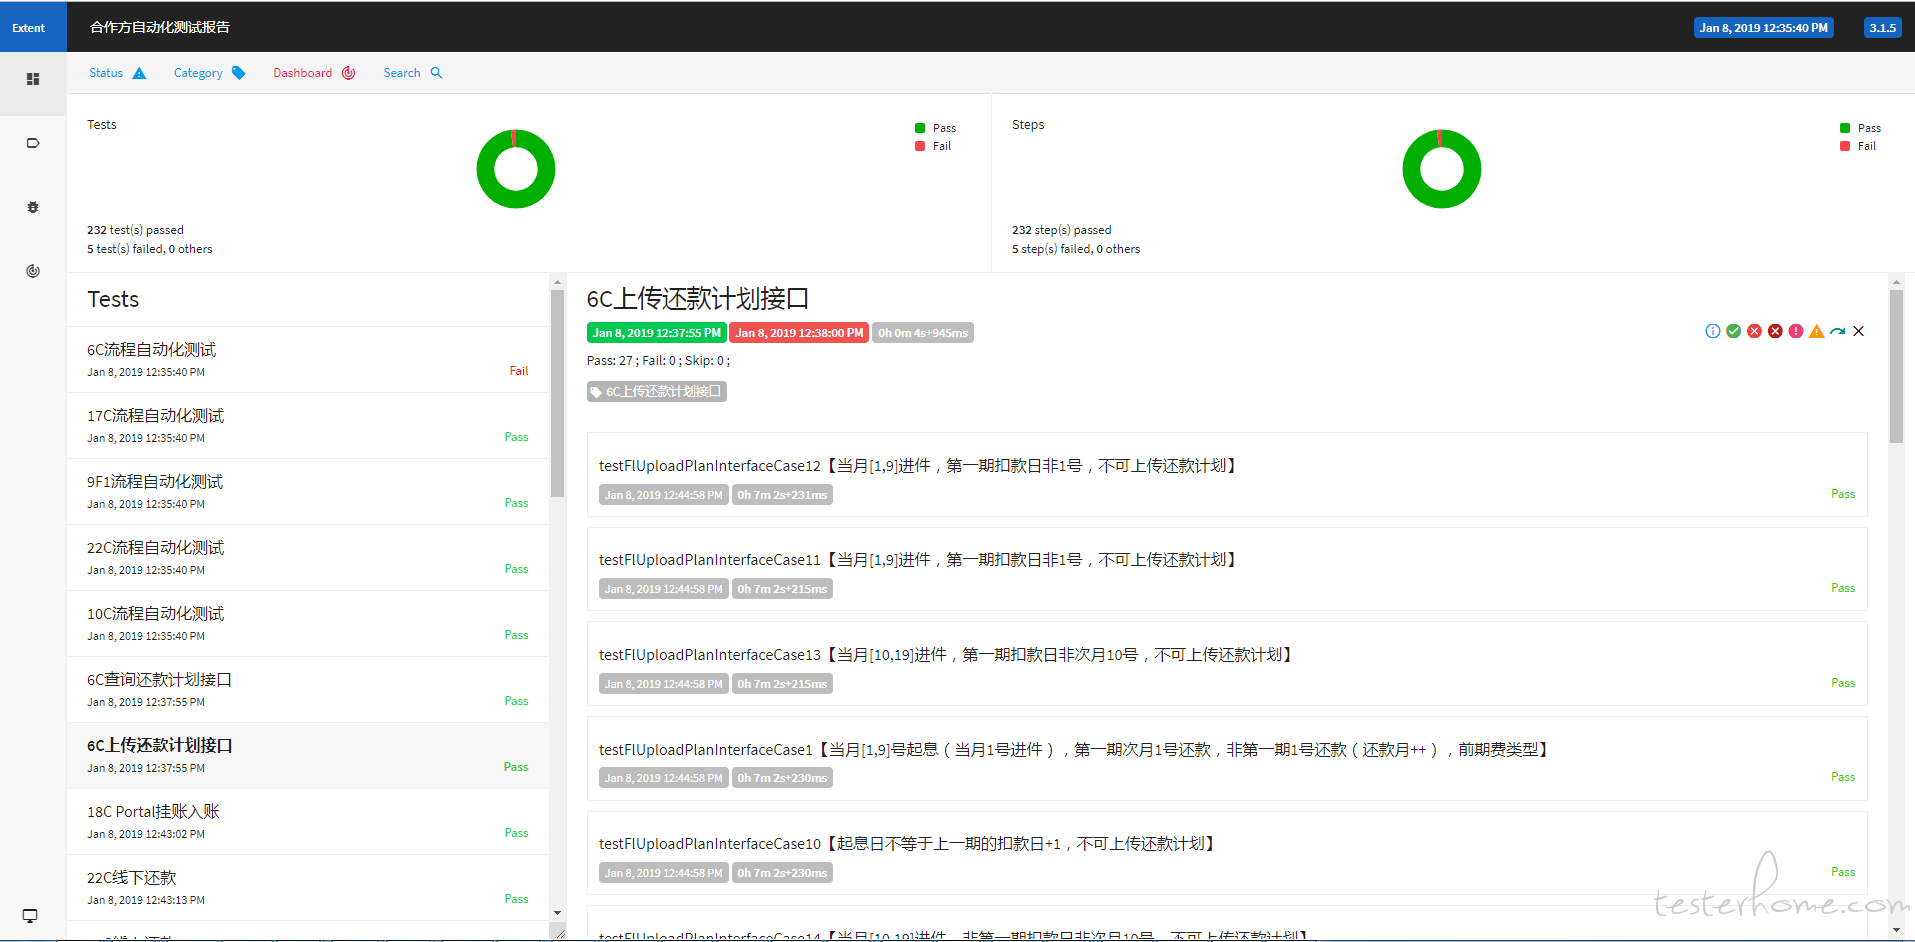
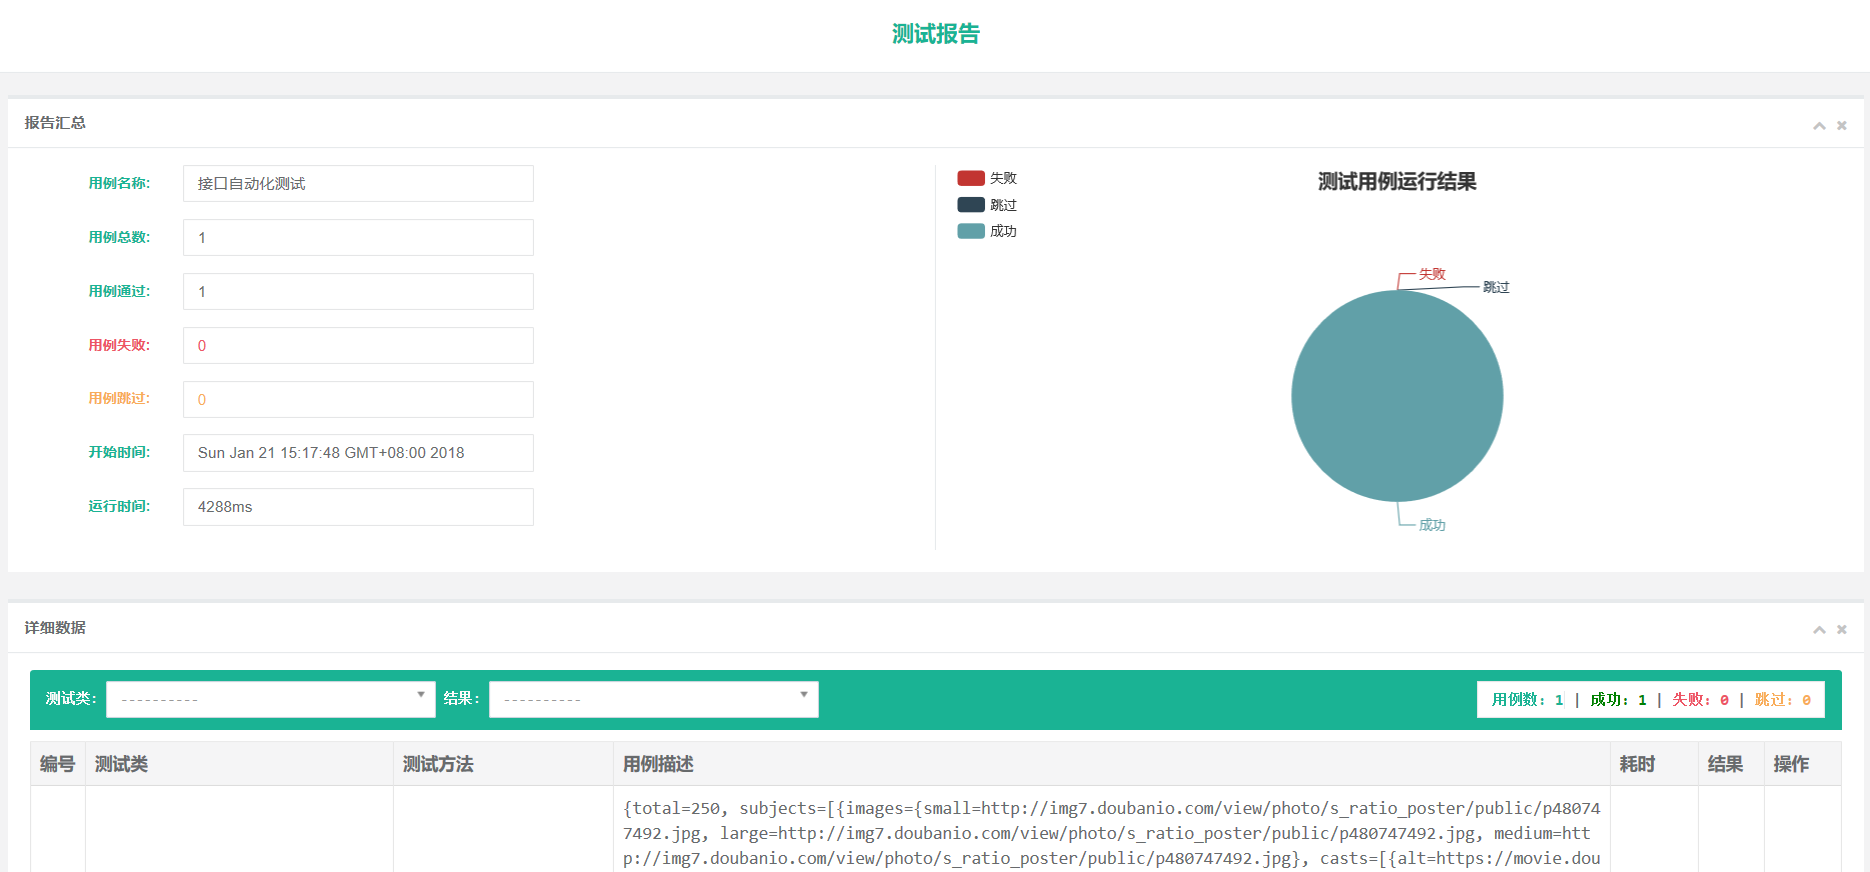
到这里我们的接口编写、接口测试用例的编写就结束了,接下来就是执行测试用例,我们在 jenkins 上执行的时候是使用诸如 mvn test -Dtest=TestMovie* 等命令来执行的,执行完后生成如下图的测试报告:
接下来简单介绍一下原理:
1、注解
在我们编写接口的时候,为了简化接口部分的编写工作,我们在该处使用了 java 的注解功能,如下代码,@SERVER指定该接口类的 HOST,@GET/@POST 则标注每个接口的后续的 URL,@Param则标注每个接口的参数
@SERVER(GlobalVar.DOUBAN_MOVIE_SERVER)
public interface MovieApi {

    /**
     * @param start
     */
    @GET(path = "/top250", description = "豆瓣电影 top 250")
    Response top250(@Param("start") Integer start,
                    @Param("count") Integer count);
}
2、动态代理
基于上述的注解下,若要使用该接口类下的接口,则需要为该接口类创建一个动态代理,有了该接口类的动态代理,调用接口就可以进行下去:
private MovieApi movieApi = ProxyUtils.create(MovieApi.class);

Response response = movieApi.top250(0, 1);
而动态代理的类实现如下,某接口类的接口方法都是从这个代理类中出去的,也就是说在这里我们就可以对上面编写接口类、接口方法、接口参数使用到的注解进行解释:
public class ProxyUtils {
    private static Logger logger = LoggerFactory.getLogger(ProxyUtils.class);

    @SuppressWarnings("unchecked")
    public static <T> T create(Class<T> clazz) {

        // 获取接口上的HOST
        Annotation annotation = clazz.getAnnotation(SERVER.class);
        if (annotation == null) {
            throw new RuntimeException(String.format("接口类%s未配置@SERVER注解",
                    clazz.getName()));
        }

        String host;
        switch (clazz.getAnnotation(SERVER.class).value()){
            case GlobalVar.DOUBAN_MOVIE_SERVER:
                host = GlobalVar.DOUBAN_MOVIE_SERVER_URL;
                break;
            default:
                throw new RuntimeException(String.format("未查找到接口类%s配置的@HOST(%s)注解中的%s接口服务器地址",
                        clazz.getName(),
                        clazz.getAnnotation(SERVER.class).value(),
                        clazz.getAnnotation(SERVER.class).value()));
        }


        HttpUtils httpUtils = new HttpUtils(host);

        return (T) Proxy.newProxyInstance(clazz.getClassLoader(),
                new Class[]{clazz},
                new InvocationHandler() {
                    @Override
                    public Object invoke(Object proxy, Method method, Object[] args) throws Throwable {

                        // 方法上的注释及对应的值
                        Annotation[] annotations = method.getAnnotations();
                        if (annotations.length == 0) {
                            throw new RuntimeException(String.format("%s方法未配置请求类型注解,如@POST、@GET等",
                                    method.getName()));
                        }

                        HttpType httpType;
                        String path;
                        String description;

                        // 当前只需要解析一个注解
                        if (annotations[0] instanceof POST) {
                            httpType = HttpType.POST;
                            path = ((POST) annotations[0]).path();
                            description = ((POST) annotations[0]).description();
                        } else if (annotations[0] instanceof GET) {
                            httpType = HttpType.GET;
                            path = ((GET) annotations[0]).path();
                            description = ((GET) annotations[0]).description();
                        } else {
                            throw new RuntimeException(String.format("暂不支持%s方法配置的请求类型注解%s",
                                    method.getName(),
                                    annotations[0].annotationType()));
                        }

                        // 方法上参数对应的注解
                        Annotation[][] parameters = method.getParameterAnnotations();
                        Integer length = parameters.length;
                        TestStep testStep = new TestStep();
                        if (length != 0) {
                            Map<String, Object> map = new HashMap<>();
                            for (Integer i = 0; i < length; i++) {
                                // 参数注解类型
                                Annotation[] annos = parameters[i];
                                if (annos.length == 0) {
                                    throw new RuntimeException(String.format("方法%s中缺少参数注解,如@Param",
                                            method.getName()));
                                }

                                if (annos[0] instanceof Param) {
                                    map.put((((Param) annos[0]).value()), args[i]);
                                }
                                else {
                                    throw new RuntimeException(String.format("暂不支持方法%s中配置的参数注解%s",
                                            method.getName(),
                                            annos[0].annotationType()));
                                }
                            }
                            testStep.setParams(map);
                        }

                        testStep.setType(httpType);
                        testStep.setPath(path);

                        logger.info("[" + path + "]" + description);
                        return httpUtils.request(testStep);
                    }
                });
    }
}
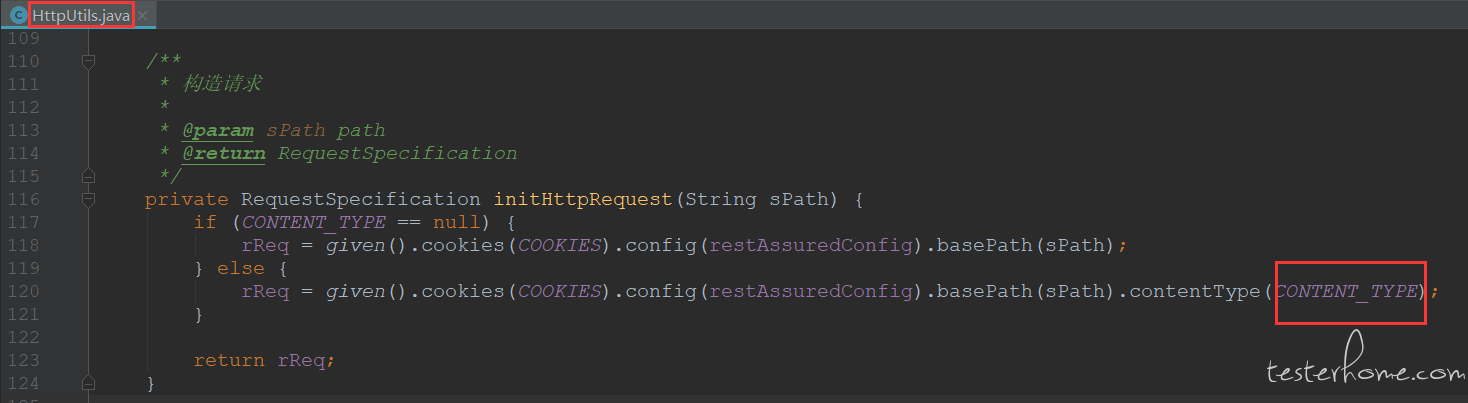
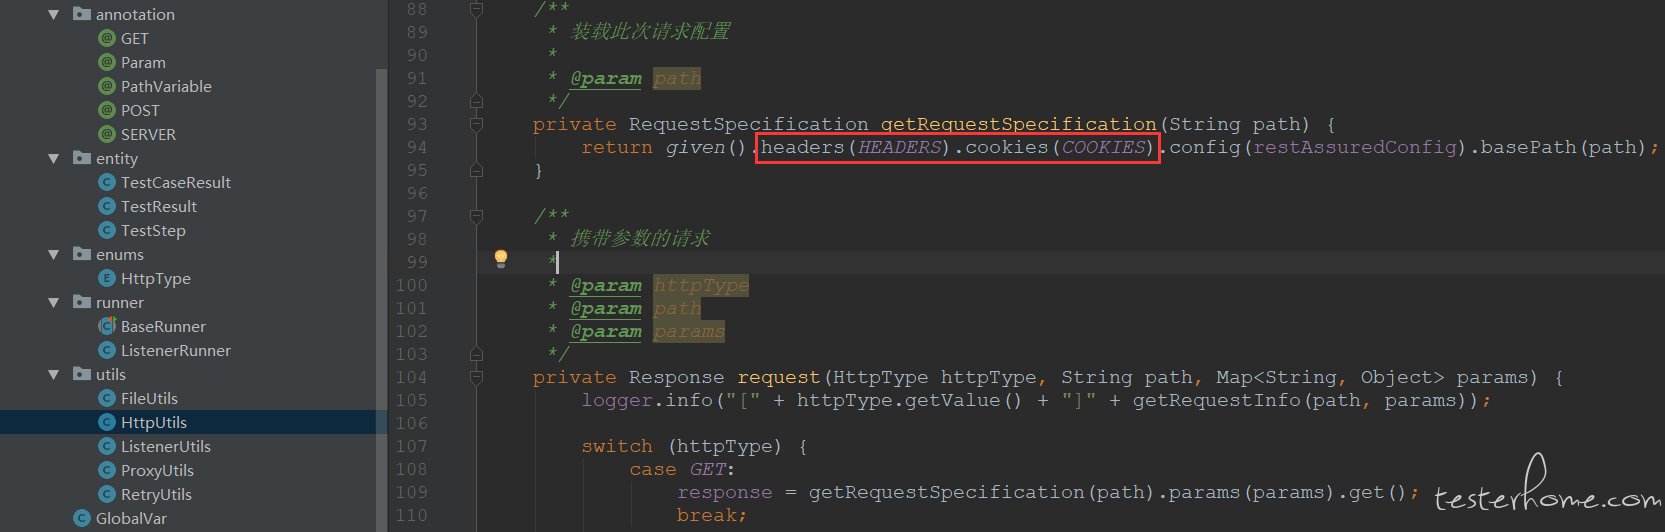
3、http 请求
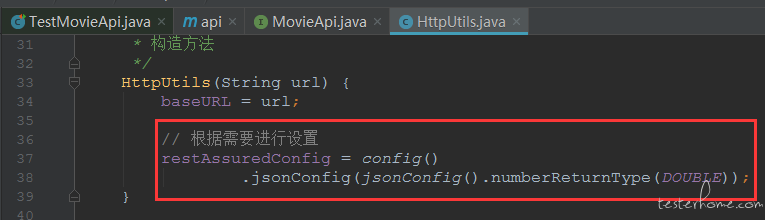
如上面的动态代理类中的 HttpUtils 类,该类中封装了 Rest-Assured,到了这一步我就不多说,大家可以参考 Rest-Assured 相关资料
4、测试报告
由于我们每个接口测试类都继承了 BaseRunner(包括失败重试),而 BaseRunner 采用了@RunWith(ListenerRunner.class) 注解
@RunWith(ListenerRunner.class)
public abstract class BaseRunner {

    protected final Logger logger = LoggerFactory.getLogger(getClass());
    protected Response response;

    @BeforeClass
    public static void beforeClass() {

    }

    @AfterClass
    public static void afterClass() {
    }

    // 失败重试
    @Rule
    public RetryUtils retryUtils = new RetryUtils(GlobalVar.RETRY_COUNTS);
}
在 ListenerRunner 中添加了我们自己的监听器(用于获取测试报告数据),继承了 JUnit 自己的 Runner(BlockJUnit4ClassRunner )
public class ListenerRunner extends BlockJUnit4ClassRunner {

    public ListenerRunner(Class<?> cls) throws InitializationError {
        super(cls);
    }

    @Override
    public void run(RunNotifier notifier){
        notifier.removeListener(GlobalVar.listenerUtils);
        notifier.addListener(GlobalVar.listenerUtils);
        notifier.fireTestRunStarted(getDescription());
        super.run(notifier);
    }
}
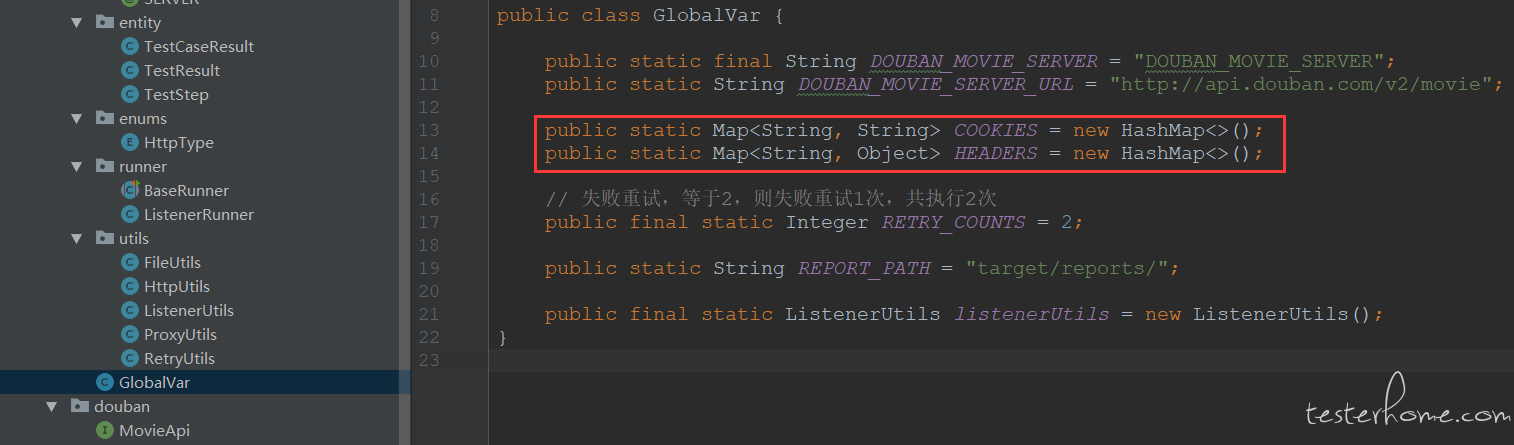
到这里我们接口自动化测试项目里面最基础的东西就介绍完了,至于为什么采用这样的方式来做接口自动化测试,而不是采用大家普遍采用的 Excel、后台编写测试用例的形式,是以因为我们的接口自动化测试项目中引入了对数据库、缓存的读写操作,这样一来在数据层面来说就更加稳定可靠,下面简单说这一块儿(由于这部分的配置都是数据库的用户数据,不能公开配置部分,这里列出和公开部分的不同的地方)
1、下图是我们项目里面对数据库的配置

2、BaseRunner、ListenerRunner 的差异
BaseRunner 添加了@ContextConfiguration注解来加载上面的数据库、缓存配置文件
@RunWith(ListenerRunner.class)
@ContextConfiguration({"classpath:spring/applicationContext*.xml"})
public abstract class BaseRunner {

    protected final Logger logger = LoggerFactory.getLogger(getClass());
    protected Response res;

    @BeforeClass
    public static void beforeClass() {
        PropertyUtils pu = new PropertyUtils(GlobalVar.CONFIG_NAME);
        pu.initConfig();
    }

    @AfterClass
    public static void afterClass() {
    }

    // 失败重试
    @Rule
    public RetryUtils ru = new RetryUtils(GlobalVar.RETRY_COUNTS);
}
ListenerRunner 继承自 Spring Test 的 Runner(而 Spring 的 Runner 继承于 JUnit 自己的 Runner BlockJUnit4ClassRunner )
public class ListenerRunner extends SpringJUnit4ClassRunner {

    public JHJRunner(Class<?> cls) throws InitializationError {
        super(cls);
    }

    @Override
    public void run(RunNotifier notifier){
        notifier.removeListener(GlobalVar.listenerUtils);
        notifier.addListener(GlobalVar.listenerUtils);
        notifier.fireTestRunStarted(getDescription());
        super.run(notifier);
    }
}
3、在编写测试用例上的差异
在很多测试数据我们依赖于对数据库、缓存,从而在构造测试数据、验证结果时更加稳定
public class TestOldJHJUser extends BaseRunner {

    private OldJHJUser oldJHJUser = new OldJHJUser();

    private String mobile = GlobalVar.OLD_JHJ_TEST_MOBILE;
    private String password = GlobalVar.OLD_JHJ_TEST_PASSWORD;
    private String noRegisterMobile = GlobalVar.NO_REGISTER_MOBILE;
    private String mac = GlobalVar.OLD_JHJ_TEST_MAC;

    @Autowired
    private SmsPoMapper smsPoMapper;

    @Autowired
    private MemberPoMapper memberPoMapper;

    @Autowired
    private JHJRedisService jhjRedisService;

    @Before
    public void before() throws Exception {
    }

    @After
    public void after() throws Exception {
    }

    /**
     * @Description: 登录接口测试
     */
    @Test
    public void testLogin() throws Exception {
        MemberPo memberPo = memberPoMapper.selectMemberByMobile(mobile);

        // 登录成功
        res = oldJHJUser.login(mobile, memberPo.getLoginPasswd(), mac);

        // 验证登录密码是否设置,密码为空则未设置密码
        // 验证用户是否禁用,getIsDisable()==1则用户被禁用
        res.then().body(
                "data.mobile", equalTo(mobile),
                "data.existPassord", equalTo(!memberPo.getLoginPasswd().isEmpty()),
                "data.isDisable", equalTo(memberPo.getIsDisable()==1));


        // 登录失败-密码错误
        res = oldJHJUser.login(mobile, memberPo.getLoginPasswd()+"123", mac);
        res.then().body("msg", equalTo("密码错误"));


        // 登录失败-未注册用户登录
        res = oldJHJUser.login(noRegisterMobile, "password", mac);
        res.then().body("msg", equalTo("用户不存在"));
    }

    /**
     * @Description: 验证码登录接口测试
     */
    @Test
    public void testLoginByCode() throws Exception {
        MemberPo memberPo = memberPoMapper.selectMemberByMobile(mobile);

        // 向Redis中插入验证码
        jhjRedisService.setSecurityCode(SmsModeEnum.LOGIN_VERIFY_CODE.getValue(), mobile);
        String code = jhjRedisService.getSecurityCode(SmsModeEnum.LOGIN_VERIFY_CODE.getValue(), mobile);


        // 用户未注册
        res = oldJHJUser.loginByCode(noRegisterMobile, code, mac);
        res.then().body("msg", equalTo("用户不存在"));


        // 验证码错误
        res = oldJHJUser.loginByCode(mobile, "000000", mac);
        res.then().body("msg", equalTo("短信验证码不正确"));


        // 验证码正确
        res = oldJHJUser.loginByCode(mobile, code, mac);
        // 验证登录密码是否设置,密码为空则未设置密码
        // 验证用户是否禁用,getIsDisable()==1则用户被禁用
        res.then().body(
                "data.mobile", equalTo(mobile),
                "data.existPassord", equalTo(!memberPo.getLoginPasswd().isEmpty()),
                "data.isDisable", equalTo(memberPo.getIsDisable()==1));

        // 验证码过期
        jhjRedisService.deleteSecurityCode(SmsModeEnum.LOGIN_VERIFY_CODE.getValue(), mobile);
        res = oldJHJUser.loginByCode(mobile, code, mac);
        res.then().body("msg", equalTo("短信验证码已过期"));
    }
}