通用技术 如何使用 Zend Expressive 建立 NASA 图片库?
在本文中,我们将借助 NASA 天文图库 API,使用 Zend Expressive 建立图片库。最后的结果将显示在 AstroSplash 网站,该网站是为了文本特意搭建的。本文系 OneAPM 工程师编译整理。
Zend Expressive 是用于创建 PSR-7 中间件程序的全新微框架。微框架相较于全栈框架的好处在于更小、更快、更加灵活,适用于设计应用时无需多余帮助、喜欢使用单独组件灵活创建应用的开发老手。
中间件一词将在本文中多次出现。其完善定义可在 Zend Expressive 文档 中找到:
“中间件是位于请求与响应间的任意代码。通常,中间件负责分析请求以收集输入数据,将数据分配给其他层进行处理,之后创建并返回响应。”
从 2013 年开始,StackPHP 为 PHP 开发者提供了创建中间件的方法。然而,StackPHP 定义的中间件与本文将会提到的中间件有些不同。考虑到本文的意图,两者的兼容性只在理论层面有效。
如果你仍感到困惑,无需担心。所有的概念都会辅之以详尽的例子,让我们马上动手创建应用吧。
应用简介
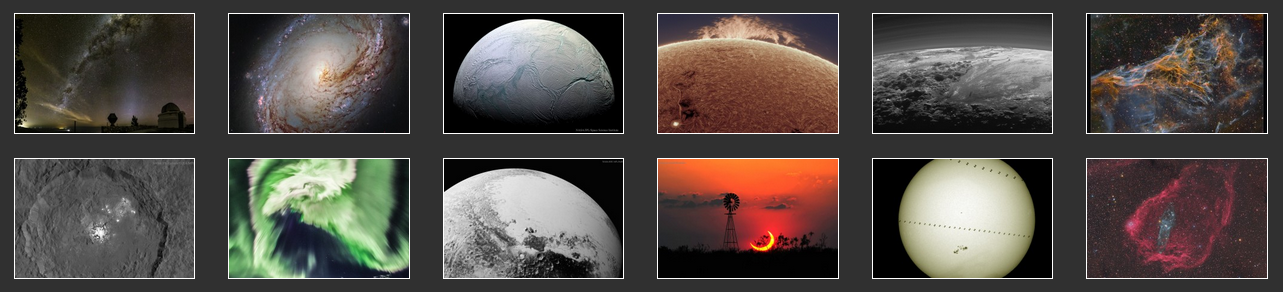
我们即将创建的应用会用到 NASA 为其天文图库网站提供的 API,该网站提供了许多美轮美奂的天文图片,虽然现在看来有些过时。只要花一些功夫,我们就能用这个 API 创造一个方便浏览的图片库。
在阅读本文时,你也可以参考 GitHub 中的 AstroSplash 公共资源库。该库包含本应用的完整源码,而应用的最终效果则在 astrosplash.com 呈现。
创建 Zend Expressive 项目
为了快速搭建开发环境,建议(但非必须)使用 Homestead Improved Vagrant 虚拟机。
Zend Expressive 提供了一个非常实用的项目框架安装程序,可用于配置框架及所选的组件。使用下面的 composer 命令,开始创建应用:
composer create-project -s rc zendframework/zend-expressive-skeleton <project-directory>
此处,需要将 <project-directory> 替换为之后安装 Zend Expressive 的目录。在使用 Homestead Improved Vagrant 虚拟机时,此处应为 Project,命令将在 Code 目录下运行。如果安装程序发现 Project 目录已经存在,会删除原有目录,再重新运行该命令。
安装程序会让我们选择框架支持的不同组件。大部分情况下,我们会选择默认设置,使用 FastRoute、Zend ServiceManager 与 Whoops 错误处理器。模板引擎没有默认选项,我们将使用 Plates。

现在,如果我们在浏览器中加载该应用,就能看到欢迎我们使用 Zend Expressive 的页面了。 大概浏览一下自动创建的文档,特别是 config 目录。该目录包含了 Zend ServiceManager 创建容器所需的数据,而容器正是 Zend Expressive 应用的核心。
接着,我们得删除所有不需要的示例代码。转入项目目录,执行以下命令:
rm public/favicon.ico

rm public/zf-logo.png

rm src/Action/*

rm test/Action/*

rm templates/app/*

rm templates/layout/*
配置容器
容器是应用的关键,它会包含路径、中间件定义,服务以及应用的其余配置。
很快,我们就得为应用的索引页动作创建服务。在此之前,让我们学习一下 Zend Expressive 文档中的服务命名策略。
“我们建议在选择服务名时,尽量使用完整的类名。唯一的例外是:当某个服务实现了用于 typehints 的接口时,选用接口名。”
基于这一策略,打开 config/autoload/dependencies.global.php,用以下代码替换其内容:
<?php

return [

    'dependencies' => [

        'factories' => [

            Zend\Expressive\Application::class => Zend\Expressive\Container\ApplicationFactory::class,

        ],

    ],

];
此处,我们删除了 invokables 键,因为在应用中无需定义此类服务。Invokable 服务无需构造函数参数即可实例化。
首先创建的服务是应用服务。如果你看一下前端控制器 (public/index.php),就会发现该控制器从容器中调用应用服务以运行应用。该服务包含依赖关系,我们必须在 factories 键下列出。这样,相当于告诉 Zend ServiceManager 它必须使用指定的 factory 类来创建服务。Zend Expressive 还提供了许多 factories 用于创建核心服务。
接下来,打开 config/autoload/routes.global.php,用以下代码替换其内容:
<?php


return [

    'dependencies' => [

        'invokables' => [

            Zend\Expressive\Router\RouterInterface::class => Zend\Expressive\Router\FastRouteRouter::class,

        ],

        'factories' => [

            App\Action\IndexAction::class => App\Action\IndexFactory::class,

        ]

    ],


    'routes' => [

        [

            'name' => 'index',

            'path' => '/',

            'middleware' => App\Action\IndexAction::class,

            'allowed_methods' => ['GET'],

        ],

    ],

];
dependencies 键下的第一个条目告诉框架,它会实例化 FastRoute adapter 类以创建 router 对象,无需传入构造函数参数。factories 键下的条目用于索引操作服务。我们会在下一节为该服务及其 factory 填写代码。
routes 键会由 Zend Expressive 载入 router,且需包含一组 route 描述符。在我们定义的单一 route 描述符中,path 键与索引 route 的条目相符,middleware 键会告诉框架将哪个服务作为处理程序, allowed_methods 键则会指定允许的 HTTP 方法。将 allowed_methods 设置为Zend\Expressive\Router\Route::HTTP_METHOD_ANY ,即为允许任意的 HTTP 方法。
Route 中间件
下面将创建在 routes 配置文件中与索引 route 关联的索引操作服务。操作类套用 Zend Expressive 中 route 中间件的形式,也即用于绑定至特定 routes 的中间件。
操作类将位于项目根目录的 src/Action/IndexAction.php。其内容如下:
<?php

namespace App\Action;

use Psr\Http\Message\ServerRequestInterface;

use Psr\Http\Message\ResponseInterface;

use Zend\Expressive\Template\TemplateRendererInterface;

use Zend\Stratigility\MiddlewareInterface;

class IndexAction implements MiddlewareInterface

{

    private $templateRenderer;

    public function __construct(TemplateRendererInterface $templateRenderer)

    {

        $this->templateRenderer = $templateRenderer;

    }

    public function __invoke(ServerRequestInterface $request, ResponseInterface $response, callable $next = null)

    {

        $html = $this->templateRenderer->render('app::index');

        $response->getBody()->write($html);

        return $response->withHeader('Content-Type', 'text/html');

    }

}
此处,我们使用依赖注入获取模板渲染器接口的实现。之后,我们需要为处理该依赖注入创建 factory 类。
__invoke 魔术方法的出现使该类变成可调用的。调用时,以 PSR-7 消息为参数。由于所有的索引请求都由该中间件处理,我们无需调用链中其他的中间件,可以直接返回响应。此处用于标识可调用中间件的签名非常常见:
public function __invoke(ServerRequestInterface $request, ResponseInterface $response, callable $next = null);
用此模式创建的中间件,PSR-7 中间件调度器 Relay 也会支持。相应地,用于 Slim v3 框架——另一种 PSR-7 中间件框架的中间件也与 Zend Expressive 兼容。Slim 现在提供的中间件可用于 CSRF 保护与 HTTP 缓存。
当操作被调用时,它会渲染 app::index 模板,将其写入响应中,并以 text/html 内容类型返回该响应。由于 PSR-7 消息是不可变的,每次给响应添加 header ,必须创建一个新的响应对象。原因在 PSR-7 规范 meta 文档中有说明。
接下来要写容器赖以实例化索引操作类的 factory 类。factory 类将位于项目根目录的 src/Action/IndexFactory.php。其内容如下:
<?php
namespace App\Action;

use Interop\Container\ContainerInterface;

use Zend\Expressive\Template\TemplateRendererInterface;

class IndexFactory

{

    public function __invoke(ContainerInterface $container)

    {

        $templateRenderer = $container->get(TemplateRendererInterface::class);

        return new IndexAction($templateRenderer);

    }

}
再一次地,使用 __invoke 魔术方法将该类变成可调用的。容器会调用该类,传入自身实例作为唯一参数。之后,可使用该容器获得模板渲染器服务的实现,将之注入操作并返回。此处,可以仔细看看容器的配置,从而了解其中原理。
模板
现在,唯一缺少的组件就是模板了。在之前的索引操作中,我们向模板渲染器索取 app::index 模板,但是该模板还未创建。Zend Expressive 使用 namespace::template 注释指代模板。在容器配置中,Plates 了解到 app 命名空间中的所有模板都能在 templates/app 目录下找到,且它该以 use .phtml 为模板文件扩展名。另外两个配置过的命名空间为 error 与 layout。
首先,我们要创建 layout 模板。该模板的名字为 layout::default,根据配置,其路径为 templates/layout/default.phtml。
<!DOCTYPE html>

<html lang="en">

    <head>

        <meta charset="utf-8" />

        <title><?=$this->e($title);?></title>

    </head>

    <body>

        <?=$this->section('content')?>

    </body>

</html>
接下来,创建 templates/app/index.phtml 中的 app::index 模板。我们会使之扩展之前创建的 layout::default 模板。error 命名空间中的模板已经配置为扩展 layout::default 模板。
<?php $this->layout('layout::default', ['title' => 'Astronomy Picture of the Day']) ?>

<h1>Astronomy Picture of the Day App</h1>

<p>Welcome to my Astronomy Picture of the Day App. It will use an API provided by NASA to deliver awesome astronomy pictures.</p>
在浏览器中加载应用,你就能看到刚才创建的模板了。
Pipe 中间件
Zend Expressive 文档中关于 pipe 中间件的说明如下:
“当你在应用中 pipe 中间件时,它会被添加到队列中,当某个中间件返回响应实例时才会按顺序从队列中移除。如果没有中间件返回响应实例,会由 ‘最终处理器’ 进行处理,后者会决定是否返回错误,若返回,则由其决定错误类型。”
pipe 中间件可用于创建应用防火墙、认证层、分析程序等等。实际上,Zend Expressive 将 pipe 中间件用于路由。在本应用中,我们会使用 pipe 中间件创建应用层缓存。
首先,需要获取缓存库。
composer require doctrine/cache ^1.5
其次,在 config/autoload/dependencies.global.php 文件添加以下代码:
<?php

return [

    'dependencies' => [

        'factories' => [

            // ...

            Doctrine\Common\Cache\Cache::class => App\DoctrineCacheFactory::class,

        ],

    ],

    'application' => [

        'cache_path' => 'data/doctrine-cache/',

    ],

];
我们添加了一个 doctrine 缓存服务,该服务所需的自定义 factory 类会在之后创建。使用文件系统缓存是使应用上线运行的最快方法,我们需要为此服务创建一个目录。
mkdir data/doctrine-cache
配置文件中的最后改动,是在路由开始之前将中间件服务报告给 Zend Expressive,并将其加入到中间件 pipe 中。打开 config/autoload/middleware-pipeline.global.php 文件,用以下代码替换其内容:
<?php

return [

    'dependencies' => [

        'factories' => [

            App\Middleware\CacheMiddleware::class => App\Middleware\CacheFactory::class,

        ]

    ],

  'middleware_pipeline' => [

        'pre_routing' => [

            [ 'middleware' => App\Middleware\CacheMiddleware::class ],

        ],

        'post_routing' => [

        ],

    ],

];
用于 doctrine 缓存的 factory 会保存在 src/DoctrineCacheFactory.php 文件中。如果需要改变应用使用的缓存,我们只需改变该文件(及其配置),使用另一个 doctrine 缓存驱动程序即可。
<?php

namespace App;

use Doctrine\Common\Cache\FilesystemCache;

use Interop\Container\ContainerInterface;

use Zend\ServiceManager\Exception\ServiceNotCreatedException;

class DoctrineCacheFactory

{

    public function __invoke(ContainerInterface $container)

    {

        $config = $container->get('config');


        if (!isset($config['application']['cache_path'])) {

            throw new ServiceNotCreatedException('cache_path must be set in application configuration');

        }


        return new FilesystemCache($config['application']['cache_path']);

    }

}
位于 src/Middleware/CacheFactory.php 的中间件 factory 会将缓存服务注入中间件:
<?php

namespace App\Middleware;

use Doctrine\Common\Cache\Cache;

use Interop\Container\ContainerInterface;

class CacheFactory

{

    public function __invoke(ContainerInterface $container)

    {

        $cache = $container->get(Cache::class);

        return new CacheMiddleware($cache);

    }

}
最后剩下中间件。创建 src/Middleware/CacheMiddleware.php,输入以下代码:
<?php

namespace App\Middleware;

use Doctrine\Common\Cache\Cache;

use Psr\Http\Message\ResponseInterface;

use Psr\Http\Message\ServerRequestInterface;

use Zend\Stratigility\MiddlewareInterface;

class CacheMiddleware implements MiddlewareInterface

{

    private $cache;

    public function __construct(Cache $cache)

    {

        $this->cache = $cache;

    }

    public function __invoke(ServerRequestInterface $request, ResponseInterface $response, callable $next = null)

    {

        $cachedResponse = $this->getCachedResponse($request, $response);

        if (null !== $cachedResponse) {

            return $cachedResponse;

        }

        $response = $next($request, $response);

        $this->cacheResponse($request, $response);

        return $response;

    }

    private function getCacheKey(ServerRequestInterface $request)

    {

        return 'http-cache:'.$request->getUri()->getPath();

    }

    private function getCachedResponse(ServerRequestInterface $request, ResponseInterface $response)

    {

        if ('GET' !== $request->getMethod()) {

            return null;

        }

        $item = $this->cache->fetch($this->getCacheKey($request));

        if (false === $item) {

            return null;

        }

        $response->getBody()->write($item['body']);

        foreach ($item['headers'] as $name => $value) {

            $response = $response->withHeader($name, $value);

        }

        return $response;

    }

    private function cacheResponse(ServerRequestInterface $request, ResponseInterface $response)

    {

        if ('GET' !== $request->getMethod() || !$response->hasHeader('Cache-Control')) {

            return;

        }

        $cacheControl = $response->getHeader('Cache-Control');

        $abortTokens = array('private', 'no-cache', 'no-store');

        if (count(array_intersect($abortTokens, $cacheControl)) > 0) {

            return;

        }

        foreach ($cacheControl as $value) {

            $parts = explode('=', $value);

            if (count($parts) == 2 && 'max-age' === $parts[0]) {

                $this->cache->save($this->getCacheKey($request), [

                    'body'    => (string) $response->getBody(),

                    'headers' => $response->getHeaders(),

                ], intval($parts[1]));

                return;

            }

        }

    }

}
中间件会首先尝试从缓存处获取响应。如果缓存中包含有效响应,则返回之,下一个中间件不会被调用。然而,如果缓存中没有有效响应,生成响应的任务就会由 pipe 中的下一个中间件负责。
在返回 pipe 中的最后一个响应之前,应用会缓存该响应以备下次使用。因此,会简单检查该响应是否可以缓存。
如果回到索引操作类,我们可以给响应对象添加一个缓存控制 header,该 header 用来告诉刚刚创建的缓存中间件,将此响应缓存一个小时:
public function __invoke(ServerRequestInterface $request, ResponseInterface $response, callable $next = null)

{

    $html = $this->templateRenderer->render('app::index');

    $response->getBody()->write($html);

    return $response

        ->withHeader('Content-Type', 'text/html')

        ->withHeader('Cache-Control', ['public', 'max-age=3600']);

}
这是一个非常原始的缓存,只有当 pipe 中之后的中间件返回的响应对象较为简单时才有效。有一系列的 header 都能影响缓存处理响应的方式。此处,作为 pipe 中间件利用应用层级设计的演示代码,已经够用。
在创建应用的同时,我们可以禁用缓存控制 header 以防止缓存旧的响应。清除缓存的指令如下:
rm -rf data/doctrine-cache/*
请注意,Cache-Control header 会激活客户端的缓存。浏览器会记下其缓存的响应,即便这些响应已经在服务端删除。
## 集成 NASA API
尽管可以直接使用 NASA API,这种方法还是有些复杂之处。最主要的两个问题是 NASA API 并未提供任何获取结果集和缩略图的方法。我们的解决方案是使用一个本文专属的 wrapper API。
在项目根目录运行以下指令:
composer require andrewcarteruk/astronomy-picture-of-the-day ^0.1
在 config/autoload/dependencies.global.php 文件添加以下代码:
<?php

return [

    'dependencies' => [

        'factories' => [

            // ...

            AndrewCarterUK\APOD\APIInterface::class => App\APIFactory::class,

        ],

    ],

    'application' => [

        // ...

        'results_per_page' => 24,

        'apod_api' => [

            'store_path' => 'public/apod',

            'base_url' => '/apod',

        ],

    ],

];
我们还需在 config/autoload/dependencies.local.php 创建本地依赖文件:
<?php

return [

    'application' => [

        'apod_api' => [

            'api_key' => 'DEMO_KEY',

            // DEMO_KEY might be good for a couple of requests

            // Get your own here: https://api.nasa.gov/index.html#live_example

        ],

    ],

];
并在 config/autoload/routes.global.php 文件添加路由信息:
<?php

return [

    'dependencies' => [

        // ...

        'factories' => [

            // ...

            App\Action\PictureListAction::class => App\Action\PictureListFactory::class,

        ],

    ],

    'routes' => [

        // ...

        [

            'name' => 'picture-list',

            'path' => '/picture-list[/{page:\d+}]',

            'middleware' => App\Action\PictureListAction::class,

            'allowed_methods' => ['GET'],

        ],

    ],

];
所以,以上配置修改会产生什么效果呢?我们添加的路由可以从 NASA API 获取近期的图片列表。该路由会接收任意的整数型分页属性,我们可将之作为页码。我们还为 API wrapper 及此路由附属的操作创建了服务。
我们需要创建在 apod_api 键中指定的存储路径,如果可行,将此路径添加至 .gitignore 文件。API wrapper 将在该路径下存储缩略图,因此它必须保存在公共目录下。否则就无法为缩略图创建公共 URL。
mkdir public/apod
此 API 的 factory 比较简单。创建 src/APIFactory.php 文件,填入以下代码:
<?php

namespace App;

use AndrewCarterUK\APOD\API;

use GuzzleHttp\Client;

use Interop\Container\ContainerInterface;

use Zend\ServiceManager\Exception\ServiceNotCreatedException;

class APIFactory

{

    public function __invoke(ContainerInterface $container)

    {

        $config = $container->get('config');

        if (!isset($config['application']['apod_api'])) {

            throw new ServiceNotCreatedException('apod_api must be set in application configuration');

        }

        return new API(new Client, $config['application']['apod_api']);

    }

}
该 API wrapper 使用 Guzzle 向 API 终端提交 HTTP 请求。我们只需注入客户端实例以及 config 服务中的配置即可。
处理路由的操作需要与 API 服务一起注入。操作 factory 位于 /src/Action/PictureListFactory.php 文件,内容如下:
<?php

namespace App\Action;

use AndrewCarterUK\APOD\APIInterface;

use Interop\Container\ContainerInterface;

use Zend\ServiceManager\Exception\ServiceNotCreatedException;

class PictureListFactory

{

    public function __invoke(ContainerInterface $container)

    {

        $apodApi = $container->get(APIInterface::class);

        $config  = $container->get('config');

        if (!isset($config['application']['results_per_page'])) {

            throw new ServiceNotCreatedException('results_per_page must be set in application configuration');

        }

        return new PictureListAction($apodApi, $config['application']['results_per_page']);

    }

}
现在只剩下操作了。创建 src/Action/PictureListAction.php 文件,填入如下代码:
<?php

namespace App\Action;

use AndrewCarterUK\APOD\APIInterface;

use Psr\Http\Message\ServerRequestInterface;

use Psr\Http\Message\ResponseInterface;

use Zend\Stratigility\MiddlewareInterface;

class PictureListAction implements MiddlewareInterface

{

    private $apodApi;

    private $resultsPerPage;

    public function __construct(APIInterface $apodApi, $resultsPerPage)

    {

        $this->apodApi        = $apodApi;

        $this->resultsPerPage = $resultsPerPage;

    }

    public function __invoke(ServerRequestInterface $request, ResponseInterface $response, callable $out = null)

    {

        $page     = intval($request->getAttribute('page')) ?: 0;

        $pictures = $this->apodApi->getPage($page, $this->resultsPerPage);

        $response->getBody()->write(json_encode($pictures));

        return $response

            // ->withHeader('Cache-Control', ['public', 'max-age=3600'])

            ->withHeader('Content-Type', 'application/json');

    }

}
该操作会从 API 获取一个页面的图片,以 JSON 格式将之导出。示例展示了如何为缓存中间件的响应添加缓存控制 header。然而,在开发时还是将这部分注释掉比较稳妥。
现在,我们只需创建一个容纳内容的工具。下面的文档可以在命令行运行。它包含了配置中的容器,会安装一个信号处理器,因此可以快速关闭程序,运行 API wrapper 中的 updateStore 方法。 创建 bin/update.php 文件:
<?php

chdir(__DIR__.'/..');

include 'vendor/autoload.php';

$container = include 'config/container.php';

// Create a SIGINT handler that sets a shutdown flag

$shutdown = false;

declare(ticks = 1);

pcntl_signal(SIGINT, function () use (&$shutdown) {

    $shutdown = true;

});


$newPictureHandler = function (array $picture) use (&$shutdown) {

    echo 'Added: ' . $picture['title'] . PHP_EOL;

    // If the shutdown flag has been set, die

    if ($shutdown) {

        die;

    }

};


$errorHandler = function (Exception $exception) use (&$shutdown) {

    echo (string) $exception . PHP_EOL;

    // If the shutdown flag has been set, die

    if ($shutdown) {

        die;

    }

};

$container->get(AndrewCarterUK\APOD\APIInterface::class)->updateStore(20, $newPictureHandler, $errorHandler);
现在,我们可以运行该命令以更新内容,从 API 处获取最近 20 天的图片。这会需要一点时间,但更新完成后,我们可以在浏览器中监控 /picture-list 路由,并看到一组 JSON 图片数据。在监控图片流时,最好禁用响应中的缓存 header,否则可能无法更新。
确保从 NASA 获取专属的 API 键,DEMO_KEY 很快就会达到请求上线,并返回 429 响应码。
php bin/update.php
若想要应用自动更新,需要将命令设置为每日运行。此外,还需将 updateStore 方法的第一个参数设置为 1,使其只下载当天的图片。
至此,本应用的 Zend Expressive 部分就介绍完毕了。然后只需修改模板,用 AJAX 从新的路由加载图片即可。AstroSplash 资源库 展示了一种实现方法(templates/app/index.phtml 与 templates/layout/default.phtml)。不过,这更应该我们发挥各人特色的地方。
最后需要做的就是不断的对网站的性能进行优化了,如果是在本地通过压测工具进行优化,那么使用 JMeter+XHProf 就可以了,不过这个方法不能完全的重现真实环境的性能状况,因此针对这种方式的结果进行优化,不一定是最优结果,这时候使用 OneAPM PHP 探针 就能解决这个问题。
使用 OneAPM 提供的 PHP 探针只需要直接在生产环境安装好探针,进行一些简单的配置,就能自动完成性能数据的收集和分析工作了,性能瓶颈准确度直达代码行,而且因为分析结果是基于真实数据,对于性能优化来说更具有参考价值,所以只需要经常按照慢事务堆栈图对标红的方法进行持续优化就可以很好的优化应用性能了。
总结
使用 Zend Expressive 这类以中间件为基础的框架使我们在设计应用时以层级为基础。依照最简单的形式,我们可以使用 route 中间件模拟在其他框架中可能熟悉的控制器操作。然而,中间件的好处在于它能在应用的任何阶段拦截并修改请求与响应。
Zend Expressive 是一种很好用的框架,因为它容易移植。之前所写的全部代码都可以轻易地移植到不同的框架使用,甚至用在没有框架的应用中,再配合 PHP 探针就能轻松搭建高性能的 PHP 应用程序了。
Zend Expressive 还支持许多意想不到的组件,使其很难不让人喜爱。目前,该框架支持三种路由 (FastRoute, Aura.Router, ZF2 Router),三种容器 (Zend ServiceManager, Pimple, Aura.DI) 以及三种模板引擎 (Plates, Twig, Zend View)。
此外,Zend Expressive 文档提供了有关该框架与其支持组件的深入文档,还包含了快速上手的简便指导教程。
原文地址:http://www.sitepoint.com/build-nasa-photo-gallery-zend-expressive/