大家好,我是温大大
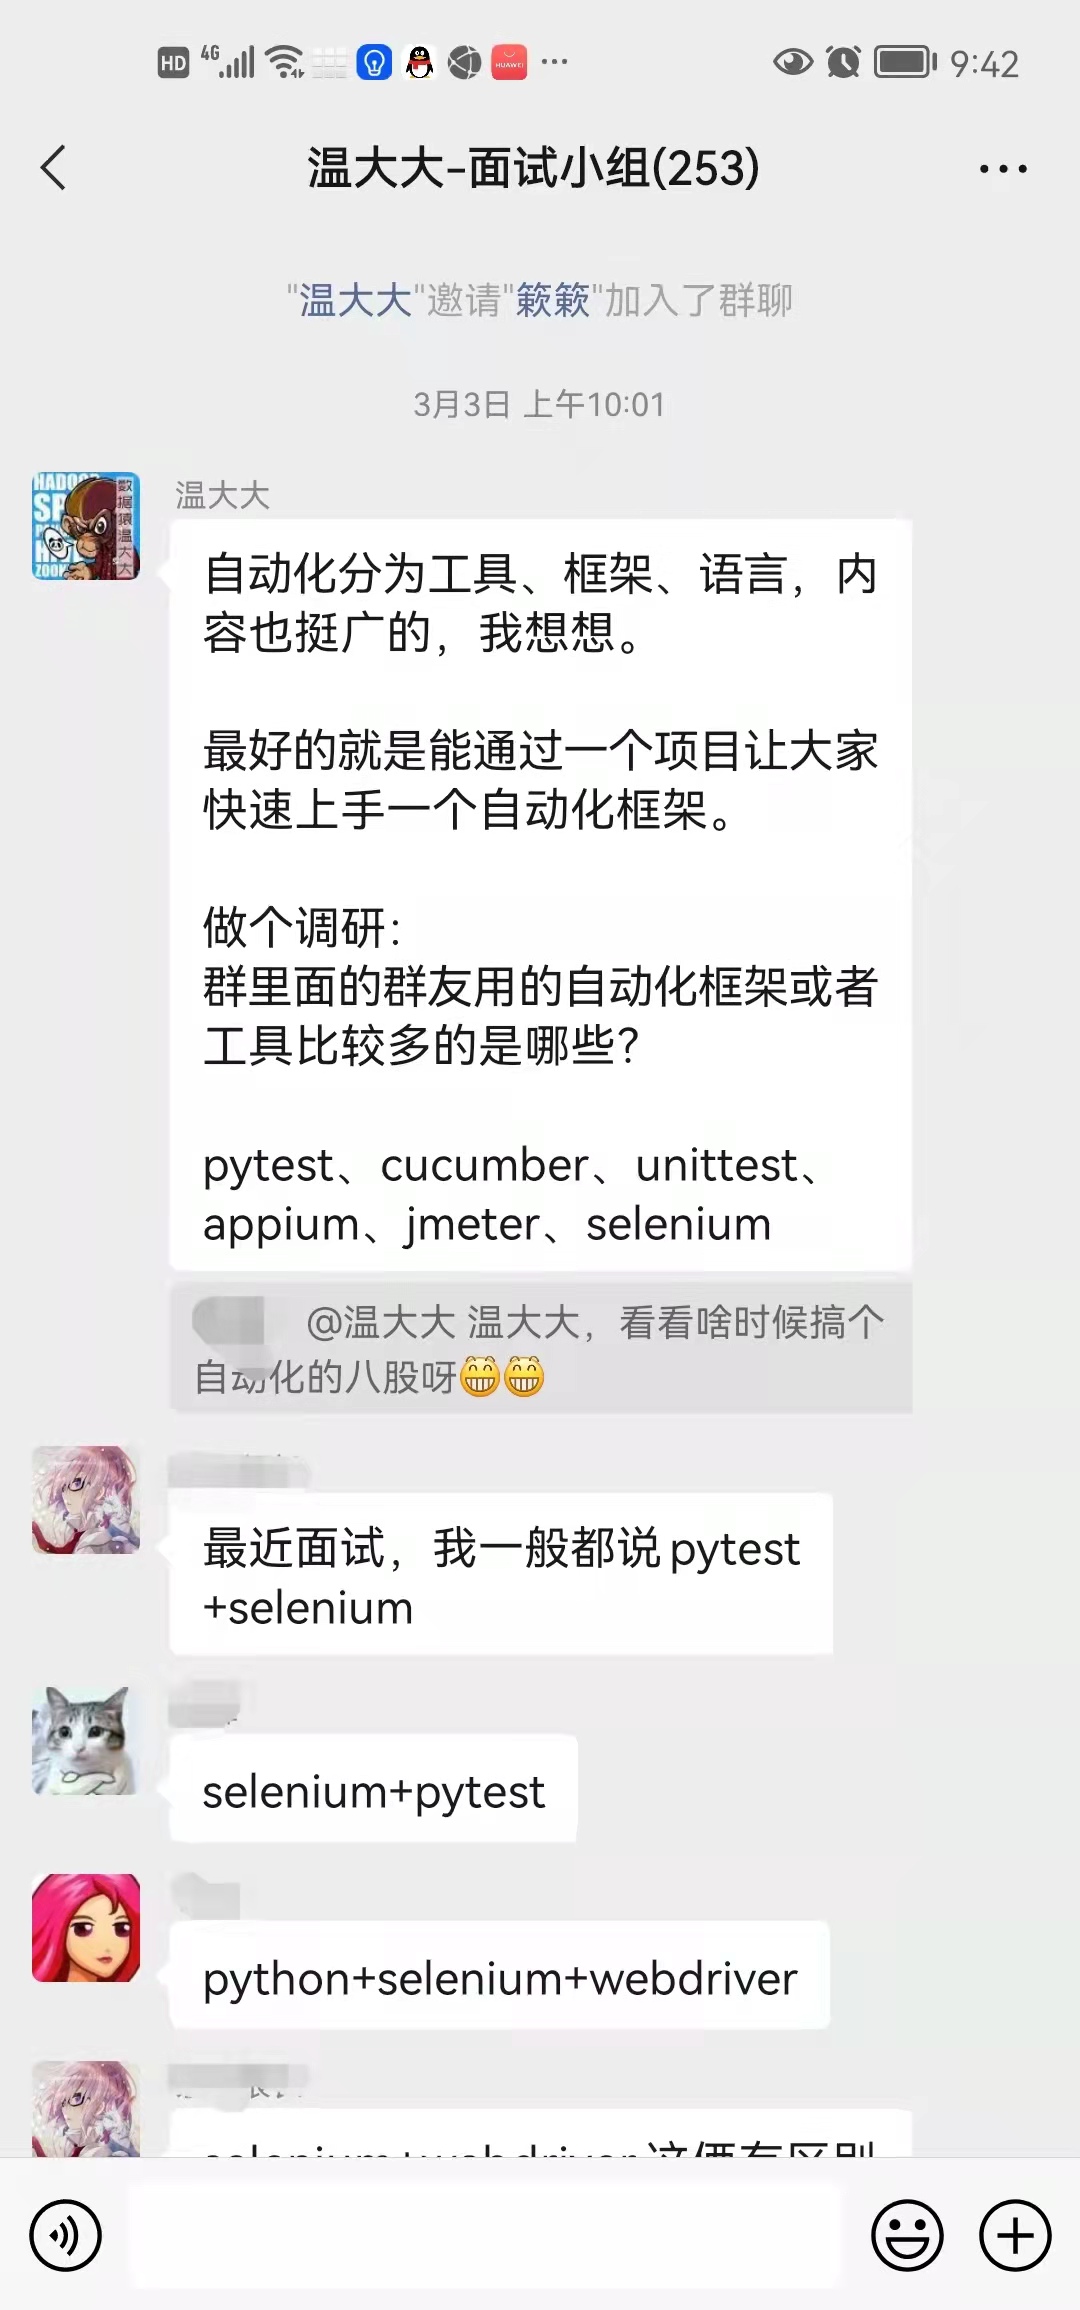
最近又开始 “卷” UI 自动化框架, 其实也是响应读者们的需求(如果你也正在找工作 / 面试 / 学习,欢迎加入我们)
教你如何使用 selenium4.1.2 + python3.9 打开 1 个 chrome 浏览器并请求 1 个 url 地址。
整个过程其实很简单,安装环境 + 写 4 行代码。 里面难点其实就是环境的搭建:
- 首先 安装 python3.9 环境,
- 接着 安装 python 编辑工具 pycharm,
- 最后 通过 pycharm 安装 selenium 的包 + 将浏览器 driver 放到指定路径,
- 注意:期间因为 pycharm 上面的安装源国外的 https://www.python.org 是国外服务器,所以需要设置下国内的安装源再安装 selenium,加速我们的安装。
总结:很多时候我们说入门一个工具难,其实不是难在工具本身,而是资源太分散了,没有正确的安装包,也不会正确的配置环境导致你无法入门使用这门工具,最终让你与 “高薪” 无缘,很难受有没有!
不用怕,同学们现在关注温大大,温大大带各位同学慢慢入门:
- 自动化测试工具
- 性能测试工具: jmeter 入门教程
- app 测试工具
再次拜托各位同学~爆肝不易,一键三连:点赞、收藏、转发

目录
- 环境准备
- 1.1 Python3.9 安装(Mac & Windows)
- 1.2 Pycharm 安装(Mac & Windows)
- 1.3 Python3 环境变量配置(Mac & Windows)
- 运行 1 个 demo:访问百度、搜索、断言
- 2.1 创建 1 个项目
- 2.2 添加 国内 repository 设置,加速安装
- 2.3 安装 Selenium 库
- 2.4 添加 Chrome driver 驱动
- 2.5 编写 1 个 demo 请求,打开 浏览器输入 URL 进行请求
- 2.6 加强脚本:搜索关键词、点击查询、断言结果
- 2.7 特殊说明:反爬虫机制
- 常用函数指南
- 3.1 查找元素 8 大方法
- 获取: d.find_elements_by_tag_name("option")
- 提交: d.find_element_by_id("submit").click()
- 拖放: ActionChains
- 窗口和框架之间移动: d.switch_to_window("windowName")
- 弹出对话框: d.driver.switch_to_alert()
- 访问浏览器历史记录: d.forward()
- 操作 Cookies: d.get_cookies()
- 3.2 等待页面 Waits 方法
- 显式等待: WebDriverWait(driver, 10).until()
- 隐式等待: d.implicitly_wait(10)
- 3.3 常用交互操作:
- 获取: d.find_elements_by_tag_name("option")
- 提交: d.find_element_by_id("submit").click()
- 拖放: ActionChains
- 窗口和框架之间移动: d.switch_to_window("windowName")
- 弹出对话框: d.driver.switch_to_alert()
- 访问浏览器历史记录: d.forward()
- 操作 Cookies: d.get_cookies()
- 3.4 页面对象设计方法
- 测试用例类
- 页面对象类
- 页面元素类
- 定位器类
- 3.5 WebDriver API 手册指南
1. 环境准备
1.1 Python3.9 安装
1、安装
官网下载地址:https://www.python.org/downloads/release/python-3910/

Mac 下载:
- https://www.python.org/ftp/python/3.9.10/python-3.9.10-macos11.pkg
Windows 下载:
- https://www.python.org/ftp/python/3.9.10/python-3.9.10.exe
- https://www.python.org/ftp/python/3.9.10/python-3.9.10-amd64.exe
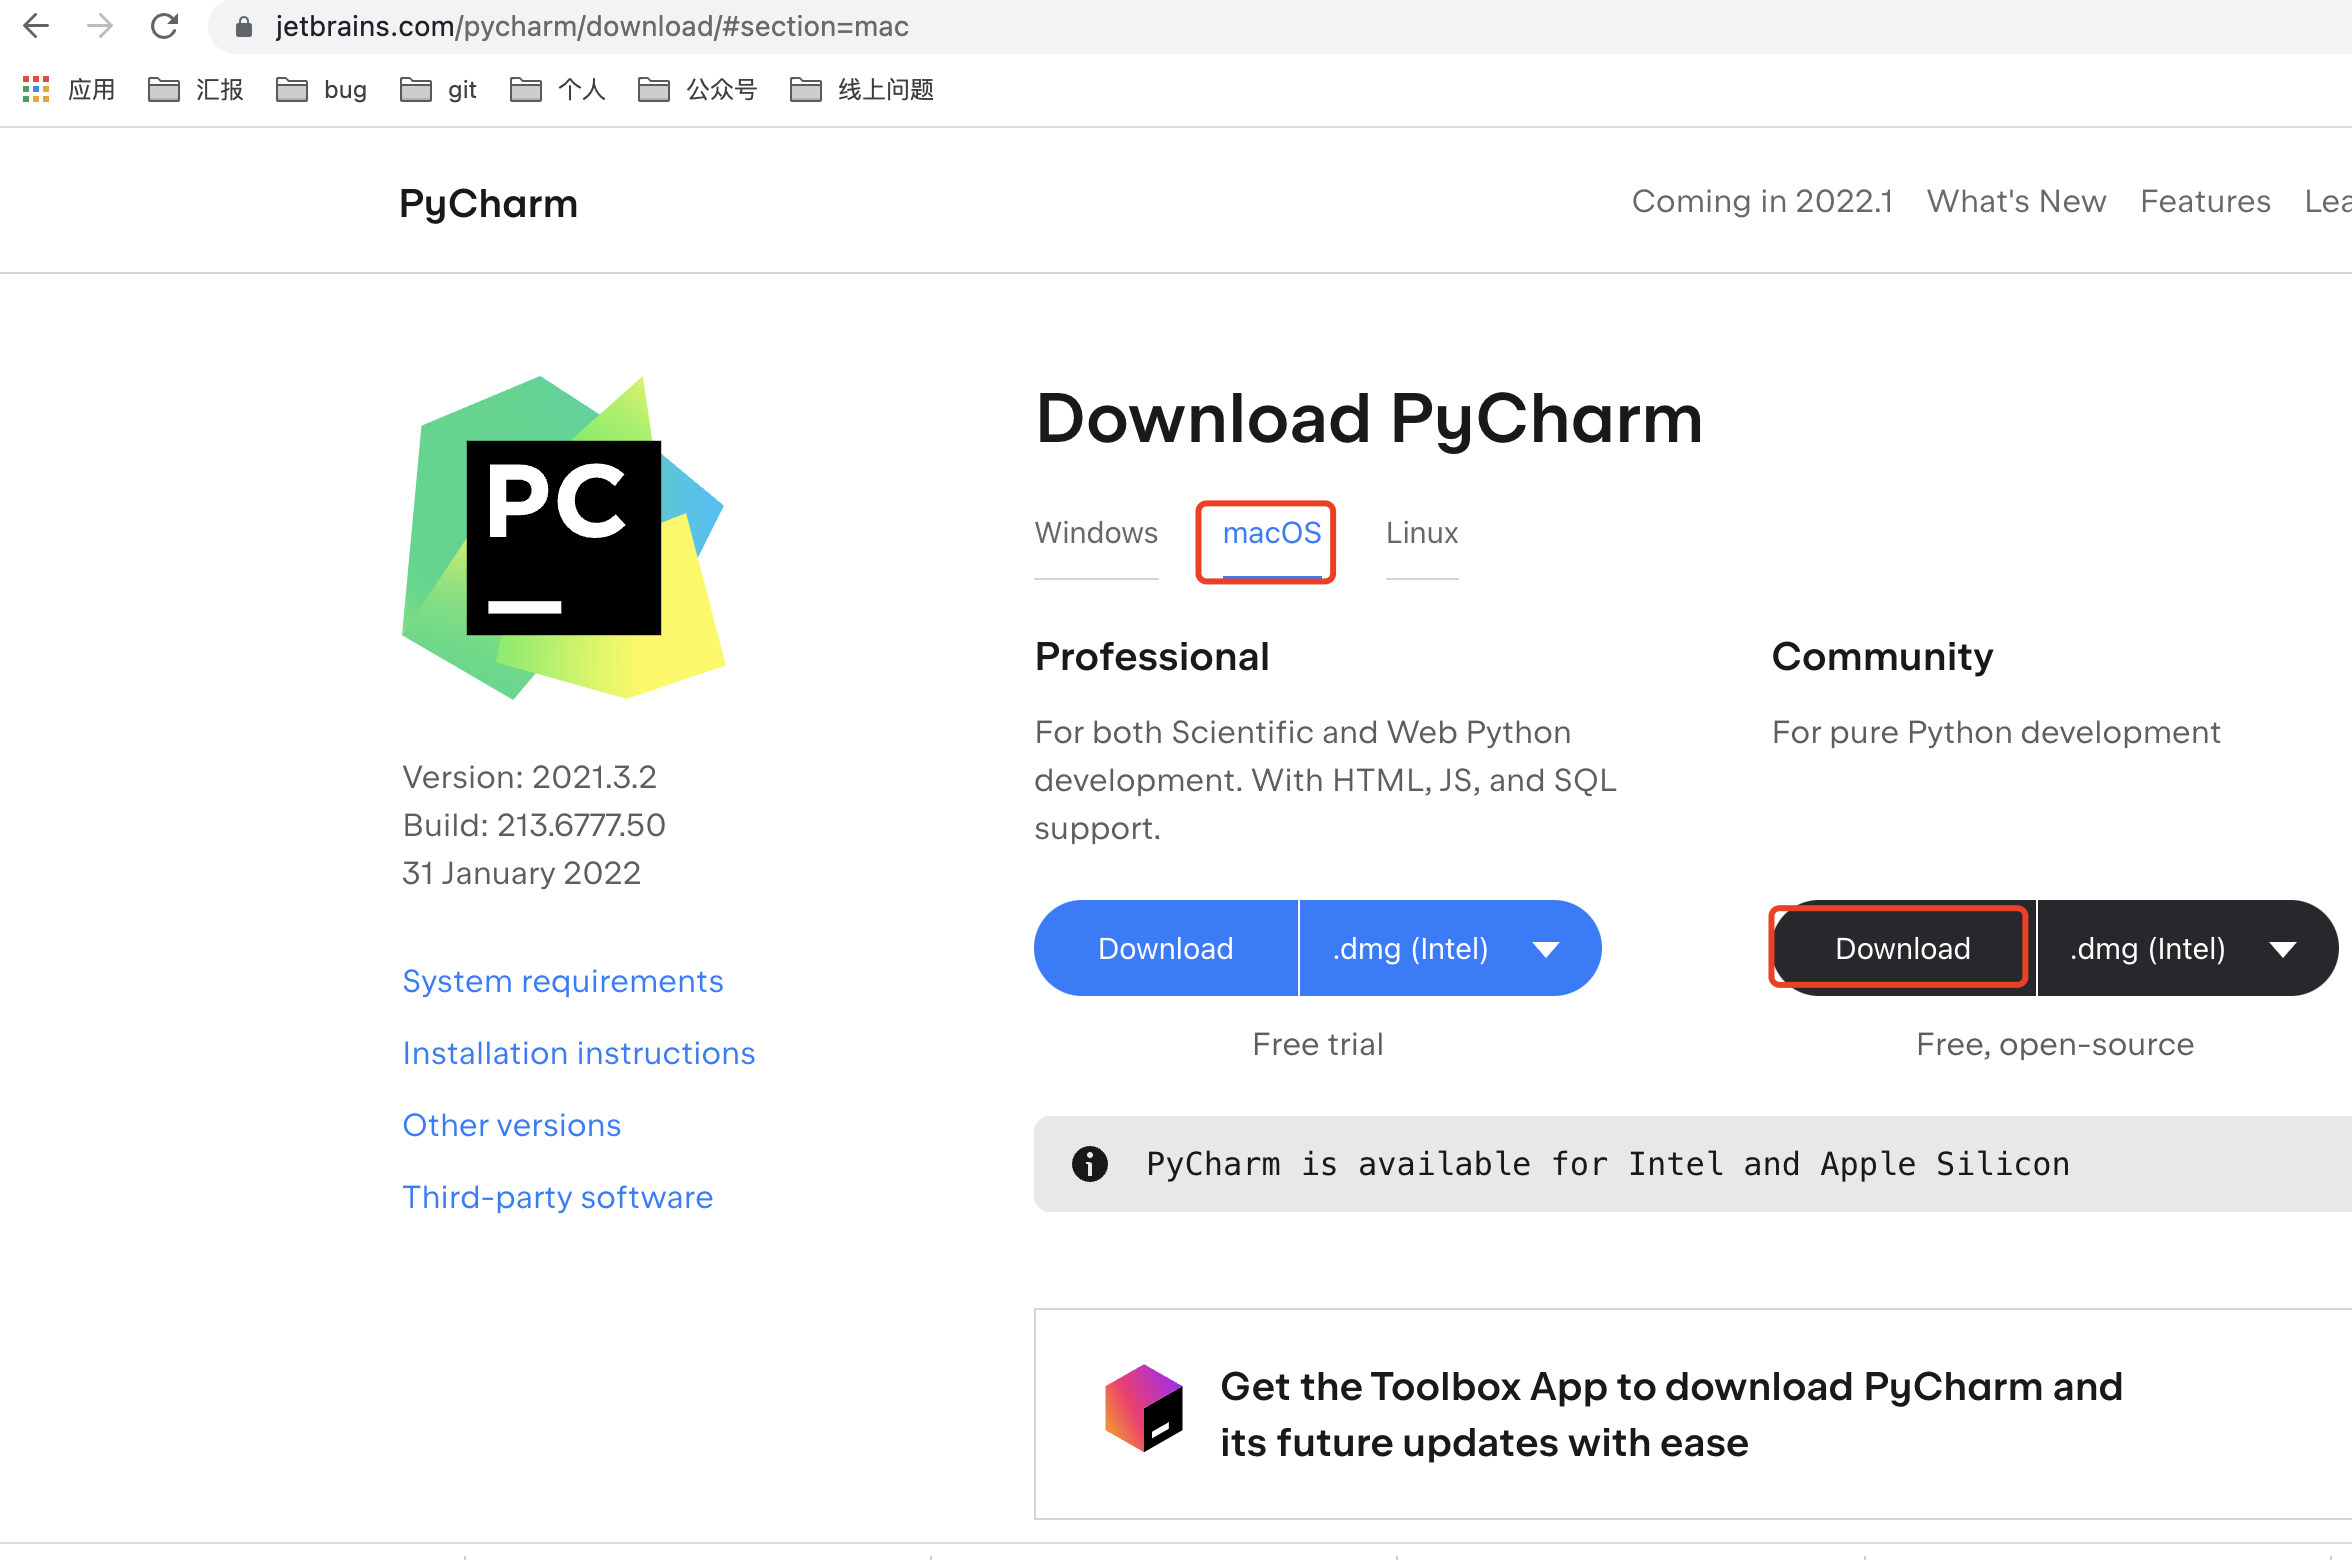
1.2 Pycharm 安装
1、安装
分为 Mac 和 Windows 版,这里默认选者 Community 版本(因为免费)
Mac 下载:
- https://www.jetbrains.com/pycharm/download/download-thanks.html?platform=mac&code=PCC
Windows 下载:
- https://www.jetbrains.com/pycharm/download/download-thanks.html?platform=windows&code=PCC
1.3 Python3 环境变量配置
Mac 为例:
终端运行:which python3,就会看到 python 的路径
user:~ user$ which python3
/Library/Frameworks/Python.framework/Versions/3.9/bin/python3
打开环境变量文件:
user:~ user$ open  .bash_profile  #打开环境变量文件
user:~ user$ touch .bash_profile  #生效更改后的环境变量
把这一段放到环境变量文件中并保存(直接推出就自动保存了哦),
# Setting PATH for Python 3.9
# The original version is saved in .bash_profile.pysave
PATH="/Library/Frameworks/Python.framework/Versions/3.9/bin:${PATH}"
export PATH
alias python="/Library/Frameworks/Python.framework/Versions/3.9/bin/python3"
生效环境变量:touch .bash_profile
Windows 为例:
- 快捷键 ctrl + R 输入 cmd 进入命令行界面
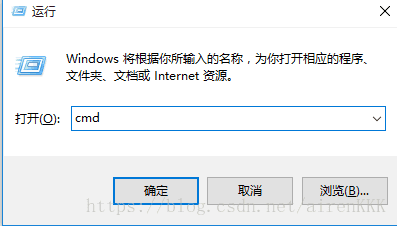
- 命令行中输入 python,可以看到已经进入了 python 环境。

- 输入 python 提示命令未找到,说明环境变量配置失败。
配置环境变量: 方法一:使用命令行配置。
- 在 cmd 下输入:path=%path%;后面加上 python 安装路径。按 enter 回车即可。
方法二:使用图形界面配置。
-
1)桌面我的计算机,右键选择属性
-
2)属性里面选择高级,点下面的环境变量
-
3)在系统变量值中找到 “path”,在系统变量值中输入 python 的安装路径。(记得先加;分号隔开)
2. 运行 1 个 demo:访问百度并搜索
2.1 创建 1 个项目
打开 pycharm,并且创建 1 个项目

2.2 添加 国内 repository 设置,加速安装
添加第三方库
-
pycharm - preference - python interpreter - “+”
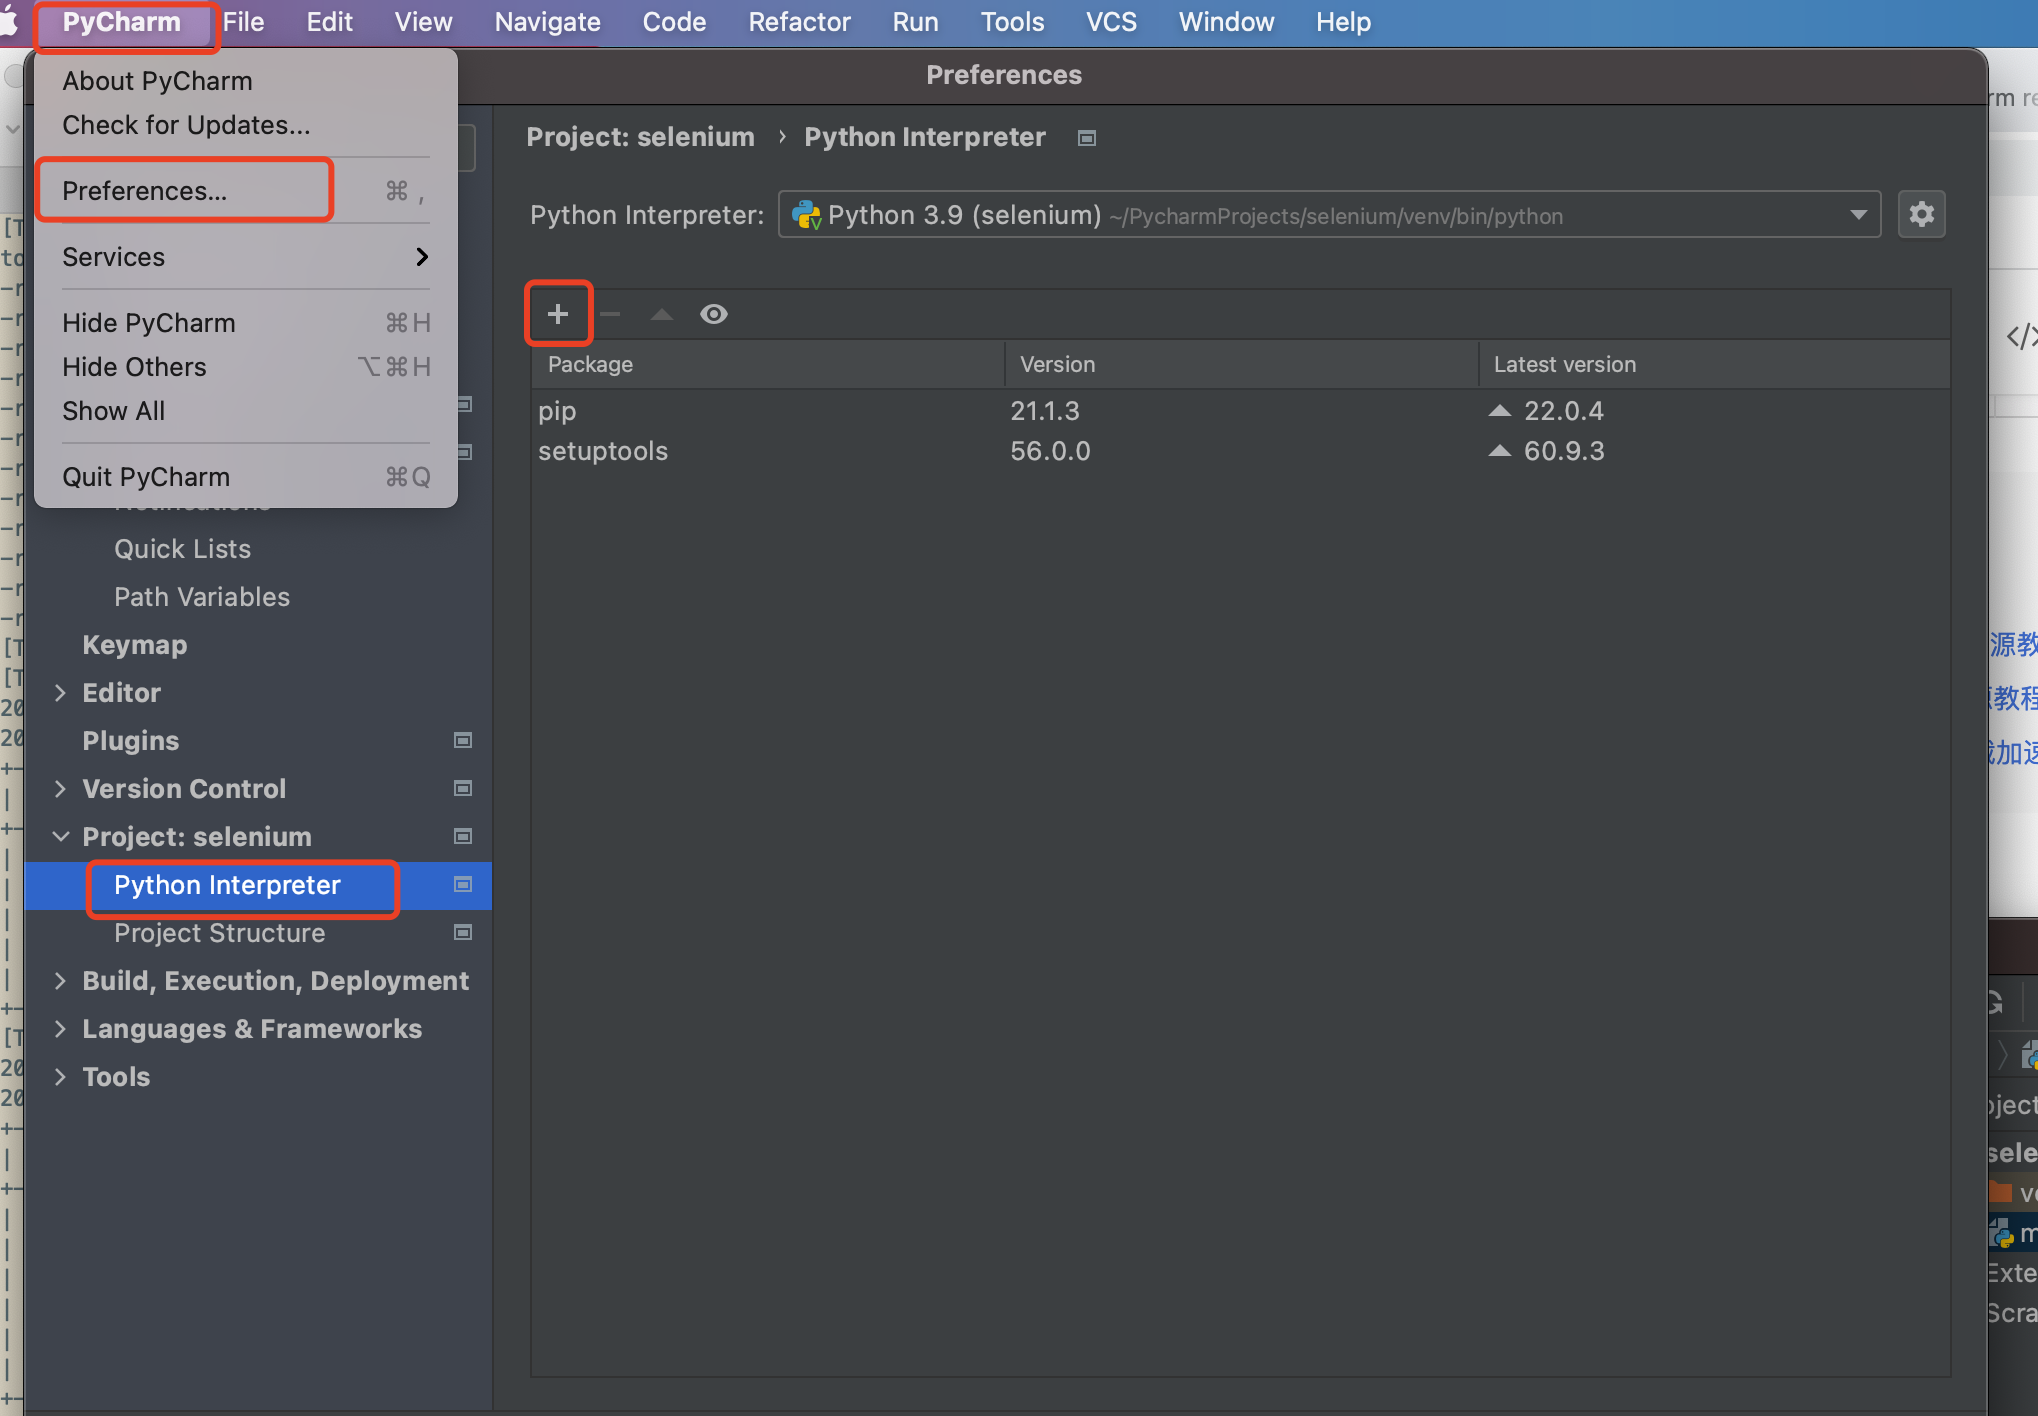
-
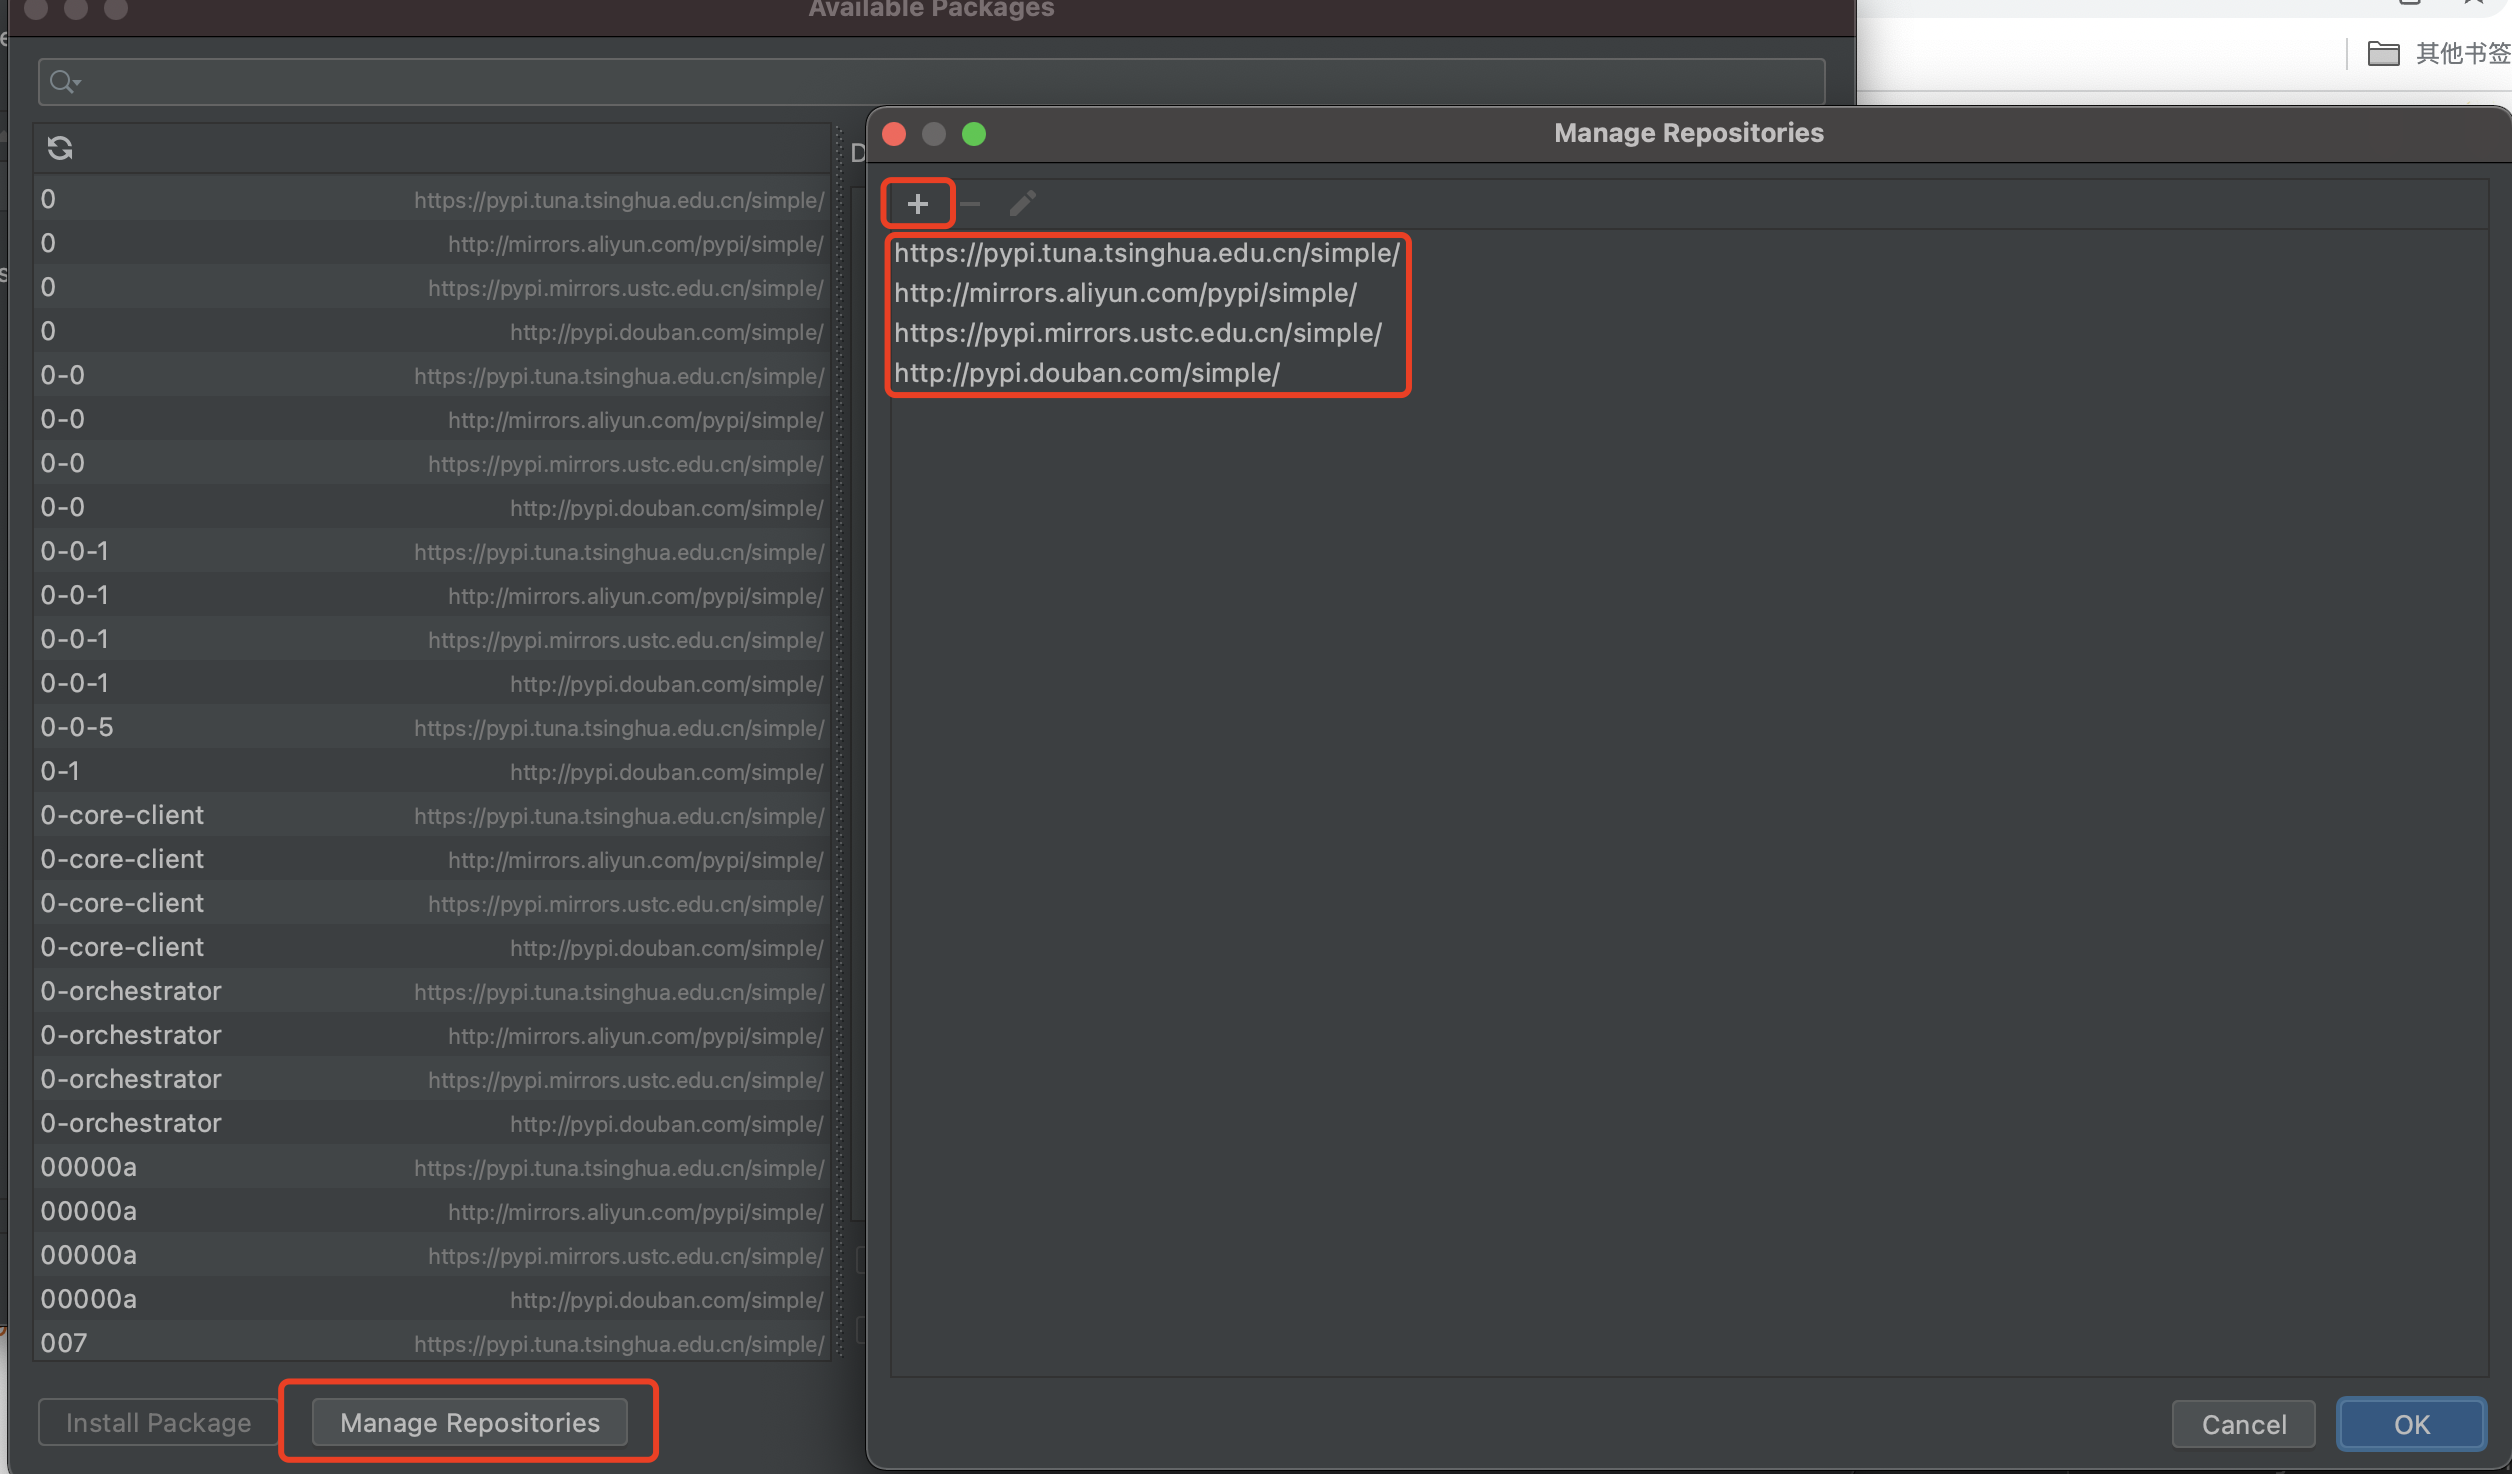
(可选操作,加快包下载)添加国内镜像:manager repository
- pip 清华源:https://pypi.tuna.tsinghua.edu.cn/simple
- pip 阿里云源:http://mirrors.aliyun.com/pypi/simple/
- pip 中科大源: https://pypi.mirrors.ustc.edu.cn/simple/
- pip 豆瓣源:http://pypi.douban.com/simple/
2.3 安装 Selenium 库
-
我们搜索 selenium,找到 4.1.2 版本(这个比较新是 2022-02-24 出来的)
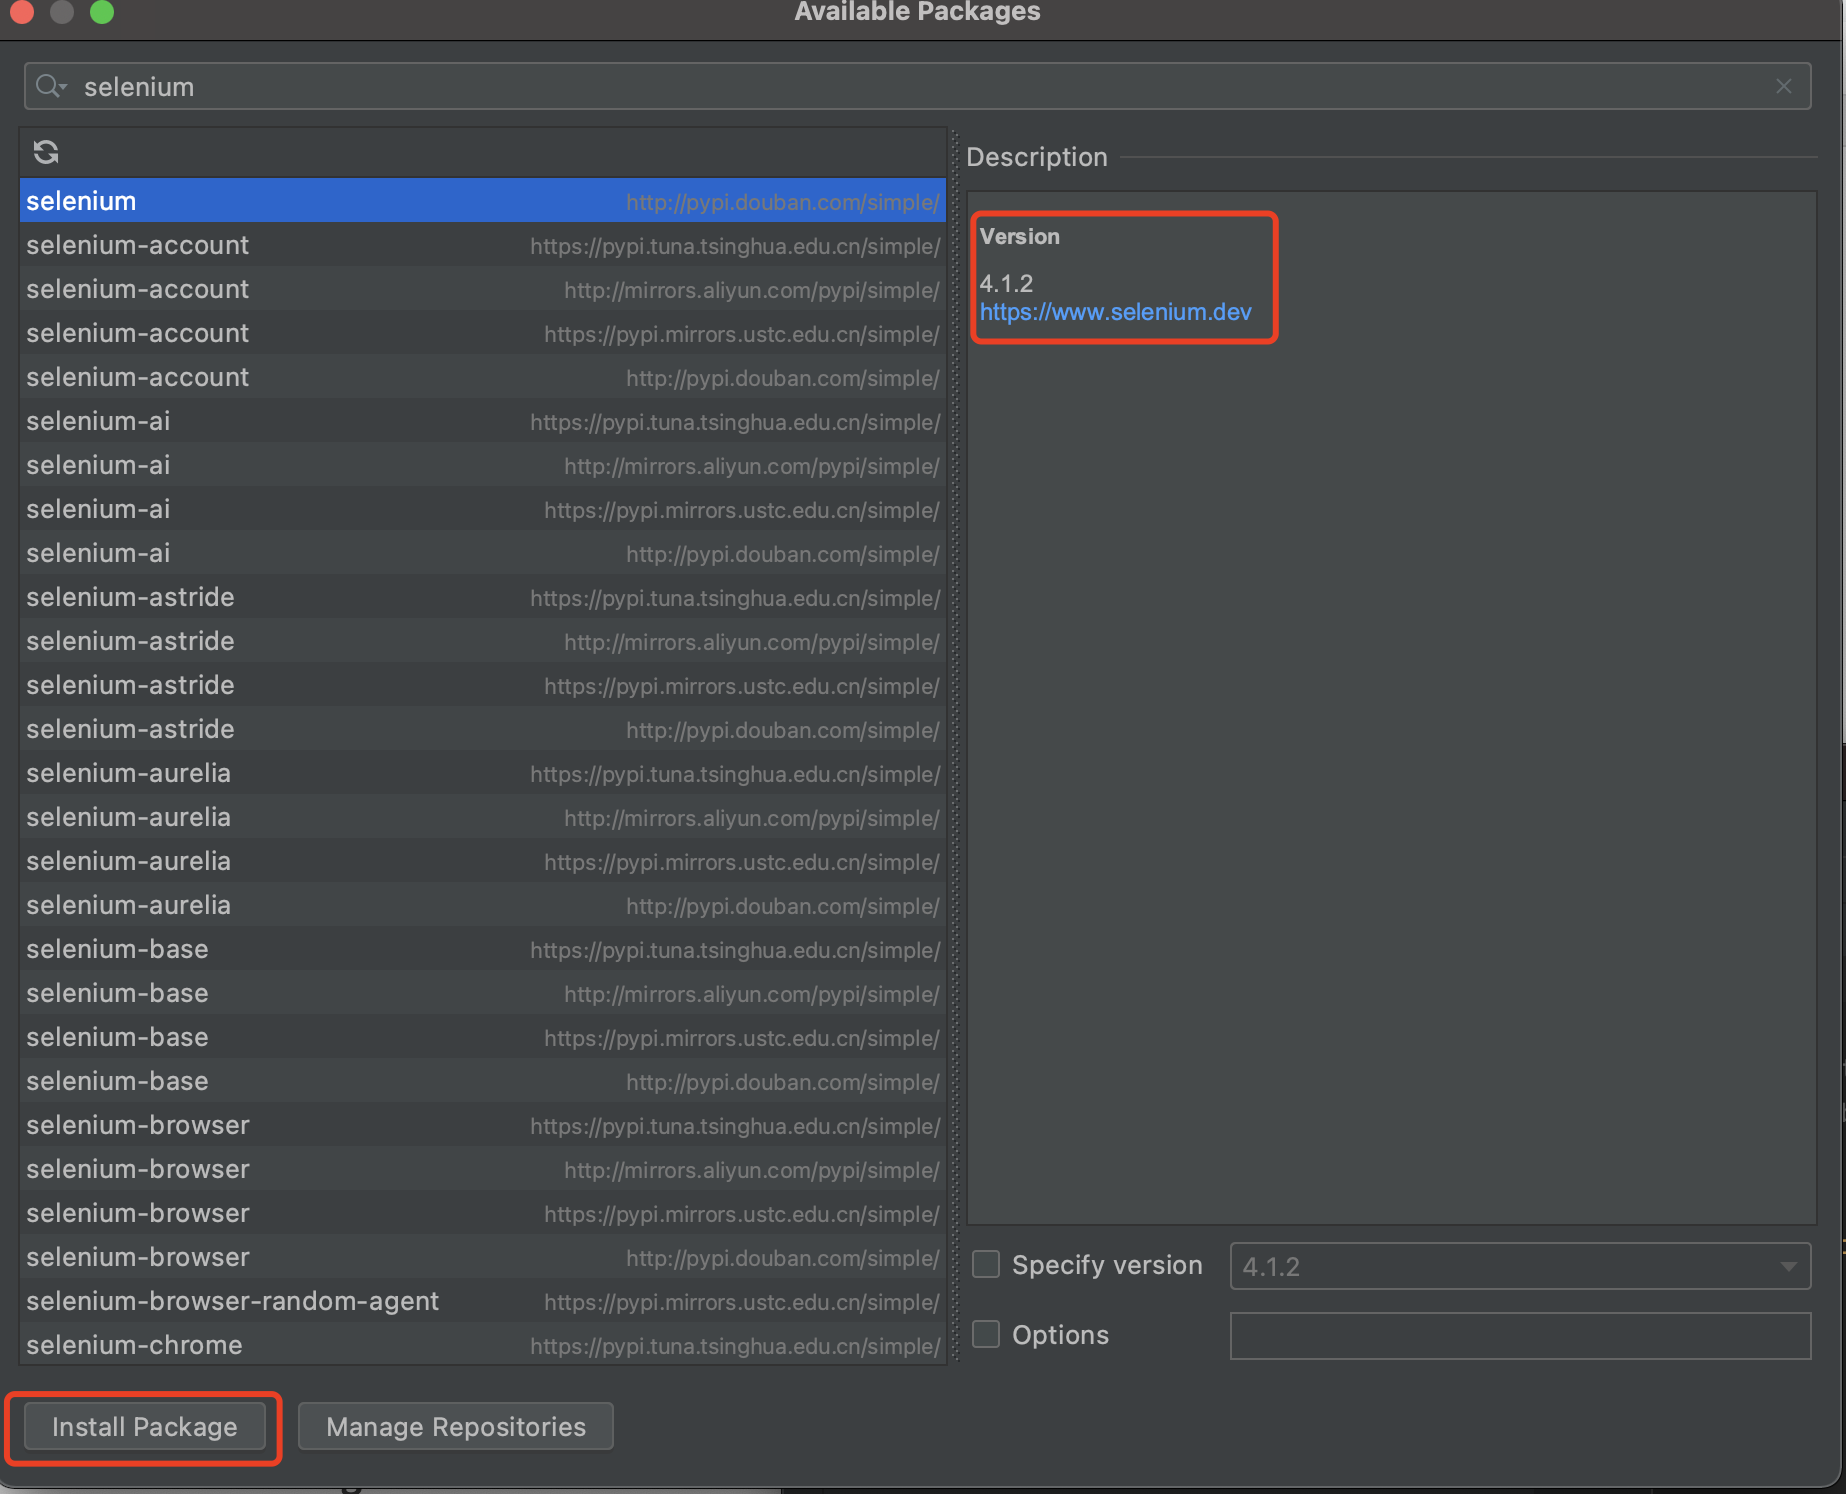
-
出现 successfully 代表安装成功

-
同时在 python interpreter 下面可以看到 selenium 4.1.2 包

注意:selenium4.1.2 对应的 python 版本需要在 3.7+ 以上
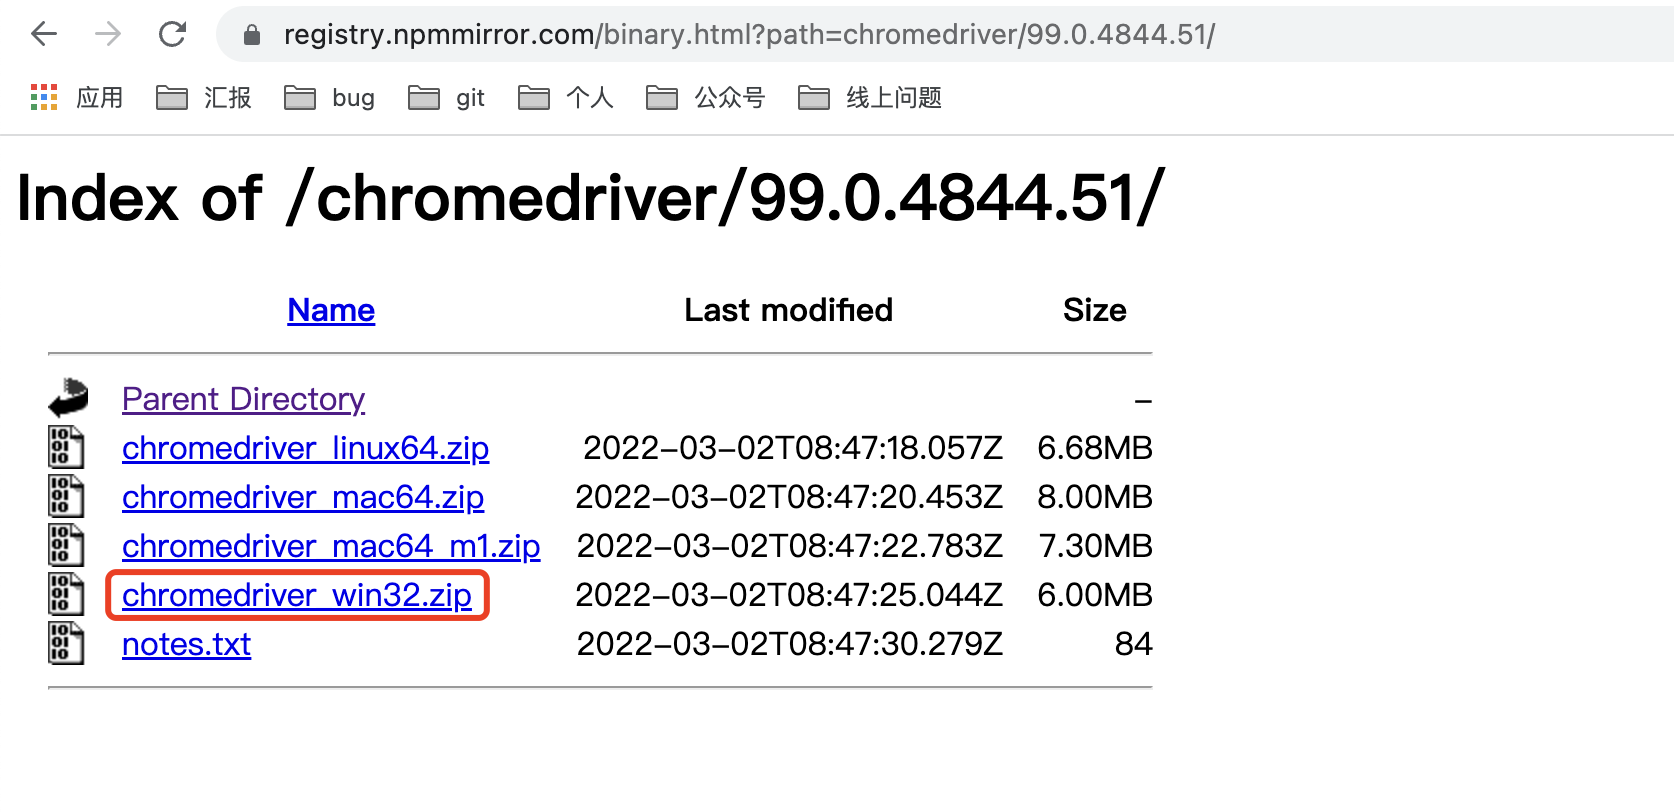
2.4 添加 Chrome driver 驱动
驱动网址:https://registry.npmmirror.com/binary.html?path=chromedriver/
为什么要下载 chrome driver(老手忽略),温大大的读者也问过我这个问题。

Mac 为例:
- 我们以 mac 对应的 chrome 对应驱动下载为例,先看 mac 是什么芯片,再看 chrome 浏览器版本
- Chrome 版本查看:更多 - 帮助 - 关于 Google Chrome,这里是 99.0.4844.51


- mac 对应芯片查看:这里是 M1

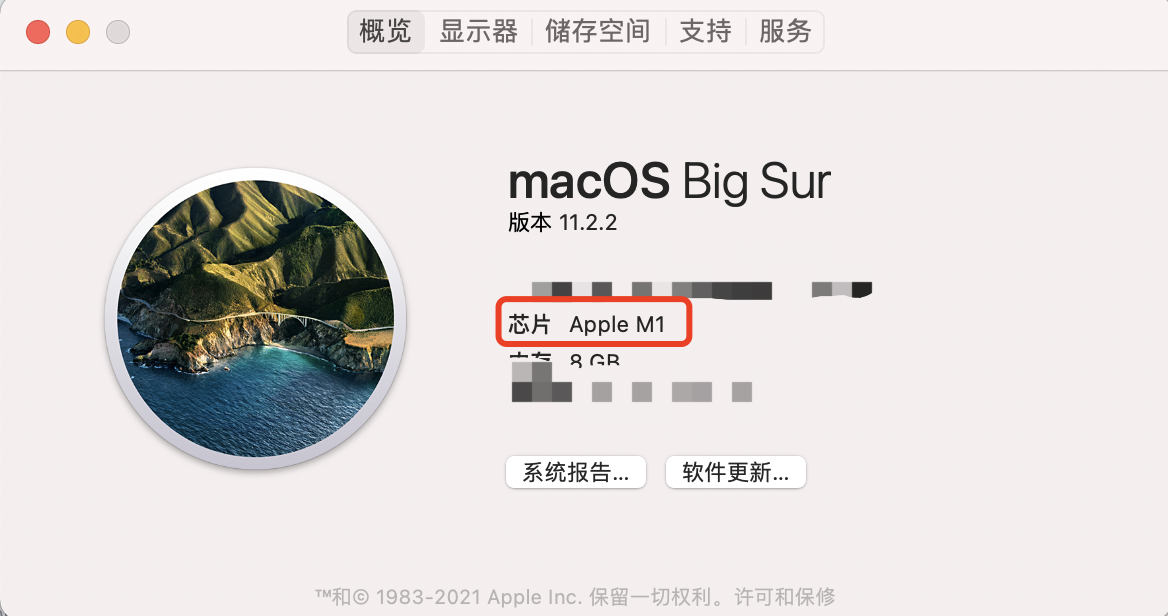
-
所以选:chrome99.0.4844.51 + _mac64_m1.zip 驱动包,并解压

-
解压 + 拷贝到:usr/local/bin
admin % unzip chromedriver_mac64_m1.zip
admin % sudo cp chromedriver /usr/local/bin
Windows 为例:
- python 获取自己的 exe 路径
- 新建脚本 test.py
import sys
print(sys.executable)
执行输出:
E:\virtualenv\django3\Scripts\python.exe
这里,就是的python.exe路径了。
-
将 chromedriver.exe 文件放到 python.exe 所在的路径。
-
比如上文输出的:E:\virtualenv\django3\Scripts\python.exe
2.5 编写 1 个 demo 请求,打开 浏览器输入 URL 进行请求
1、代码如下
from selenium import webdriver

driver = webdriver.Chrome()
driver.get("http://www.baidu.com")

#解释
#1、from selenium import webdriver # 加载驱动
#2、driver = webdriver.Chrome()    # 打开chrome浏览器
#3、driver.get("http://www.baidu.com") # 请求URL
2、run

2.6 加强脚本:搜索关键词、点击查询、断言结果
1、代码如下
from selenium import webdriver
from selenium.webdriver import Keys
from selenium.webdriver.common.by import By

driver = webdriver.Chrome()
driver.get("https://www.baidu.com/")
elem = driver.find_element(By.CLASS_NAME, "s_ipt")
elem.clear()
elem.send_keys("测试猿温大大")
elem.send_keys(Keys.RETURN)
assert "百度" in driver.page_source

driver.close()

# 解释
#1、elem = driver.find_element(By.CLASS_NAME, "s_ipt") # 找到搜索框
#2、elem.clear() # 搜索框清空
#3、elem.send_keys("测试猿温大大")  # 输入:测试猿温大大
#4、elem.send_keys(Keys.RETURN)   # 回车
#5、assert "百度" in driver.page_source # 断言:结果内有'百度'
#6、driver.close()       # 关闭浏览器
若运行脚本报错:找不到 Keys,说明同学你当前环境中 selenium 不是 4.2.1 版本,所以没有 Key 这个类,要么升级 selenium 或者找当前你版本中支持的方法
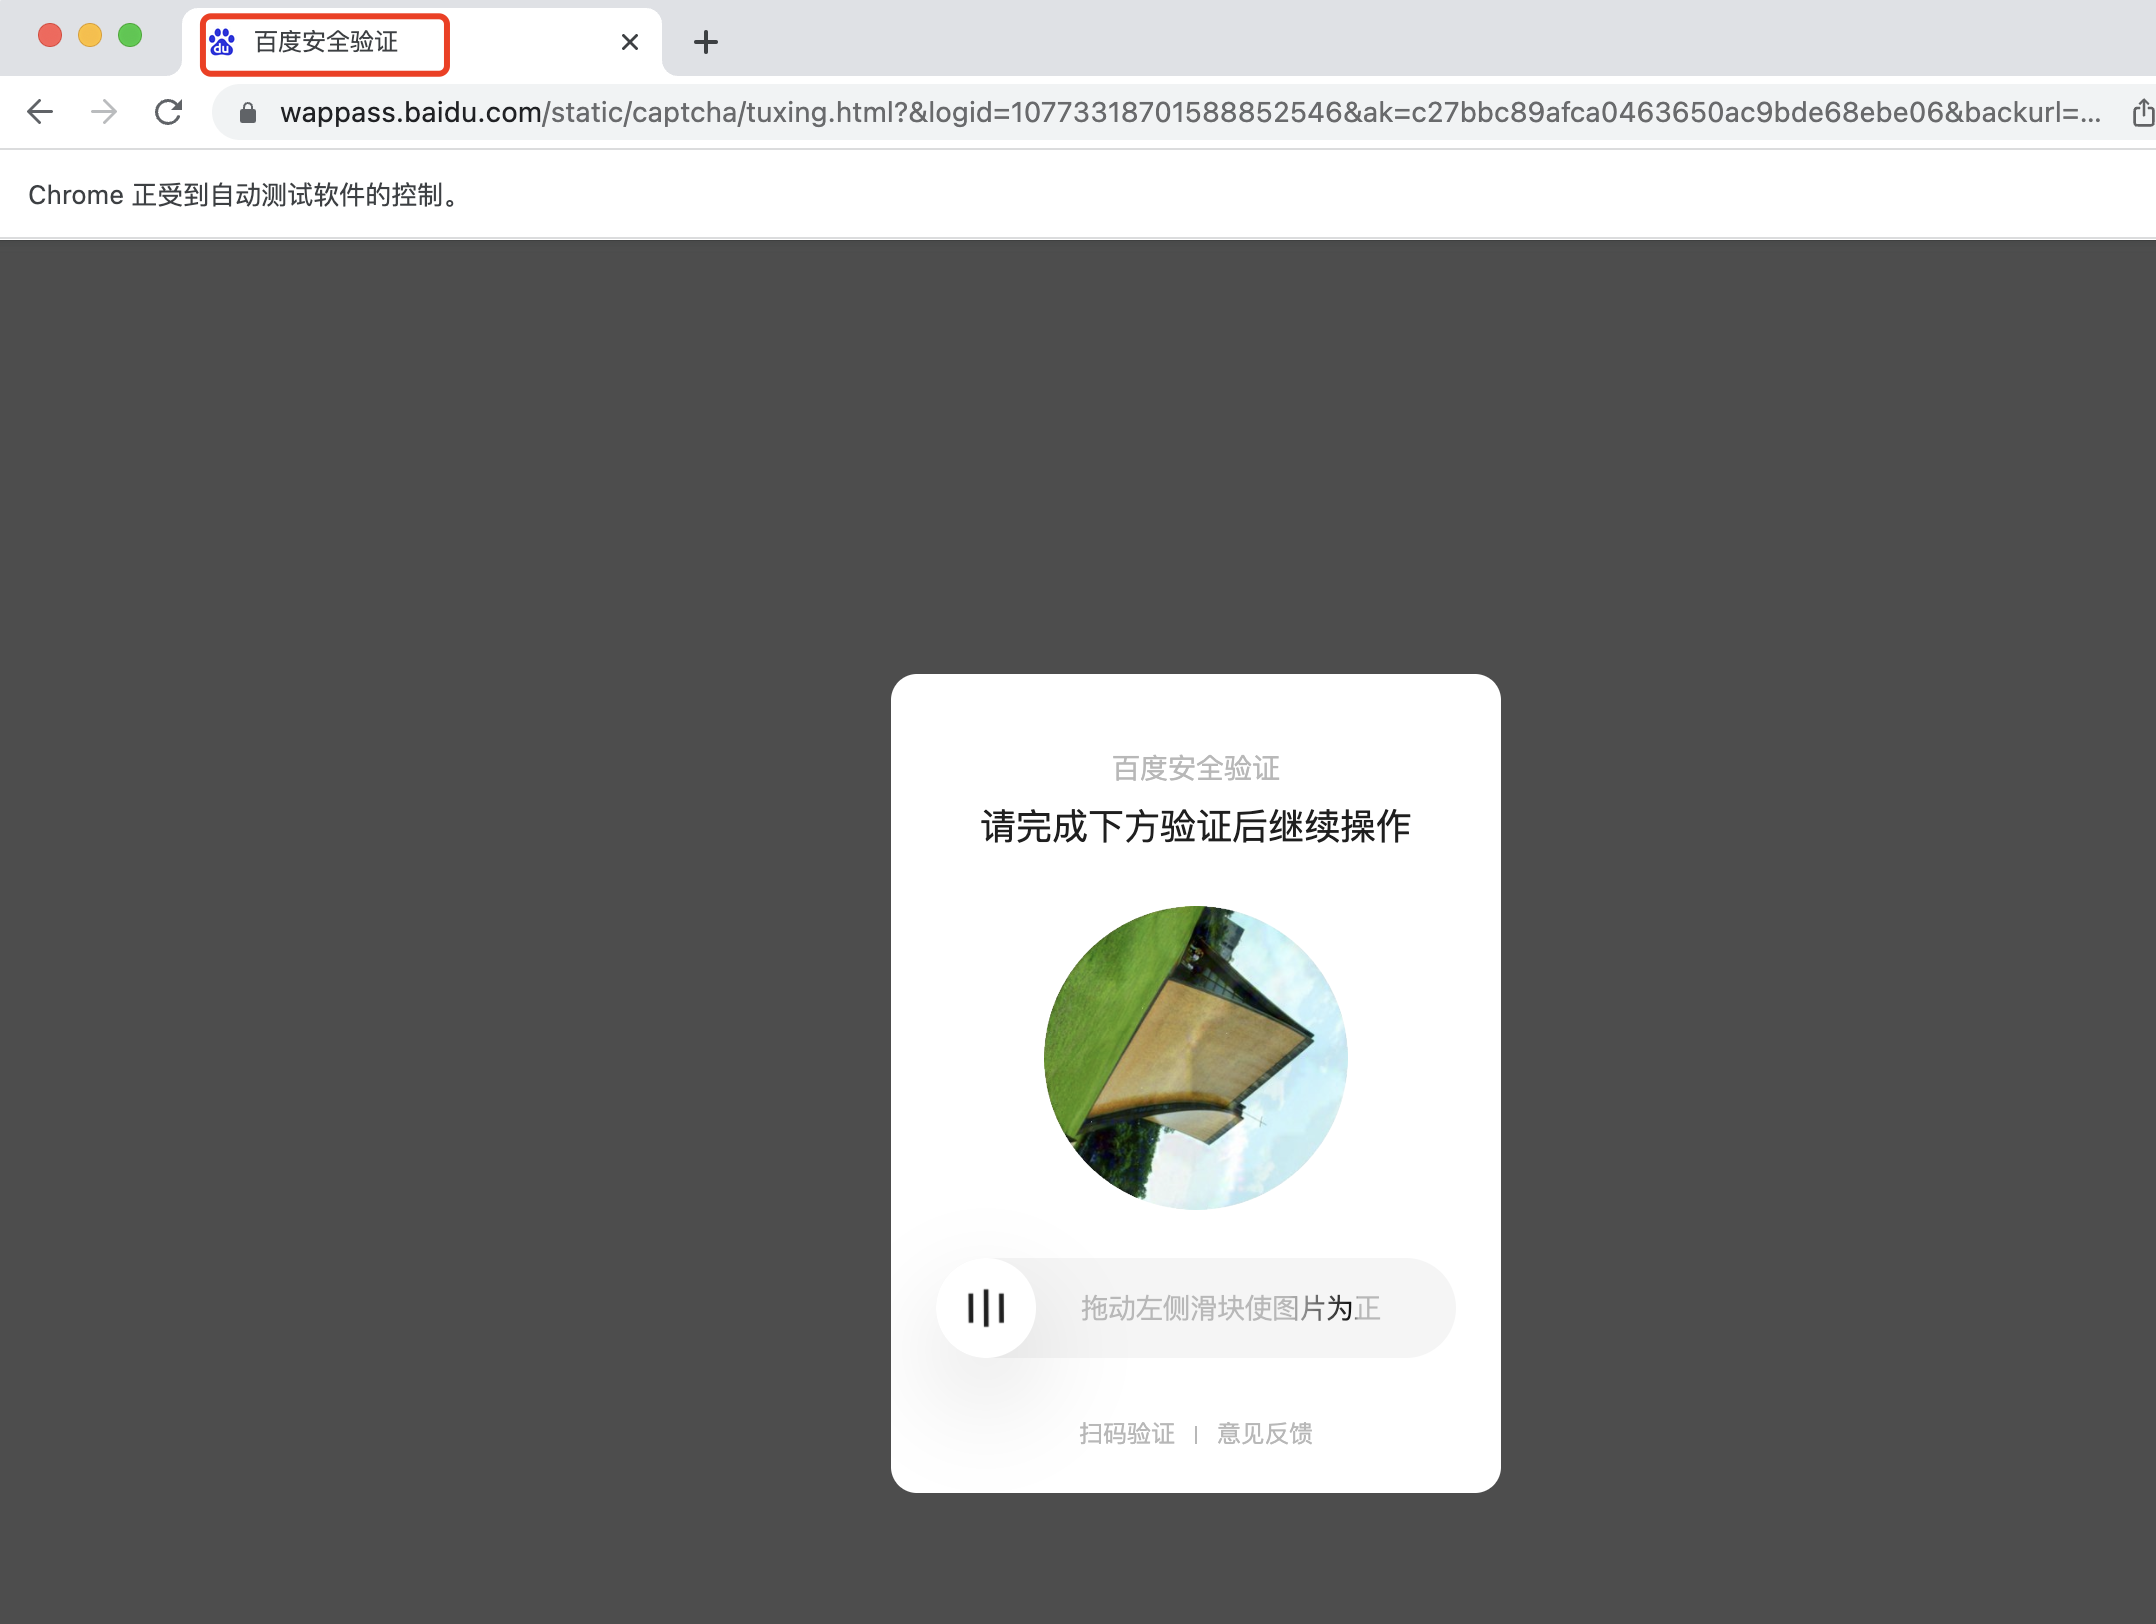
2.7 特殊说明:反爬虫机制
有时候用百度作为练手网站,它会出现反爬虫机制,所以会出现以下验证码校验情况,这时需要手动输入下,再继续下一步
3 常用函数指南
掌握了搭建环境并运行 1 个 demo,这是 UI 自动化测试万里长征第一步,后面你还需掌握:
- 如何查找元素
- 如何在页面加载不出来的时候 Waits
- 如何在页面填写表格
- 如何提高自己编程能力,面向页面对象编程,做到代码复用率高、可读性强
同学别怕,温大大陪你一起来"卷"~
3.1 查找元素 8 大方法
- find_element_by_id('loginForm'),根据 id 查找,唯一
- find_element_by_name('username'),根据 name 查找,可能重名
- find_element_by_xpath("/html/body/form[1]"),根据路径查找
- find_element_by_link_text('Continue'),根据链接文本查找
- find_element_by_partial_link_text('Conti'),根据链接文本模糊查找
- find_element_by_tag_name('h1'),根据 tag_name 查找
- find_element_by_class_name('content'),根据 class_name 查找
- find_element_by_css_selector('p.content'),根据 css 选择器查找
3.2 等待页面 Waits 方法
场景:有些页面需要加载完成后,才能去断言,去查找元素,否者用例会失败,这时就需要用到:显式等待 与 隐式等待 方法
- 显式等待: 是你在代码中定义等待一定条件发生后再进一步执行你的代码。
from selenium import webdriver
from selenium.webdriver.common.by import By
from selenium.webdriver.support.ui import WebDriverWait
from selenium.webdriver.support import expected_conditions as EC

driver = webdriver.Chrome()
driver.get("http://somedomain/url_that_delays_loading")
try:
    element = WebDriverWait(driver, 10).until(
        EC.presence_of_element_located((By.ID, "myDynamicElement"))
    )
finally:
    driver.quit()
- 隐式等待: 如果某些元素不是立即可用的,隐式等待是告诉 WebDriver 去等待一定的时间后去查找元素。
from selenium import webdriver

driver = webdriver.Chrome()
driver.implicitly_wait(10) # seconds
driver.get("http://somedomain/url_that_delays_loading")
myDynamicElement = driver.find_element_by_id("myDynamicElement")
3.3 常用交互操作:下拉、提交、拖放、cookies 操作
- 获取:下拉列表
方法1: 获取后循环
  element = driver.find_element_by_xpath("//select[@name='name']")
  all_options = element.find_elements_by_tag_name("option")
  for option in all_options:
    print("Value is: %s" % option.get_attribute("value"))
    option.click()
方法2: Select直接选择
  from selenium.webdriver.support.ui import Select
  select = Select(driver.find_element_by_name('name'))
  select.select_by_index(index)
  select.select_by_visible_text("text")
  select.select_by_value(value)
取消:
select = Select(driver.find_element_by_id('id'))
select.deselect_all()
- 提交
driver.find_element_by_id("submit").click()
- 拖放:
您可以使用拖放,无论是移动一个元素,或放到另一个元素内:
  element = driver.find_element_by_name("source")
  target = driver.find_element_by_name("target")

  from selenium.webdriver import ActionChains
  action_chains = ActionChains(driver)
  action_chains.drag_and_drop(element, target).perform()
- 查看窗口名
<a href="somewhere.html" target="windowName">Click here to open a new window</a>
- 不同的窗口和框架之间移动
web应用来说,没有任何frames或者只包含一个window窗口是比较罕见的。
WebDriver 支持在不同的窗口之间移动,
只需要调用``switch_to_window``方法即可:

driver.switch_to_window("windowName")
- 弹出对话框
Selenium WebDriver 内置了对处理弹出对话框的支持。 在你的某些动作之后可能会触发弹出对话框,你可以像下面这样访问对话框:

alert = driver.switch_to_alert()
- 访问浏览器历史记录
driver.get("http://www.example.com")
driver.forward()
driver.back()
- 操作 Cookies
打开一个页面 driver.get(“http://www.example.com”)

现在设置Cookies,这个cookie在域名根目录下(”/”)
生效 cookie = {‘name’ : ‘foo’, ‘value’ : ‘bar’} driver.add_cookie(cookie)

现在获取所有当前URL下可获得的Cookies driver.get_cookies()
- 宝典:WebDriver 常用 API 接口,
- 官网地址:https://www.selenium.dev/selenium/docs/api/py/api.html
3.4 页面对象设计方法
页面对象设计方法,便于维护代码、让代码可读性加强、复用性更高
1、测试用例类
下面是一个在 python.org 网站搜索一个词并保证一些结果可以找到的测试用例
import unittest
from selenium import webdriver
import page

class PythonOrgSearch(unittest.TestCase):
    """A sample test class to show how page object works"""

    def setUp(self):
        self.driver = webdriver.Chrome()
        self.driver.get("http://www.python.org")

    def test_search_in_python_org(self):
        """
        Tests python.org search feature.
        Searches for the word "pycon" then verified
        that some results show up.
        Note that it does not look for any particular
        text in search results page. This test verifies that
        the results were not empty.
        """

        #Load the main page. In this case the home
        page of Python.org.
        main_page = page.MainPage(self.driver)
        #Checks if the word "Python" is in title
        assert main_page.is_title_matches(),
        "python.org title doesn't match."
        #Sets the text of search textbox to "pycon"
        main_page.search_text_element = "pycon"
        main_page.click_go_button()
        search_results_page = page.SearchResultsPage(self.driver)
        #Verifies that the results page is not empty
            assert search_results_page.is_results_found(),
            "No results found."

    def tearDown(self):
        self.driver.close()

if __name__ == "__main__":
    unittest.main()
2、页面对象类
页面对象为每个网页模拟创建出一个对象。 按照此技术,在测试代码和技术实施之间的一个分离层被创建。
这个 page.py 看起来像这样:
from element import BasePageElement
from locators import MainPageLocators

class SearchTextElement(BasePageElement):
    """This class gets the search text
    from the specified locator"""

    #The locator for search box where search string is entered
    locator = 'q'


class BasePage(object):
    """Base class to initialize the base page
    that will be called from all pages"""

    def __init__(self, driver):
        self.driver = driver


class MainPage(BasePage):
    """Home page action methods come here. I.e. Python.org"""

    #Declares a variable that will contain the retrieved text
    search_text_element = SearchTextElement()

    def is_title_matches(self):
        """Verifies that the hardcoded text "Python"
        appears in page title"""
        return "Python" in self.driver.title

    def click_go_button(self):
        """Triggers the search"""
        element = self.driver.find_element(*MainPageLocators.GO_BUTTON)
        element.click()


class SearchResultsPage(BasePage):
    """Search results page action methods come here"""

    def is_results_found(self):
        # Probably should search for this text in the specific page
        # element, but as for now it works fine
        return "No results found." not in self.driver.page_source
3、页面元素类
这个 element.py 看起来像这样:
from selenium.webdriver.support.ui import WebDriverWait


class BasePageElement(object):
    """Base page class that is initialized
    on every page object class."""

    def __set__(self, obj, value):
        """Sets the text to the value supplied"""
        driver = obj.driver
        WebDriverWait(driver, 100).until(
            lambda driver: driver.find_element_by_name(self.locator))
        driver.find_element_by_name(self.locator).send_keys(value)

    def __get__(self, obj, owner):
        """Gets the text of the specified object"""
        driver = obj.driver
        WebDriverWait(driver, 100).until(
            lambda driver: driver.find_element_by_name(self.locator))
        element = driver.find_element_by_name(self.locator)
        return element.get_attribute("value")
4、定位器类 其中一个做法是,从它们正在使用的地方分离定位字符。在这个例子中,同一页面的定位器属于同一个类。
这个 locators.py 看起来像这样:
from selenium.webdriver.common.by import By

class MainPageLocators(object):
    """A class for main page locators.
    All main page locators should come here"""
    GO_BUTTON = (By.ID, 'submit')

class SearchResultsPageLocators(object):
    """A class for search results locators.
    All search results locators should come here"""
    pass
3.5 WebDriver API 手册指南
官方文档:https://www.selenium.dev/selenium/docs/api/py/api.html
关注我,加我好友拉你进面试群,一起讨论面试干货 / 套路,还会有测试工具 / 技能培训 大家一起升职加薪,关注公众号:「测试猿温大大」