一、WEditor 简介
在执行 APP UI 自动化测试时,需要使用到元素定位,通常我们会直接使用 appium Desktop 的 Inspector。介绍另一款 UI 元素定位的工具--WEditor。WEditor 能够提供辅助编写脚本,定位元素,调试代码等功能,是基于 python 的一个查看 APP 元素的工具。
二、WEditor 安装
1、环境准备:
(1)已安装 python3.6+ 以上
(2)如果运行 iOS 需要使用 tidevice,参考:
Windows:http://testerhome.com/topics/31207
Mac:https://blog.csdn.net/dou_being/article/details/120401626
2、打开终端,输入命令:pip3 install -U weditor # uiautomator2, facebook-wda 会被作为依赖一并安装
三、WEditor 运行
1、Windows 上运行 Android 端:
(1)打开终端输入命令启动 weditor:python -m weditor,命令执行成功后会自动调用浏览器打开地址http://localhost:17310/
(2)选择目标设备 Android
(3)输入命令查看 android 设备 UUID:adb devices
(4)在 WEditor 界面输入设备 UUID
(5)点击 Connect,连接成功
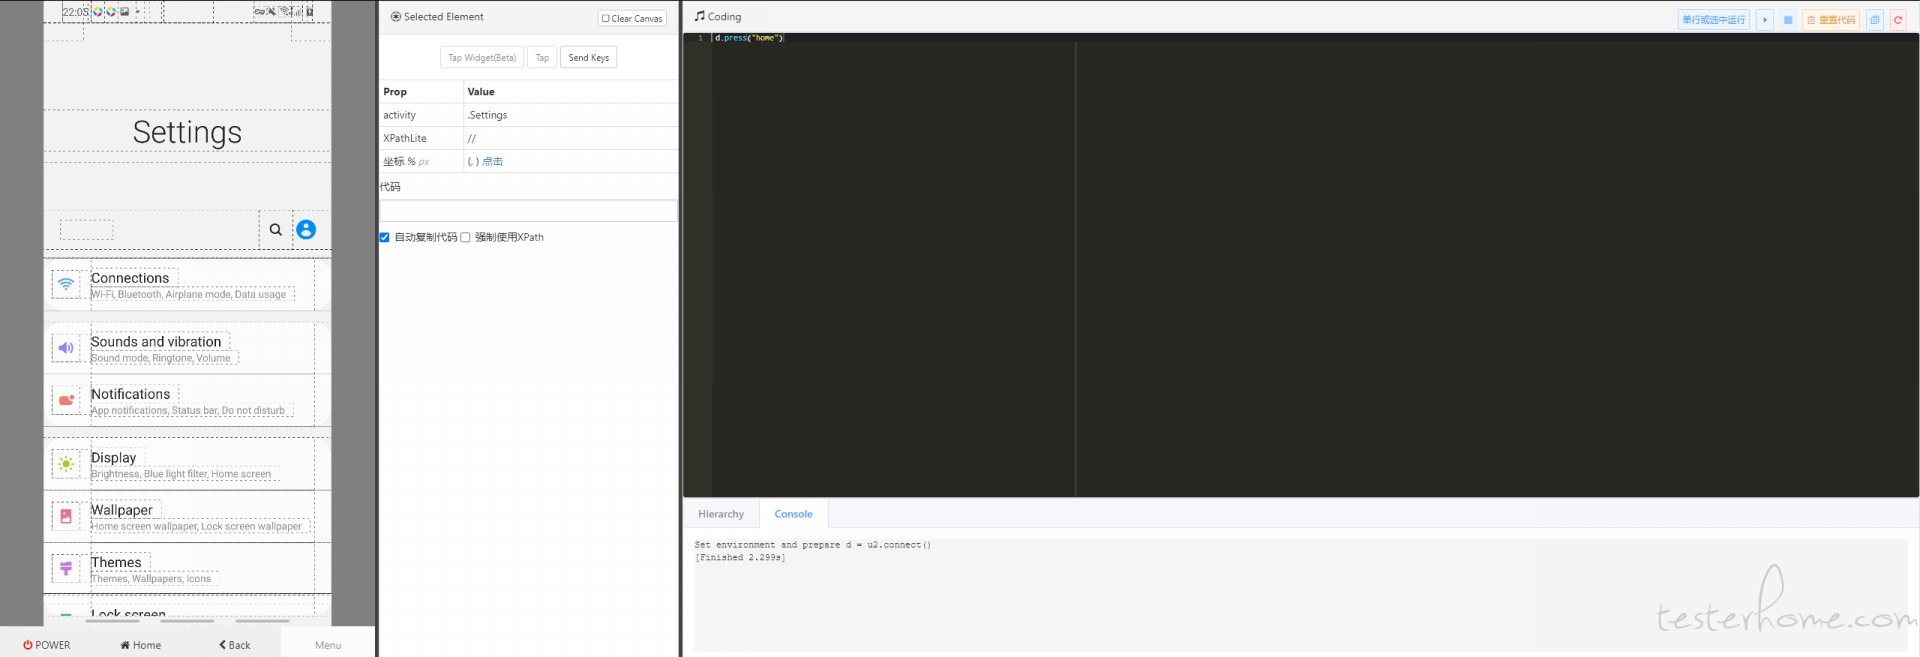
(6)点击 dump hierarchy
运行成功截图:
2、MacOS/Windows 上运行 iOS 端:
(1)打开终端 1,启动 WDA:tidevice wdaproxy -B com.xxx.xxx.WebDriverAgent.Runner --port 8200
(2)打开终端 2,转发请求到手机:tidevice relay -x 8100 8100
(3)打开终端 3,启动 weditor:python3 -m weditor,命令执行成功后会自动调用浏览器打开地址http://localhost:17310/
(4)选择目标设备 iOS
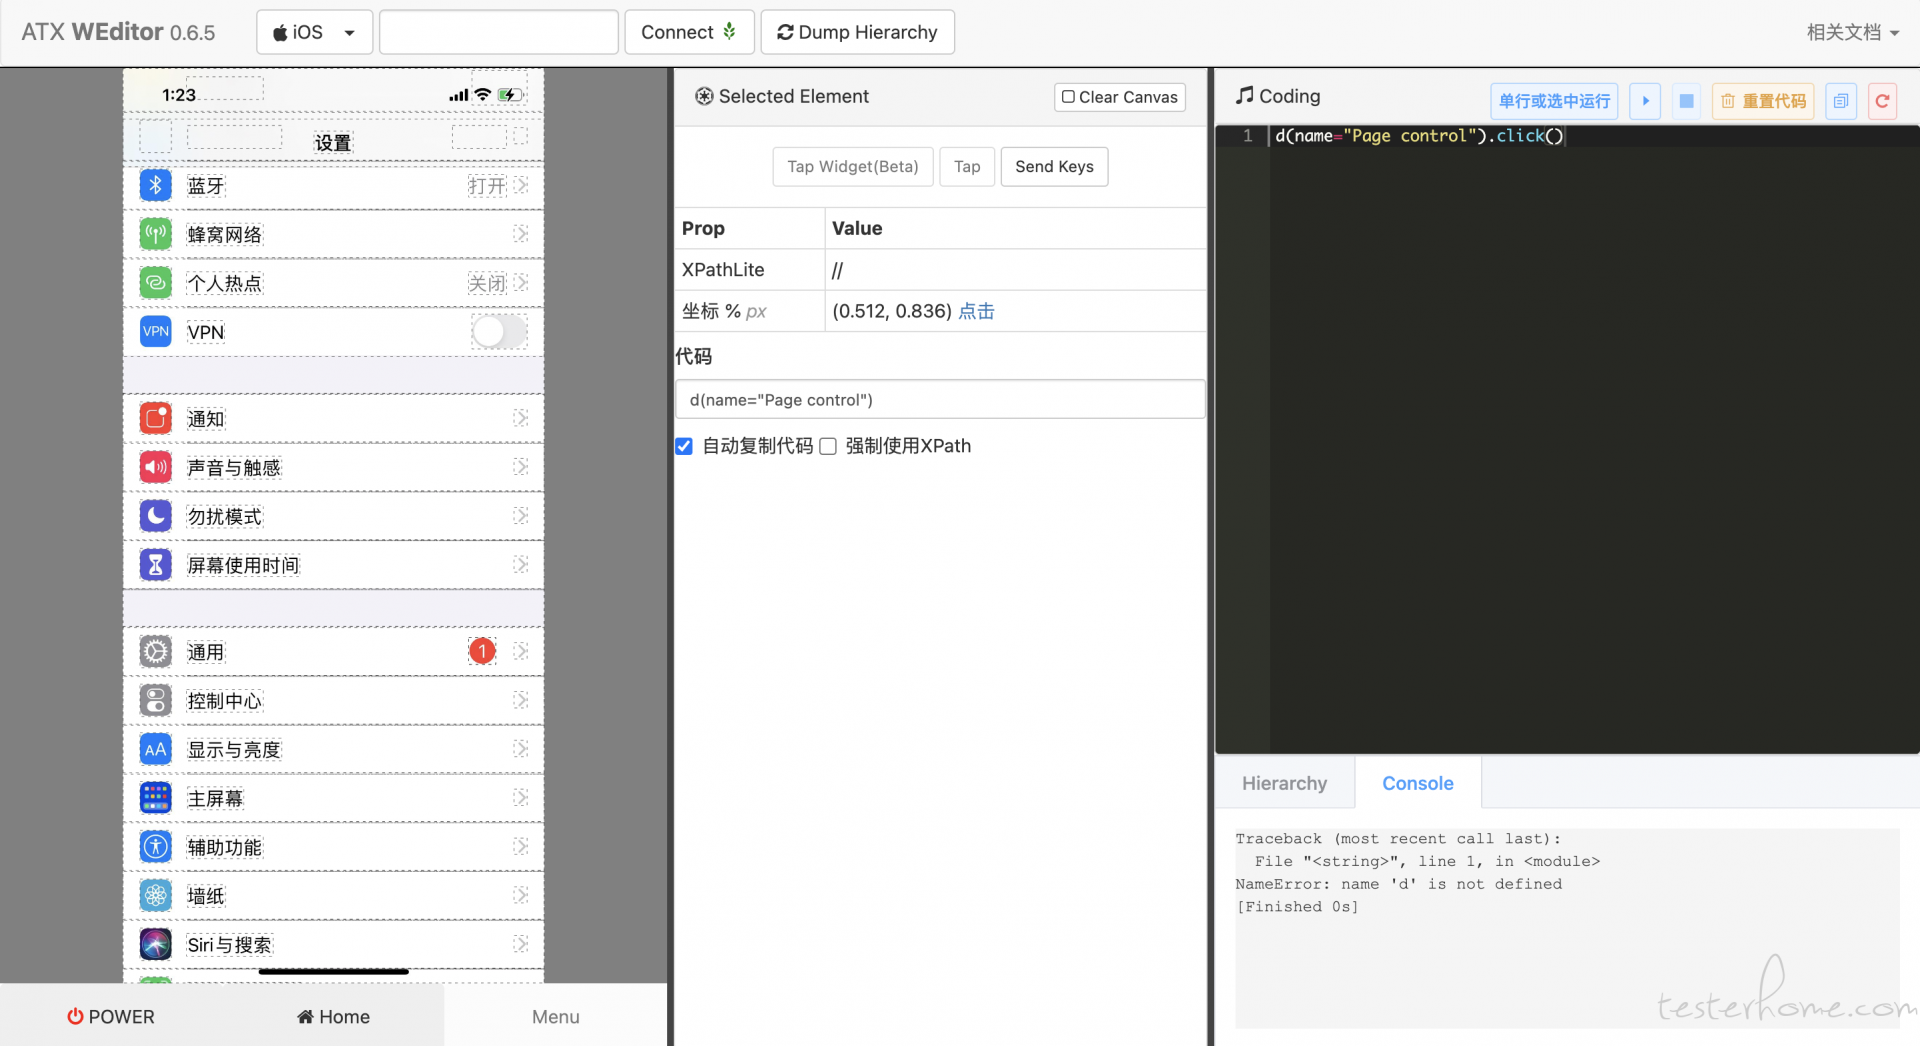
(5)点击 dump hierarchy
运行成功截图:
欢迎关注公众号:测试记