前言
在我们自动化测试过程中,我们最终肯定会生成一个测试报告,测试报告可能为一个 txt、xml、json 文件、Excel 或者 HTML 报告,大家基本上都偏向于 HTML 报告,pytest 提供了 pytest-html 和 allure 的 HTML 报告。本章节我们讲解使用pytest-html 插件生成 HTML 报告。
pytest-html用法
说明:pytest-html 是 pytest 插件生成一个 HTML 测试报告。
安装
- 当前环境:
python 3.7.0 - 前提条件:
pytest (!=6.0.0,>=5.0)、python > 3.0 - 安装方式:
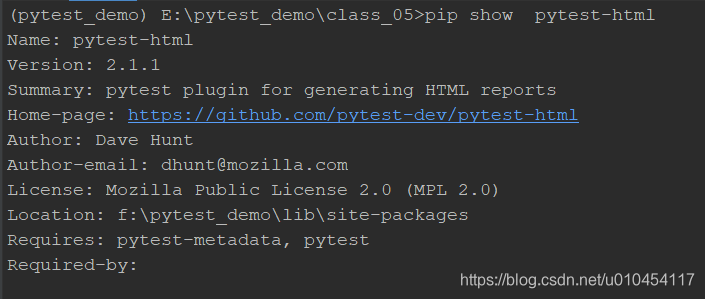
pip install pytest-html==2.1.1安装指定版本,3.0 以上有兼容性问题,目前已经停止更新 - 查看版本号:
pip show pytest-html ### 使用
 - 使用方式:添加命令行参数
--html=report.html和--html=report.html --self-contained-html - 查看示例:
test_htm.py
# !/usr/bin/python3
# _*_coding:utf-8 _*_
""""
# @Time  :2021/7/11 19:24
# @Author  : king
# @File    :test_html.py
# @Software  :PyCharm
# @blog     :https://blog.csdn.net/u010454117
# @WeChat Official Account: 【测试之路笔记】
"""
import pytest
import logging

def test_01():
    logging.info("我是 test_01 测试用例")
    assert True

def test_02():
    logging.info("我是 test_02 测试用例")
    assert True

def test_03():
    logging.info("我是 test_03 测试用例")
    assert True

if __name__ == '__main__':
    pytest.main()
在命令行窗口输入: pytest --html=test_report.html test_html.py, 查看结果,在当前目录生成一个 test_report.html 的测试报告,在项目目录查看还有一个 assets 的样式文件目录


打开报告,可以看见一个 HTML 报告已经生成

我们删除项目目录下面的test_report.html 和assets 的样式文件目录,再次执行pytest --html=test_report.html --self-contained-html test_html.py,查看结果:只看见 test_report.html 文件,未看见样式目录

结论:建议使用 --html=report.html --self-contained-html方式生成报告,方便后期要通过邮件发送报告
修改 pytest-html 报告为中文
修改后样式:

修改源码位置
-
../Lib/site-packages/pytest_html/plugin.py文件:
469行
summary = [
            html.p(f"总共 {numtests} 个测试用例运行时间 {suite_time_delta:.2f} 秒. "),
            html.p(
                "可以通过选择筛选项筛选测试结果。",
                class_="filter",
                hidden="true",
            ),
        ]
484行
cells = [
    html.th("执行结果", class_="sortable result initial-sort", col="result"),
    html.th("测试用例", class_="sortable", col="name"),
    html.th("用例耗时", class_="sortable numeric", col="duration"),
    html.th("Links"),
]
session.config.hook.pytest_html_results_table_header(cells=cells)

results = [
    html.h2("测试结果"),
    html.table(
        [
            html.thead(
                html.tr(cells),
                html.tr(
                    [
                        html.th(
                            "当前筛选条件下无测试结果,请重新筛选。",
                            colspan=len(cells),
                        )
522行
body = html.body(
            html.script(raw(main_js)),
            html.h1(self.title),
            html.p(
                "报告生成于 {} {} by ".format(
                    generated.strftime("%Y-%m-%d"), generated.strftime("%H:%M:%S")
                ),
                html.a("pytest-html", href=__pypi_url__),
                f" v{__version__}",
            ),
            onLoad="init()",
        )
541行
body.extend([html.h2("汇总信息")] + summary_prefix + summary + summary_postfix)
558行
environment = [html.h2("测试环境")]
-
/Lib/site-packages/pytest_html/resources/main.jsjavascript function add_collapse() { // Add links for show/hide all var resulttable = find('table#results-table'); var showhideall = document.createElement("p"); showhideall.innerHTML = '<a href="javascript:show_all_extras()">显示所有详情</a> / ' + '<a href="javascript:hide_all_extras()">收起所有详情</a>'; resulttable.parentElement.insertBefore(showhideall, resulttable); -
/Lib/site-packages/pytest_html/resources/style.csscss .expander::after { content: " (显示详情)"; color: #BBB; font-style: italic; cursor: pointer; } .collapser::after { content: " (收起详情)"; color: #BBB; font-style: italic; cursor: pointer; conftest.py 文件
# !/usr/bin/python3
# _*_coding:utf-8 _*_
""""
# @Time  :2021/7/11 22:32
# @Author  : king
# @File    :conftest.py
# @Software  :PyCharm
# @blog     :https://blog.csdn.net/u010454117
# @WeChat Official Account: 【测试之路笔记】
"""
from time import strftime

from py._xmlgen import html
import pytest

def pytest_collection_modifyitems(items):
    # item表示每个测试用例,解决用例名称中文显示问题
    for item in items:
        item.name = item.name.encode("utf-8").decode("unicode-escape")
        item._nodeid = item._nodeid.encode("utf-8").decode("unicode-escape")

@user13hook
def pytest_html_results_table_header(cells):
    cells.insert(1, html.th('用例描述', class_="sortable", col="name"))  # 表头添加Description
    cells.insert(4, html.th('执行时间', class_='sortable time', col='time'))
    cells.pop(-1)  # 删除link

@user14hook
def pytest_html_results_table_row(report, cells):
    cells.insert(1, html.td(report.description))  # 表头对应的内容
    cells.insert(4, html.td(strftime('%Y-%m-%d %H:%M:%S'), class_='col-time'))
    cells.pop(-1)  # 删除link列

@user15hook
def pytest_html_results_table_html(report, data):   # 清除执行成功的用例logs
    if report.passed:
        del data[:]
        data.append(html.div('正常通过用例不抓取日志', class_='empty log'))

@user16hook
def pytest_html_report_title(report):
    report.title = "自动化测试报告"

# 修改Environment部分信息,配置测试报告环境信息
def pytest_configure(config):
    # 添加接口地址与项目名称
    config._metadata["项目名称"] = "web项目冒烟用例"
    config._metadata['接口地址'] = 'https://XX.XXX.XXX'
    config._metadata['开始时间'] = strftime('%Y-%m-%d %H:%M:%S')
    # 删除Java_Home
    config._metadata.pop("JAVA_HOME")
    config._metadata.pop("Packages")
    config._metadata.pop("Platform")
    config._metadata.pop("Plugins")
    config._metadata.pop("Python")

# 修改Summary部分的信息
def pytest_html_results_summary(prefix, summary, postfix):
    prefix.extend([html.p("所属部门: 测试部")])
    prefix.extend([html.p("测试人员: XXX")])

@user17per
def pytest_runtest_makereport(item, call):
    outcome = yield
    report = outcome.get_result()
    if item.function.__doc__ is None:
        report.description = str(item.function.__name__)
    else:
        report.description = str(item.function.__doc__)
    report.nodeid = report.nodeid.encode("utf-8").decode("unicode_escape")  # 设置编码显示中文
再次执行pytest --html=test_report.html --self-contained-html test_html.py,查看结果:修改报告样式成功

修改报告样式文件本站下载地址:pytest-HTML 样式修改报告样式文件
其他下载地址:百度云盘下载 提取码:6666
总结
- 通过
pytest-html生成报告,使用方式:添加命令行参数--html=report.html和--html=report.html --self-contained-html,建议使用后者,方便后期通过发送邮件 - 通过修改源码及在
conftest.py文件内重写 hooks 函数,修改报告
以上为内容纯属个人理解,如有不足,欢迎各位大神指正,转载请注明出处!