一:minicap 简介:
minicap 属于 STF 框架的一个工具,可以高速截图、同步手机屏幕至浏览器等功能,经过试验,截同一个屏幕的一张图,使用 adb shell screencap 命令进行截图速度为 2.9 秒,而 minicap 仅为 0.8 秒,效率高很多,这在基于图像识别的自动化测试中,起到至关重要的作用,假如你要做一个类似于腾讯的 wetest 网测平台,那么或许你可以尝试一下结合 minicap 工具实现屏幕同步功能。
二:minicap 获取途径:
1,通过下载源码进行编译,源码地址:https://github.com/openstf/minicap, 编译环境为 NDK+make,有兴趣的朋友可以参考 https://www.cnblogs.com/qiangayz/p/9580389.html 进行尝试,但本人觉得 windows 的环境设置有点麻烦,就选择了其他现成的 minicap 进行操作。
2,airtest 源码项目进行 minicap 获取,airtest 是网易开发的一款开源项目, 它里面集成了 minicap 和 minitouch 等工具,使用这些工具我们只需要到相应的目录去查找即可,下面介绍通过使用 airtest 上的 minicap 实现录屏功能。
三:将 airtest 上的 minicap 及 minicap.so 文件 push 到手机固定的目录当中去。
1,下载 Airtest IDE,官方网站http://airtest.netease.com/,解压后获得项目源码。

2,使用 pycharm 打开项目,进入 AirtestIDE_2020-01-21_py3_win64\airtest\core\android\static\stf_libs,如图可以看到,stf_libs 目录下有着各种 minicap 版本的父目录。它是根据手机 CPU 架构(arm64-v8a、armeabi-v7a,x86,x86_64)和 sdk 版本进行分类的。

3,获取手机 cpu 架构,sdk 版本
cpu 版本:adb shell getprop ro.product.cpu.abi
sdk 版本:adb sehll getprop ro.build.version.sdk
如图,可以看到 cpu 的架构是 arm64-v8a,sdk 版本是 26

4,在 airtest 上找到相应的 minicap 可执行文件和 minicap.so 文件。minicap 在(AirtestIDE_2020-01-21_py3_win64\airtest\core\android\static\stf_libs\arm64-v8a)目录下,而 minicap.so 在(airtest\core\android\static\stf_libs\minicap-shared\aosp\libs\android-27\arm64-v8a)目录下。


5,push minicap,minicap.so 到手机中
adb push minicap /data/local/tmp
adb push minicap.so /data/local/tmp
6,对它们进行赋权
adb shell chmod 777 /data/local/tmp/minicap
adb shell chmod 777 /data/local/tmp/minicap.so
四:获取手机分辨率后测试并且启动 minicap 服务
1,屏幕分辨率:adb shell wm size

2,测试是否可运行:adb shell LD_LIBRARY_PATH=/data/local/tmp /data/local/tmp/minicap -P 1080x2160@1080x2160/0 -t

3,启动 minicap 服务:adb shell LD_LIBRARY_PATH=/data/local/tmp /data/local/tmp/minicap -P 1080x2160@1080x2160/0
-P 后面的参数格式:{RealWidth}x{RealHeight}@{VirtualWidth}x{VirtualHeight}/{Orientation}
Orientation 可以理解为手机的旋转角度,可选参数为 0 | 90 | 180 | 270
五. 端口映射,把 minicap 映射到 1717 端口,也可以是其他端口。**
1,adb forward tcp:1717 localabstract:minicap

六,进行测试
1,minicap 源码里面有 example/文件夹下就是一个 minicap 提供的测试服务,由 node.js 搭建的服务端
所以启动需要本地有 node.js 环境,具体实现大概为开启 socket 连接,监听 1717 端口,然后再开一个 websocket 把监听到数据发给前端页面启动方式为:node app.js PORD=9002
pord 为指定前端页面端口,
2,打开浏览器访问:http://localhost:9002/ 即可看到手机投屏

七:通过 python 实现录屏:
1,执行下面代码,可以看到在当前目录下会有手机截屏图片生成。
# coding: utf8
import socket
import sys
import time
import struct
from collections import OrderedDict


class Banner:
    def __init__(self):
        self.__banner = OrderedDict(
            [('version', 0),
             ('length', 0),
             ('pid', 0),
             ('realWidth', 0),
             ('realHeight', 0),
             ('virtualWidth', 0),
             ('virtualHeight', 0),
             ('orientation', 0),
             ('quirks', 0)
             ])

    def __setitem__(self, key, value):
        self.__banner[key] = value

    def __getitem__(self, key):
        return self.__banner[key]

    def keys(self):
        return self.__banner.keys()

    def __str__(self):
        return str(self.__banner)

class Minicap(object):
    def __init__(self, host, port, banner):
        self.buffer_size = 4096
        self.host = host
        self.port = port
        self.banner = banner

    def connect(self):
        try:
            self.__socket = socket.socket(socket.AF_INET, socket.SOCK_STREAM)
        except :
            print('2')
            sys.exit(1)
        self.__socket.connect((self.host, self.port))

    def on_image_transfered(self, data):
        file_name = str(time.time()) + '.jpg'
        with open(file_name, 'wb') as f:
            for b in data:
                f.write(b)

    def consume(self):
        readBannerBytes = 0
        bannerLength = 24
        readFrameBytes = 0
        frameBodyLength = 0
        data = []
        while True:
            try:
                chunk = self.__socket.recv(self.buffer_size)
            except:
                print('11')
                sys.exit(1)
            cursor = 0
            buf_len = len(chunk)
            while cursor < buf_len:
                if readBannerBytes < bannerLength:
                    map(lambda i, val: self.banner.__setitem__(self.banner.keys()[i], val),
                        [i for i in range(len(self.banner.keys()))], struct.unpack("<2b5ibB", chunk))
                    cursor = buf_len
                    readBannerBytes = bannerLength
                    print(self.banner)
                elif readFrameBytes < 4:
                    frameBodyLength += (struct.unpack('B', chunk[cursor])[0] << (readFrameBytes * 8)) >> 0
                    cursor += 1
                    readFrameBytes += 1
                else:
                    print("frame length:{0} buf_len:{1} cursor:{2}".format(frameBodyLength, buf_len, cursor))
                    # pic end
                    if buf_len - cursor >= frameBodyLength:
                        data.extend(chunk[cursor:cursor + frameBodyLength])
                        self.on_image_transfered(data)
                        cursor += frameBodyLength
                        frameBodyLength = readFrameBytes = 0
                        data = []
                    else:
                        data.extend(chunk[cursor:buf_len])
                        frameBodyLength -= buf_len - cursor
                        readFrameBytes += buf_len - cursor
                        cursor = buf_len

if '__main__' == __name__:
    print('开始')
    mc = Minicap('localhost', 1717, Banner())
    mc.connect()
    mc.consume()
2,将图片帧转换为视频,执行下面代码:
import cv2
import glob
import os
from datetime import datetime


def frames_to_video(fps, save_path, frames_path, max_index):
    fourcc = cv2.VideoWriter_fourcc(*'mp4v')
    videoWriter = cv2.VideoWriter(save_path, fourcc, fps, (960, 544))
    imgs = glob.glob(frames_path + "/*.jpg")
    frames_num = len(imgs)
    for i in range(max_index):
        if os.path.isfile("%s/%d.jpg" % (frames_path, i)):
            frame = cv2.imread("%s/%d.jpg" % (frames_path, i))
            videoWriter.write(frame)
    videoWriter.release()
    return


if __name__ == '__main__':
    t1 = datetime.now()
    frames_to_video(22, "result.mp4", 'face_recog_frames', 1000)
    t2 = datetime.now()
    print("耗时 :", (t2 - t1))
    print("完成了 !!!")
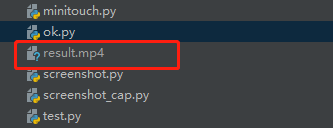
3,结果,可以看到当前项目目录有一个 result.mp4 文件生成,耗时也是相当的短,可以看到通过 minicap 进行截图效率大大提升了。


八:总结。
1,在启动 minicap 过程中,出现没有权限的问题,安卓手机在没有 root 的情况下是没有权限对系统文件进行读写操作的,但是可通过 adb 命令进行权限赋予。adb shell chmod 777

2,一个简单的基于 minicap 的录屏功能就基本完成了,后续将基于 minicap 进行实时录屏操作,并加入 minitouch 进行点击操作,期待能实现更多更多的功能!