GitHub:https://github.com/yjlch1016/dapi
QQ 群:529063263
我的博客:https://www.cnblogs.com/yjlch1016/
第 1 个帖子:https://testerhome.com/topics/20582
第 2 个帖子:https://testerhome.com/topics/20601
第 3 个帖子:https://testerhome.com/topics/20713
第 4 个帖子:https://testerhome.com/topics/20931
第 5 个帖子:https://testerhome.com/topics/21126
第 6 个帖子:https://testerhome.com/topics/21082
第 8 个帖子:https://testerhome.com/topics/22294
Nginx+uWSGI
前置条件:
以下所有操作均在 root 账号下面进行
如果不是 root 用户
请注意权限问题
因为是自己搭的服务器
所以无所谓安全问题
如果是公司的服务器
请不要使用 root 账号
一、安装 uWSGI 服务器:
当我们在本地运行 Django 时
一般是 python manage.py runserver
但是在服务器上面是结合 uWSGI
pip install uwsgi
安装 uWSGI
uWSGI 是 Python 的 Web 服务器
类似于 Java 的 Tomcat
find / -name uwsgi
找到 uwsgi 的执行位置
ln -s /usr/local/python/bin/uwsgi /usr/bin/uwsgi
创建软连接
pip install uwsgitop
安装 uWSGI 性能监控库
类似于 top 命令
find / -name uwsgitop
找到 uwsgitop 的执行位置
ln -s /usr/local/python/bin/uwsgitop /usr/bin/uwsgitop
创建软连接
uwsgi.ini 文件:
[uwsgi]
socket = 127.0.0.1:3031
# Socket套接字
chdir = /django/dapi
# 工程的绝对路径
wsgi-file = dapi/wsgi.py
# wsgi.py的相对路径
master = true
# 启用主进程
processes = 4
# 4个线程,每个进程有2个线程
threads = 2
# 2个进程
# uWSGI默认单个进程和单个线程
uid = root
gid = root
# 启动uwsgi的用户名和用户组
buffer-size = 65535
# 内部缓存区大小为64k,默认4k
max-requests = 65535
# 每个进程的最大请求数
stats = 127.0.0.1:9191
# stats子系统将uWSGI的内部统计信息导出为JSON
memory-report = true
# 开启内存使用情况报告
pidfile = %(chdir)/uwsgi.pid
# pid
vacuum = true
# 当服务停止的时候,自动清理Unix Socket和pid文件
#logto = %(chdir)/uwsgi.log
daemonize = %(chdir)/uwsgi.log
# 使进程在后台运行,并将日志打到指定的日志文件
二、上传代码:
因为本次是演示,
所以直接把代码上传到服务器上面了,
在实际的生活中,
请按照规范流程 git push 到仓库,
不然要被打 shi
mkdir /django
在根目录下面创建 django 目录
把 dapi 工程代码上传到此目录下面
如果之前运行过并且上传过文件
把/dapi/media/jmeter 目录删掉
以免占磁盘空间
如果没有
则不用管
chmod -R 777 /django
赋予此目录及其所有的子目录最高读写权限
cd /django/dapi
进入 dapi 工程根目录
pip install https://codeload.github.com/sshwsfc/xadmin/zip/django2
安装适配 Django2.0 以后版本的 xadmin
pip install -r requirements.txt
安装工程所需的依赖
修改 dapi/settings.py 配置文件
把 DEBUG = True 改为
DEBUG = False
把 ALLOWED_HOSTS = [] 改为
ALLOWED_HOSTS = ["*"]
或者指定的 IP 列表
ALLOWED_HOSTS = ["IP1", "IP2", "IP3"]
DATABASES = {
'default': {
'ENGINE': 'django.db.backends.mysql',
'NAME': 'dapi',
'HOST': '192.168.1.111',
'PORT': '3306',
'USER': 'root',
'PASSWORD': 'Abcdef@123456',
}
}
MySQL 数据库
CELERY_BROKER_URL = 'redis://:Abcdef@123456@192.168.1.111:6379/0'
redis://:password@hostname:port/db_number
CELERY_BROKER_TRANSPORT = 'redis'
使用 redis 作为中间件
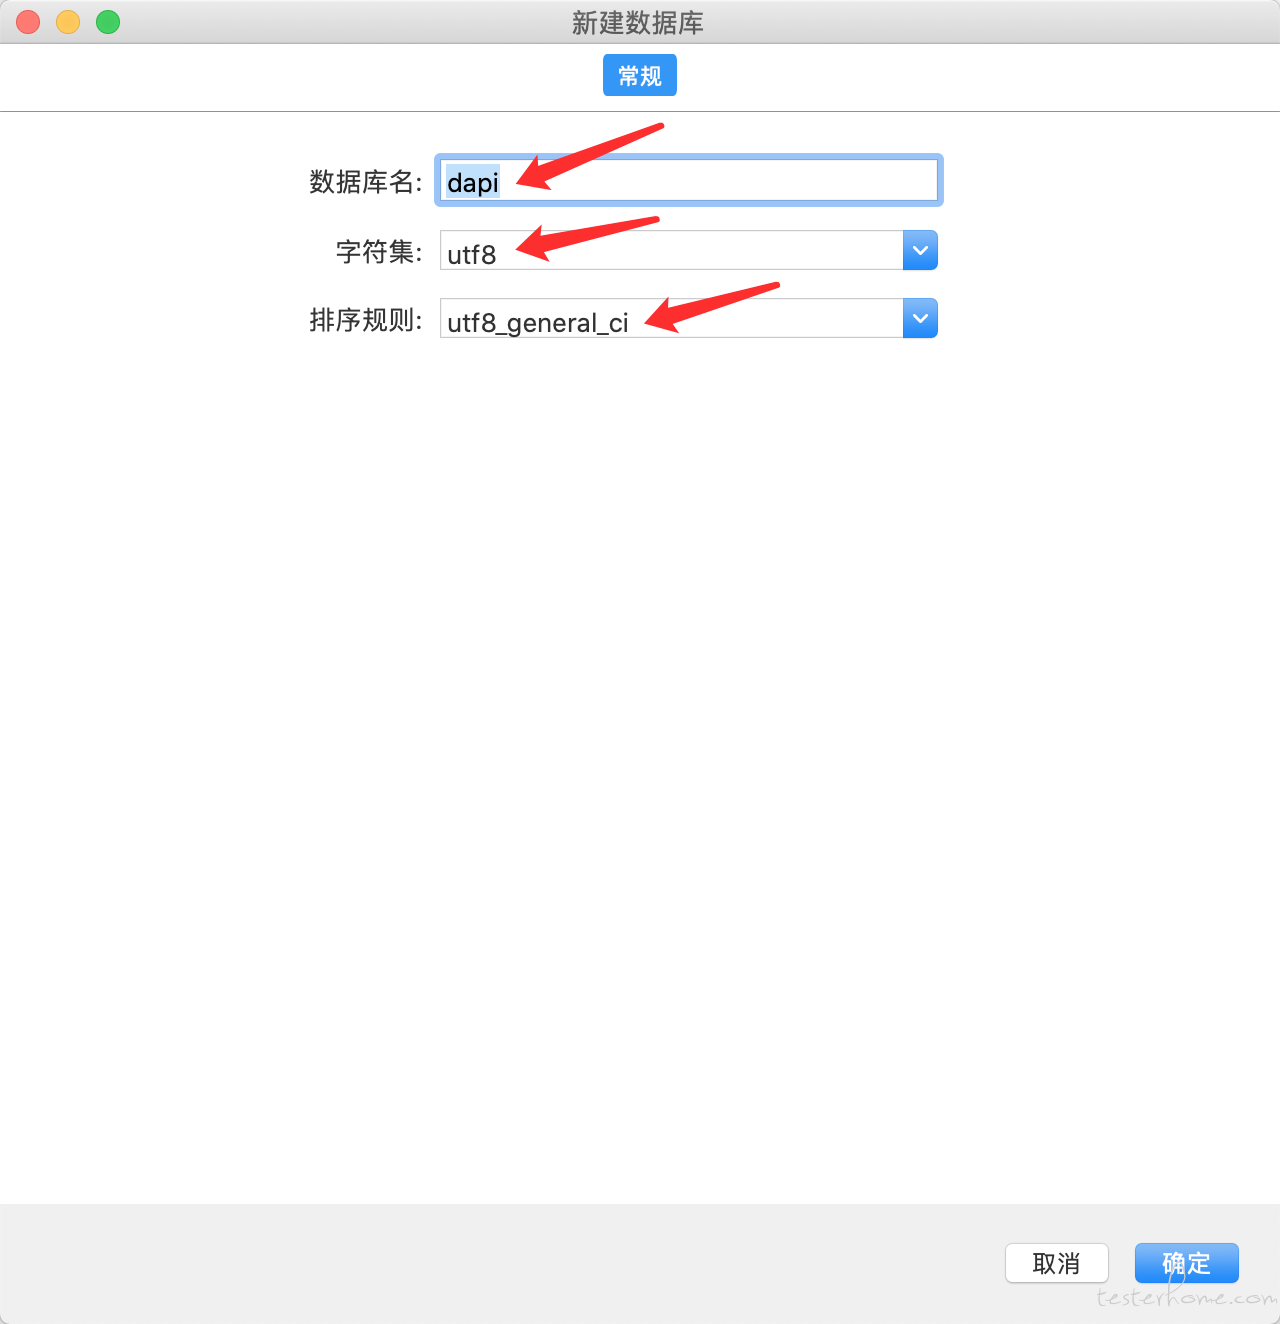
三、迁移 MySQL 数据库:
新建 dapi 库
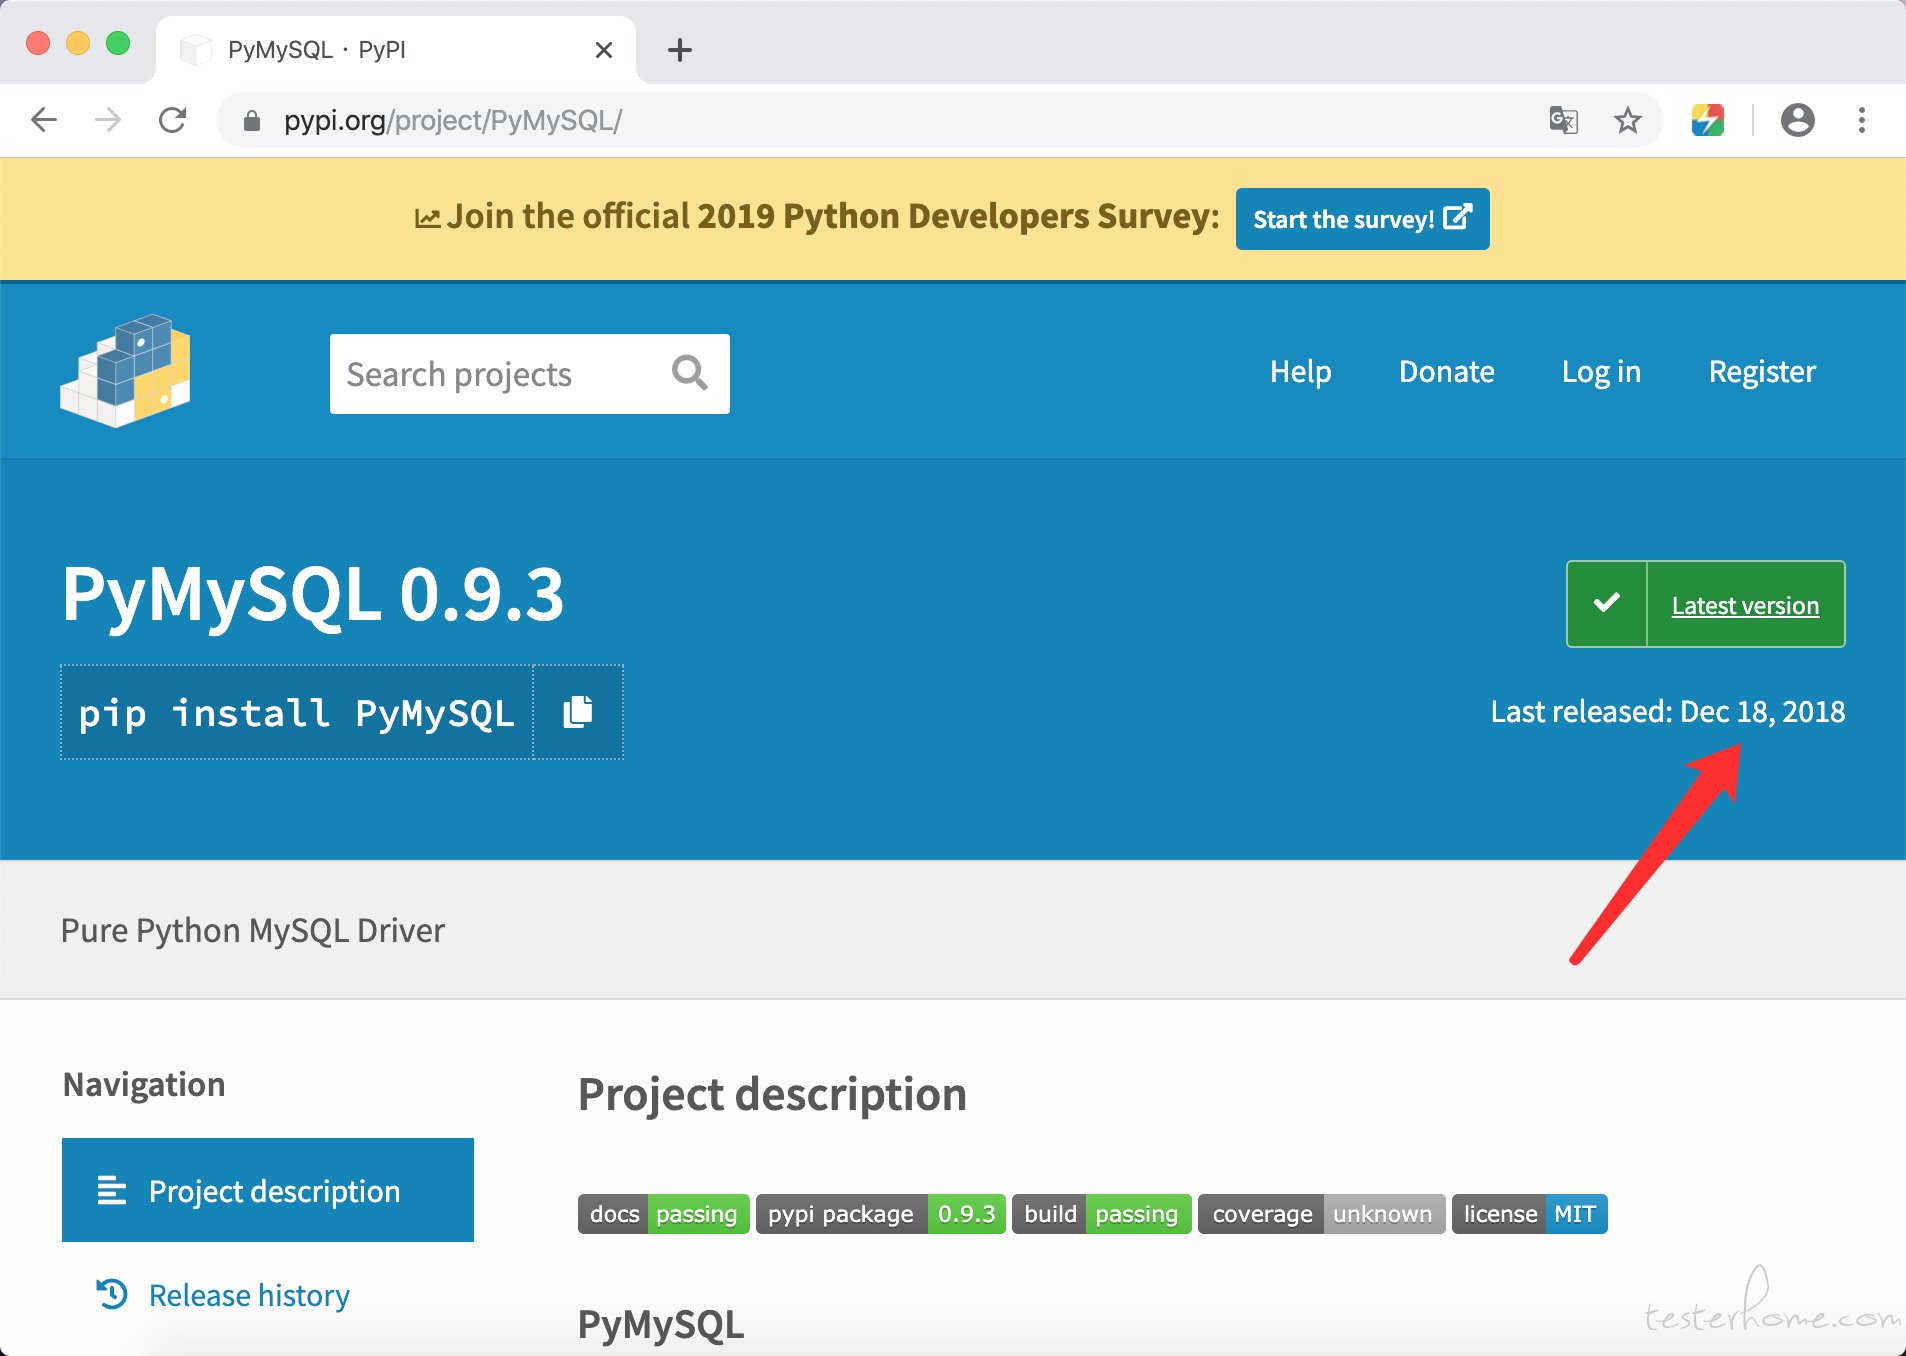
PyMySQL 年久失修,
对 Django2.0 以后的版本支持不是很好
有 2 个小 BUG
vim /usr/local/python/lib/python3.6/site-packages/django/db/backends/mysql/base.py
把第 35~36 行注释掉
vim /usr/local/python/lib/python3.6/site-packages/django/db/backends/mysql/operations.py
把第 145~146 行注释掉
请注意:
迁移之前要把/dapi/interface/migrations 目录下面除了init.py 以外的所有文件都删掉
如果之前没有运行过
则不用管
python manage.py makemigrations
激活模型
报错:
django.db.utils.ProgrammingError: (1146, "Table 'dapi.product_info' doesn't exist")

分析了一下原因
mysql 服务已经启动了
IP、端口、账号与密码都是对的呀
现在是直接连接本机的 mysql
不存在 root 远程访问的问题
况且在安装 mysql 时已经打开了 root 账号的远程访问权限
继续往上找:
(找跟 dapi 工程相关的报错信息,而不是找 Python 源码相关的报错信息)
File "/django/dapi/dapi/urls.py", line 136, in
url('pyecharts/', include('interface.urls')),
File "/django/dapi/interface/urls.py", line 3, in
from interface import pyecharts
File "/django/dapi/interface/pyecharts.py", line 45, in
product_count = ProductInfo.objects.all().count()
当我们在激活模型时,
程序已经开始执行了,
但是在 urls.py 文件下未能找到所需的表,
于是便会出现报错。
vim /django/dapi/dapi/urls.py
把第 136 行注释掉
等迁移完成后再恢复
(报错是因为 pyecharts 的原因,之后会考虑是否把 pyecharts 抛弃掉)
python manage.py makemigrations
重新激活模型
这次成功了

python manage.py migrate
迁移
python manage.py createsuperuser
创建超级管理员账号
因为静态文件我已经放在工程的 static 目录下面了
所以不用再 python manage.py collectstatic 收集静态资源文件了
四、配置 Nginx:
vim /usr/local/nginx/conf/nginx.conf
修改 nginx 配置文件
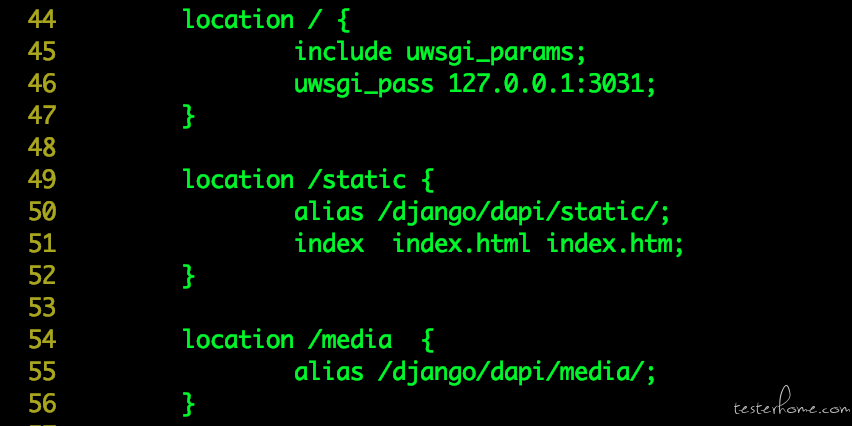
location / {
include uwsgi_params;
uwsgi_pass 127.0.0.1:3031;
}
location /static {
alias /django/dapi/static/;
index index.html index.htm;
}
location /media {
alias /django/dapi/media/;
}
systemctl restart nginx
重启 nginx 服务
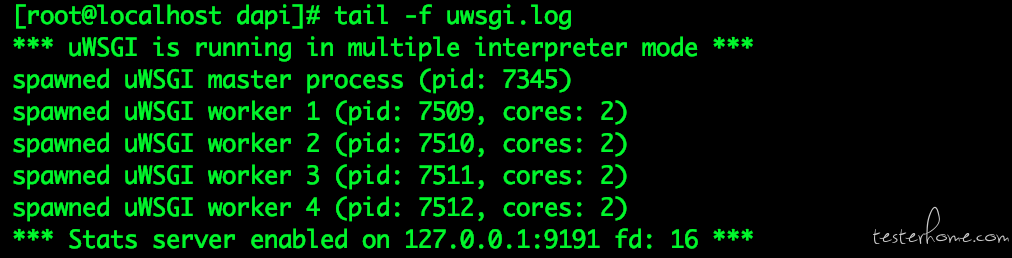
uwsgi uwsgi.ini
启动 uwsgi 服务

ls -a
查看 dapi 工程目录下面的所有文件

tail -f uwsgi.log
查看日志
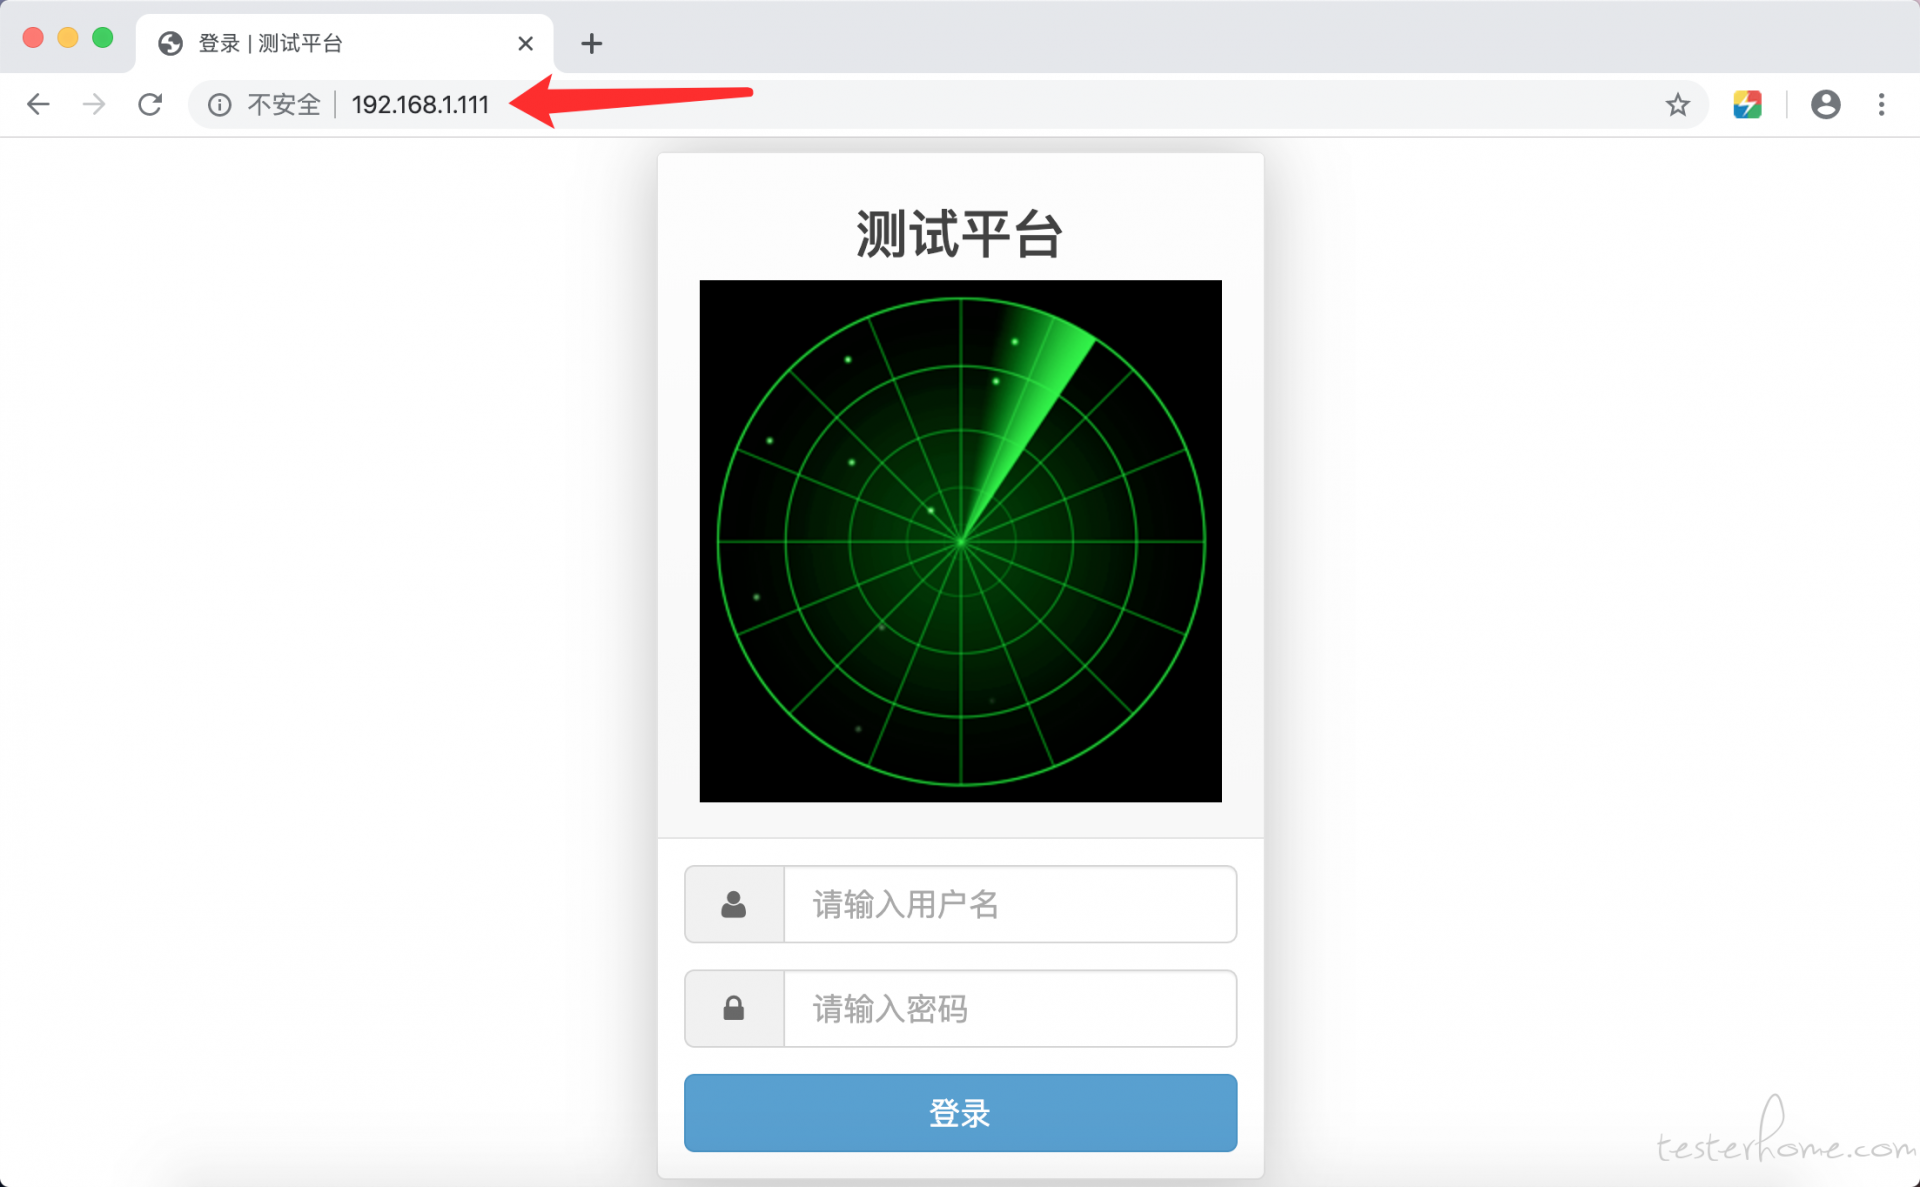
五、Web 页面:
访问http://192.168.1.111/
后台http://192.168.1.111/admin/

tail -f uwsgi.log
查看日志

uwsgitop :9191
监控 uwsgi 性能

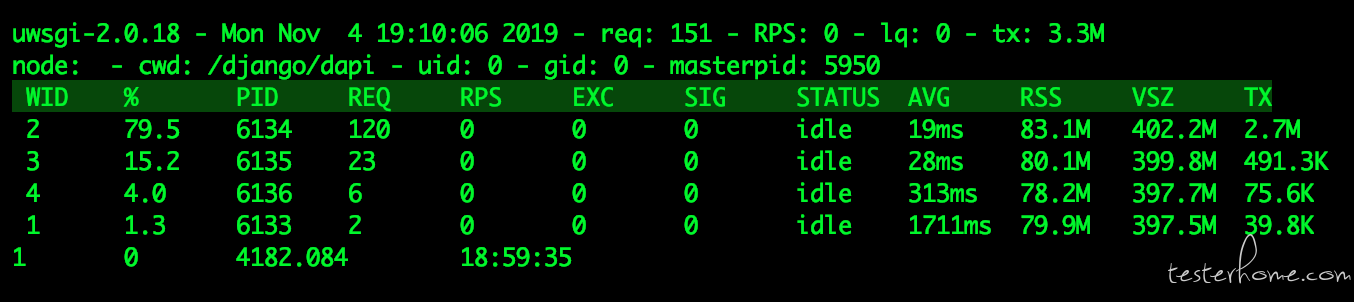
这个界面按 Q 退出
六、uwsgi 命令:
uwsgi --ini uwsgi 文件
启动
uwsgi --stop pid 文件
停止
uwsgi --reload pid 文件