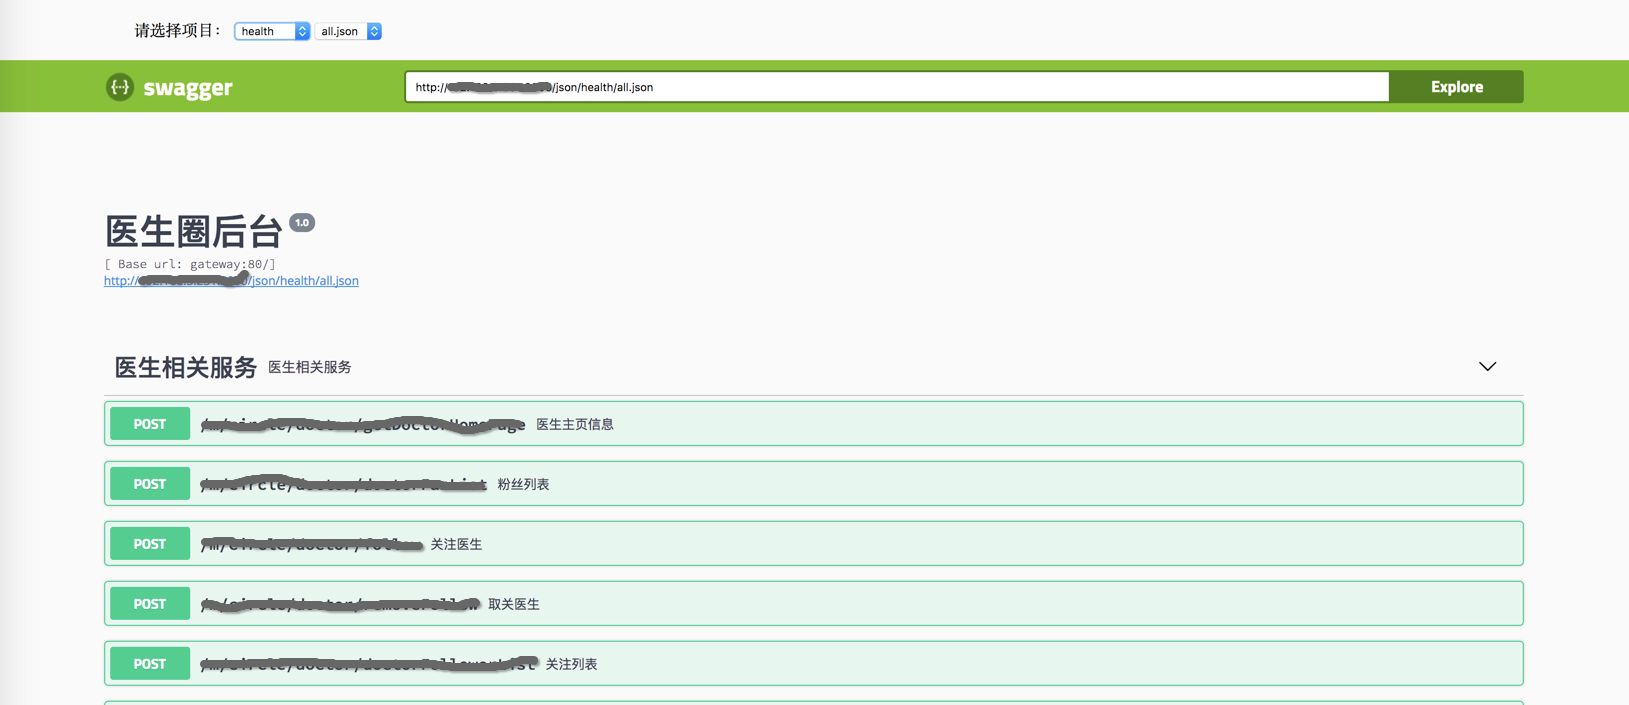
Swagger 是个前后端协作的利器,解析代码里的注解生成 JSON 文件,通过 Swagger UI 生成网页版的接口文档,可以在上面做简单的接口调试
缺点是有多少个后台服务就有多少个这样的网址,对采用微服务的项目来说有个地方集中看几十上百个服务的文档是刚需
运维同事想到了给 Swagger UI 的网页加个选单,用 JS 操作页面本来就有的输入框和按钮切换 JSON 数据源
我后来又改成支持遍历目录,配合另一个解析和对比 swagger json、增量导出接口文档的脚本使用
于是就有了以下的东西:
1 级菜单选后台服务,2 级菜单选 json 文件(如果目录下只有 1 个会自动选中)


https://github.com/swagger-api/swagger-ui
下载 Swagger UI,只需要 dist 文件夹,单独拿出来扔进 web server 里就能用
把 dist 复制到工程目录下(我把它改名成 public),初始化工程
npm init
# 偷懒的话一路回车就行

npm i express --save
npm i cors --save  # 解决CORS问题的神器

# eslint之类语法检查的就不说了
新建index.js文件,作为默认的程序入口
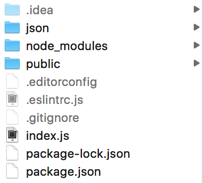
工程结构如下

我们约定 swagger 导出的 JSON 文件都放 json/ 目录下, 子目录以后台服务命名,各服务的 json 分别放进对应的目录里:

用 GET 方法访问 http://<host>:3000/json 就会遍历 json/ 下面各目录里的 json 文件,会返回以下 json 字符串:
{"<dir1>": [<file1>, <file2>], "<dir2>": ...}
简单写一下
const path = require('path');
const fs = require('fs');
const express = require('express');
const cors = require('cors');

const isDir = (dir) => {
  try {
    const stat = fs.statSync(dir);
    return stat.isDirectory();
  } catch (err) {
    return false;
  }
};

const isFile = (file) => {
  try {
    const stat = fs.statSync(file);
    return stat.isFile();
  } catch (err) {
    return false;
  }
};


const app = express();
const jsonDir = path.join(__dirname, 'json');

app.use(cors());
app.use(express.static(path.join(__dirname, 'public')));
app.use('/apidoc', express.static(path.join(__dirname, 'public')));
app.use('/json', express.static(jsonDir));

app.get('/json', (req, res) => {
  const swaggerJsons = {};
  const serviceNames = fs.readdirSync(jsonDir, 'utf-8');

  serviceNames.forEach((serviceName) => {
    const dirPath = path.join(jsonDir, serviceName);

    if (isDir(dirPath)) {
      const files = fs.readdirSync(dirPath, 'utf-8');
      const jsonFiles = [];

      files.forEach((filename) => {
        const filePath = path.join(dirPath, filename);
        if (isFile(filePath) && filename.indexOf('.json') >= 0) {
          jsonFiles.push(filename);
        }
      });
      swaggerJsons[serviceName] = jsonFiles;
    }
  });

  res.send(JSON.stringify(swaggerJsons));
});

app.listen(3000, () => {
  console.log('Listening on port 3000!');
});
运行
node index.js
浏览器访问 http://<host>:3000/ 或 http://<host>:3000/apidoc 就会打开 Swagger UI 的接口文档网页
修改 dist 下的 index.html,加上二级关联菜单
<body> 顶部:
<div id="select-json-src"
     style="width: 100%; max-width: 87.5rem; margin: 0 auto; padding: 0 1.25rem; line-height: 3.75rem;">
  <label>请选择项目:
    <select id="dropdown-parent" onchange="getResponseJson('http://localhost:3000/json', addChildOptions)"></select>
    <select id="dropdown-child" onchange="changeJsonSrc();"></select>
  </label>
</div>
底部的 <script> 下加上需要的函数
var parent = document.getElementById('dropdown-parent');
var child = document.getElementById('dropdown-child');

function getResponseJson(url, callback) {
  var xmlHttp = new XMLHttpRequest();
  xmlHttp.onreadystatechange = function () {
    if (xmlHttp.readyState === 4) {
      callback(JSON.parse(xmlHttp.responseText));
    }
  };
  xmlHttp.open('GET', url, true); // async
  xmlHttp.send(null);
}

function clearOptions(dropDown) {
  var length = dropDown.options.length;
  if (length > 0) {
    for (var i = 0; i < length; i++) {
      dropDown.options.remove(0);
    }
  }
}

function addOption(dropDown, text, value) {
  var option = document.createElement('option');
  option.text = text;
  option.value = value;
  dropDown.options.add(option);
}

function changeJsonSrc() {
  var urlBox = document.getElementsByClassName('download-url-input')[0];
  var btn = document.getElementsByClassName('download-url-button')[0];
  urlBox.value = child.options[child.selectedIndex].value;
  btn.click();
}

function updateServices(respJson) {
  if (respJson) {
    var services = Object.keys(respJson);
    clearOptions(parent);
    addOption(parent, '请选择...', '');
    services.forEach(function (service) {
      addOption(parent, service, service);
    });
  }
}

function addChildOptions(respJson) {
  if (respJson) {
    clearOptions(child);
    var service = parent.value;
    var jsonFiles = respJson[service];

    if (jsonFiles && jsonFiles.length) {
      jsonFiles.forEach(function (file) {
        addOption(child, file, 'http://localhost:3000/json/' + service + '/' + file);
      });
    }

    if (child.options.length > 0) {
      child.selectedIndex = 0;
      changeJsonSrc();
    }
  }
}
修改下面的 window.onload 函数,顶部加上:
getResponseJson('http://localhost:3000/json', updateServices);
再把下面 SwaggerUIBundle 默认的 url 改成空: url: "",
然后就会碰到一个大坑,用 js 触发页面上 Explore 按钮,会忽略文本框里的输入,总是用 SwaggerUIBundle 里设置的 url
动手能力强的人可以自己尝试改掉 swagger-ui-standalone-preset.js,但文件是压缩过的,美化了那堆 abcdefg 的变量名也还是没法看
GitHub 上能搜到 issue 里说 3.0.8 的旧版本是没问题的,备份一下找个没问题的版本替换掉这文件
测试过没问题之后替换一下网页里的 url,放到开发服务器上
json 文件可以在构建服务时用脚本从 swagger url(http://<host>:<port>/v2/api-docs)下载到指定目录(简单点用 curl,复杂点见这里)
另外 swagger 的 json 文件还能导进 postman,用途很多,就看想象力了
如果项目是 Java + Spring Boot + Swagger,springfox-swagger2 和 springfox-swagger-ui 插件建议升到 2.7.0+
旧版本的 @ApiImplicitParam没有dataTypeClass参数,方法的参数类型是 String、Integer、Enum 等,总之不是你自己定义注解了@ApiModel的类,生成的网页就会类似以下的错误:
Could not resolve reference because of: Could not resolve pointer: /definitions/String does not exist in document
如果实在不想升,修改下 dist 下的 index.html,在 <head> <style> 下加段 css 把错误信息藏起来:
pre.errors-wrapper {
  visibility: hidden;
  height: 0;
}
<base> 指定 base URL如果在 <head> 加了 <base href="xxx">,页面上显示的就只有相对路径了,不太好看
