
想查看下配置文件 如:xueqiu_private.yml 下,到底可以支持配置哪些参数。想从源码里得到答案。故先部署下 appcrawler 的开发环境。
https://github.com/seveniruby/AppCrawler 查看知道是基于 scala 开发环境的 sbt 打包构建的工程。
笔者既是 D:\workspace\
需要用到 windows 版本的 git bash 工具,请先安装配置好 git bash
cd d:

cd workspace/

git clone https://github.com/seveniruby/AppCrawler.git
http://www.scala-lang.org/download/ 下载安装了 scala-2.12.2.msi 安装包
配置 scala 环境变量
SCALA_HOME D:\scala
PATH 追加 %SCALA_HOME%\bin
检查是否成功
C:\Users\cmd>scala -version

 Scala code runner version 2.12.2 -- Copyright 2002-2017, LAMP/EPFL and Lightbend, Inc
http://www.scala-sbt.org/ 下载安装 sbt-0.13.15.msi
安装到 D:\sbt\
经查默认自动添加了环境变量
SBT_HOME D:\sbt\
PATH D:\sbt\bin
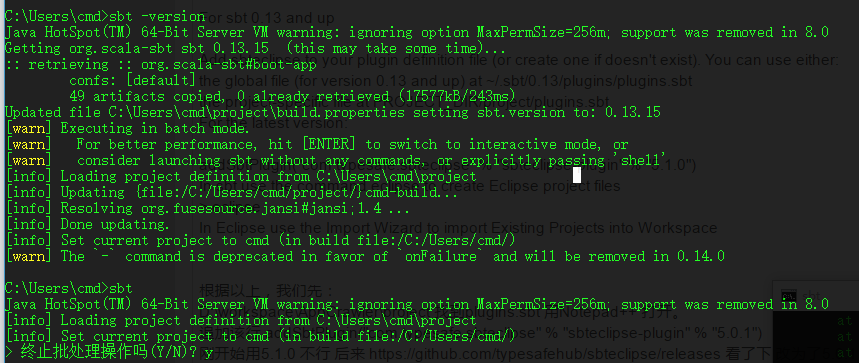
首次执行 sbt -version 会自动下载构建所需
会 downloading 相当一大篇的东西,总之又是老问题,外网问题,最终我还是依靠中国移动 4G 热点大法搞定了。
最后安装成功的标志就是在这个目录下多了 0.13 的文件夹

最后的几行日志
 5 artifacts copied, 0 already retrieved (24494kB/60ms)
Updated file C:\Users\cmd\project\build.properties setting sbt.version to: 0.13.15
[warn] Executing in batch mode.
[warn]   For better performance, hit [ENTER] to switch to interactive mode, or
[warn]   consider launching sbt without any commands, or explicitly passing 'shell'
[info] Loading project definition from C:\Users\cmd\project
[info] Updating {file:/C:/Users/cmd/project/}cmd-build...
[info] Resolving org.fusesource.jansi#jansi;1.4 ...
[info] Done updating.
[info] Set current project to cmd (in build file:/C:/Users/cmd/)
[warn] The `-` command is deprecated in favor of `onFailure` and will be removed in 0.14.0
发现一些信息,这样子好像部署的是全局的 scala 项目环境 默认的项目路径是/C:/Users/cmd/project/。
和下文 D:\workspace\AppCrawler 下执行 sbt eclipse 是分开的,下文执行后日志看出来最后这个应该是项目级别的非全局的配置。大家看英文帮助也可见端倪。分为全局配置和项目级配置,大家各取所需吧。我就选了项目级的配置思路。
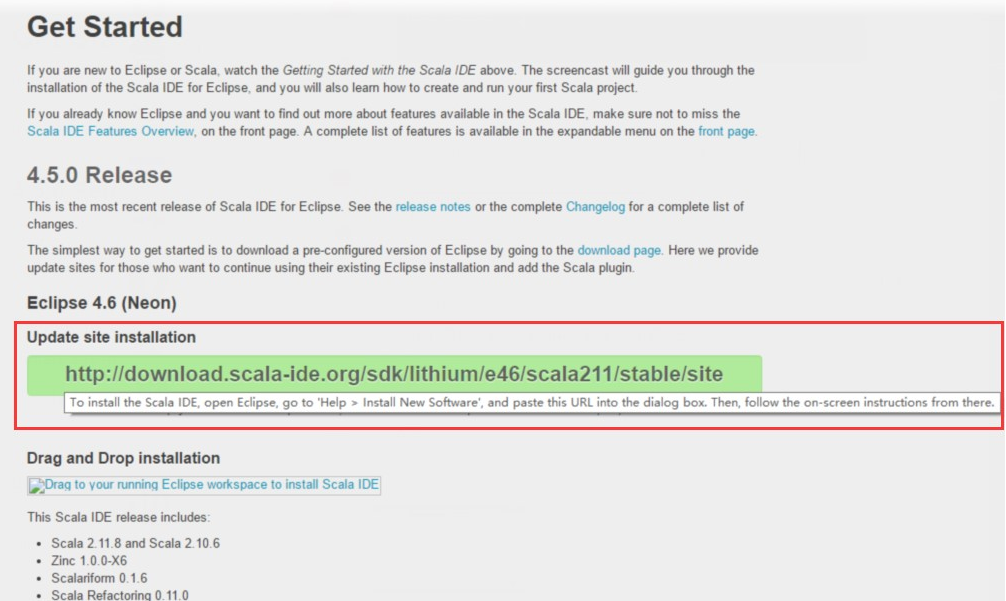
http://scala-ide.org/download/current.html 提供了 eclipse 的 scaca IDE 插件
照此配置即可 笔者已经用的就是 Eclipse 4.6 Neon.3 版本
scala-ide http://download.scala-ide.org/sdk/lithium/e46/scala211/stable/site
由于是 scala sbt 工程,查了资料,最终可以如此导入
https://app.assembla.com/wiki/show/scala-ide/Getting_Started
Start from an existing SBT project
SBT is the standard build tool for Scala projects. There are two versions in wide use today: 0.7.x and 0.10+. Both have plugins that can generate Eclipse project files out of the SBT project definition.
If you are using SBT 0.7.x, use eclipsify. Follow the instructions at https://github.com/musk/SbtEclipsify/tree/0.8.0 to install the plugin. You may want to check out the update-sources plugin, which can download attached sources for your dependencies. They allow the IDE to navigate to definitions in those libraries.
If you are using SBT 0.11.x use sbteclipse. Follow the instructions at https://github.com/typesafehub/sbteclipse to install and use the plugin to generate the project definition. sbteclipse can download attached sources natively, so you do not need the update-sources plugin.
Once you have installed and generated the Eclipse project files using one of the above plugins, start Eclipse and Choose File/Import, then choose Existing Project into workspace. Navigate to the directory of your project, and Eclipse should detect the generated project.
Important: SBT manages the dependency to scala-library.jar. Make sure the version of Scala you use in your SBT project
matches the version of Scala installed in Eclipse.
Plugin for sbt to create Eclipse project definitions. Please see the Documentation for information about installing and using sbteclipse. Information about contribution policy and license can be found below.
For sbt 0.13 and up
Add sbteclipse to your plugin definition file (or create one if doesn't exist). You can use either:
the global file (for version 0.13 and up) at ~/.sbt/0.13/plugins/plugins.sbt
the project-specific file at PROJECT_DIR/project/plugins.sbt
For the latest version:
addSbtPlugin("com.typesafe.sbteclipse" % "sbteclipse-plugin" % "5.1.0")
In sbt use the command eclipse to create Eclipse project files
eclipse
In Eclipse use the Import Wizard to import Existing Projects into Workspace
根据以上,我们先:
D:\workspace\AppCrawler\project 找到 plugins.sbt 用 Notepad++ 打开。
追加该行 addSbtPlugin("com.typesafe.sbteclipse" % "sbteclipse-plugin" % "5.0.1")
刚开始用 5.1.0 不行 后来 https://github.com/typesafehub/sbteclipse/releases 看了下 改为了 5.0.1
然后还需要修改 D:\workspace\AppCrawler 下的 build.sbt 追加
EclipseKeys.createSrc := EclipseCreateSrc.Default + EclipseCreateSrc.Resource
然后命令行到该项目 D:\workspace\AppCrawler\下执行 sbt
然后进入 sbt 后,执行 eclipse
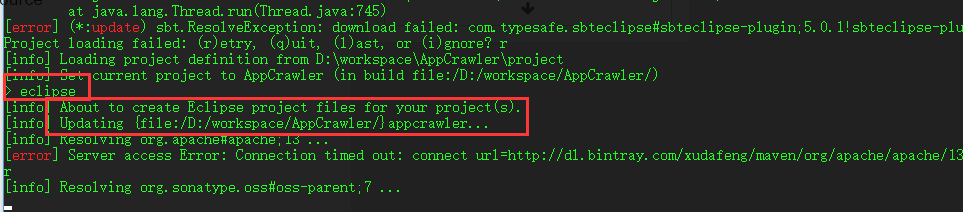
最后是这样
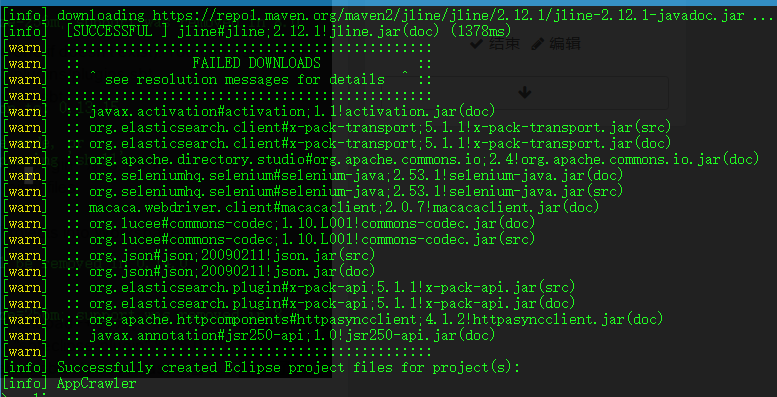
然后开 eclipse 选择 import existing project into workspace
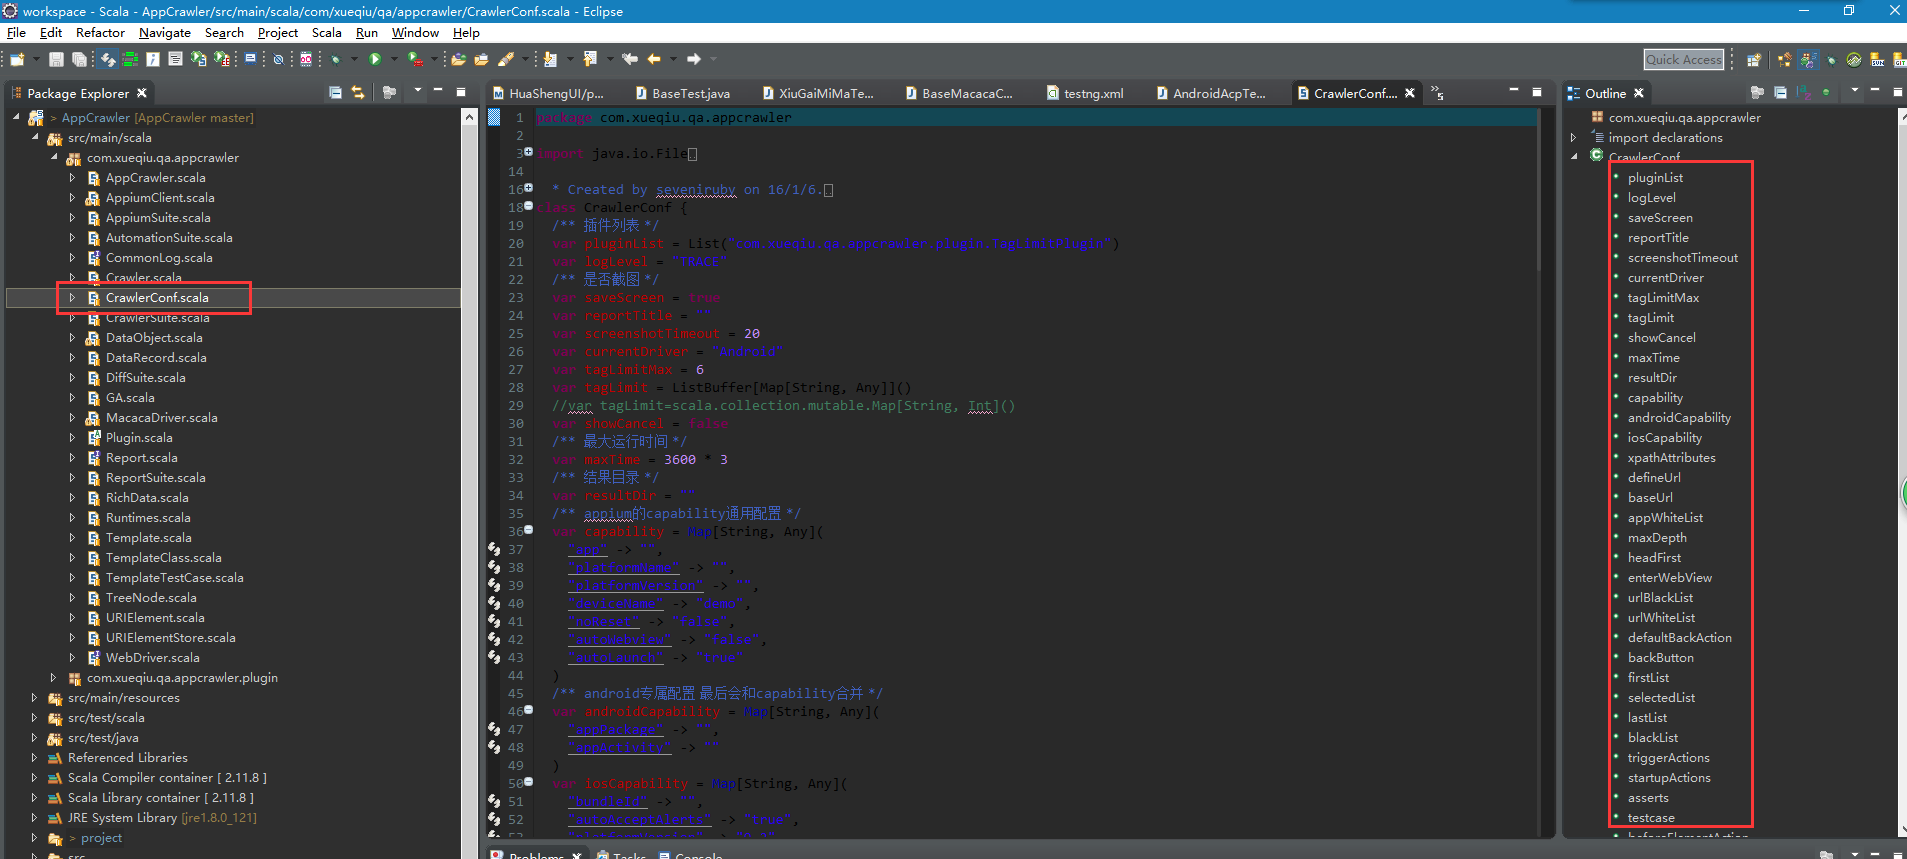
OK 完成 终于没报错了,大神指导在 CrawlerConf.scala 这儿 去看看
/**
  * Created by seveniruby on 16/1/6.
  */
class CrawlerConf {
  /** 插件列表 */
  var pluginList = List("com.xueqiu.qa.appcrawler.plugin.TagLimitPlugin")
  var logLevel = "TRACE"
  /** 是否截图 */
  var saveScreen = true
  var reportTitle = ""
  var screenshotTimeout = 20
  var currentDriver = "Android"
  var tagLimitMax = 6
  var tagLimit = ListBuffer[Map[String, Any]]()
  //var tagLimit=scala.collection.mutable.Map[String, Int]()
  var showCancel = false
  /** 最大运行时间 */
  var maxTime = 3600 * 3
  /** 结果目录 */
  var resultDir = ""
  /** appium的capability通用配置 */
  var capability = Map[String, Any](
    "app" -> "",
    "platformName" -> "",
    "platformVersion" -> "",
    "deviceName" -> "demo",
    "noReset" -> "false",
    "autoWebview" -> "false",
    "autoLaunch" -> "true"
  )
  /** android专属配置 最后会和capability合并 */
  var androidCapability = Map[String, Any](
    "appPackage" -> "",
    "appActivity" -> ""
  )
  var iosCapability = Map[String, Any](
    "bundleId" -> "",
    "autoAcceptAlerts" -> "true",
    "platformVersion" -> "9.2",
    "deviceName" -> "iPhone 6"
  )
  var xpathAttributes = List("name", "label", "value", "resource-id", "content-desc", "index", "text")
  /** 用来确定url的元素定位xpath 他的text会被取出当作url因素 */
  var defineUrl = List[String]()
  /** 设置一个起始url和maxDepth, 用来在遍历时候指定初始状态和遍历深度 */
  var baseUrl = List[String]()
  var appWhiteList = ListBuffer[String]()
  /** 默认的最大深度10, 结合baseUrl可很好的控制遍历的范围 */
  var maxDepth = 6
  /** 是否是前向遍历或者后向遍历 */
  var headFirst = true
  /** 是否遍历WebView控件 */
  var enterWebView = true
  /** url黑名单.用于排除某些页面 */
  var urlBlackList = ListBuffer[String]()
  var urlWhiteList = ListBuffer[String]()

  var defaultBackAction = ListBuffer[String]()
  /** 后退按钮标记, 主要用于iOS, xpath */
  var backButton = ListBuffer[String]()

  /** 优先遍历元素 */
  var firstList = ListBuffer[String](
  )
  /** 默认遍历列表 */
  var selectedList = ListBuffer[String](
    "//*[contains(name(), 'Text')]",
    "//*[contains(name(), 'Image')]",
    "//*[contains(name(), 'Button')]",
    "//*[contains(name(), 'CheckBox')]"
  )
  /** 最后遍历列表 */
  var lastList = ListBuffer[String]()

  //包括backButton
  //todo: 支持正则表达式
  /** 黑名单列表 matches风格, 默认排除内容是2个数字以上的控件. */
  var blackList = ListBuffer[String](
    ".*[0-9]{2}.*"
  )
  /** 引导规则. name, value, times三个元素组成 */
  var triggerActions = ListBuffer[scala.collection.mutable.Map[String, Any]]()
  var startupActions = ListBuffer[String]()
  var asserts = ListBuffer[Map[String, Any]]()
  var testcase=TestCase()
  startupActions ++= List("println(\"startupAction call use scala code\")")

  var beforeElementAction = ListBuffer[Map[String, String]]()
  var afterElementAction = ListBuffer[String]()
  var afterUrlFinished = ListBuffer[String]()
  var monkeyEvents = ListBuffer[Int]()
  var monkeyRunTimeSeconds = 30


  def loadByJson4s(file: String): Option[this.type] = {
    implicit val formats = DefaultFormats + FieldSerializer[this.type]()
    if (new java.io.File(file).exists()) {
      println(s"load config from ${file}")
      println(Source.fromFile(file).mkString)
      Some(read[this.type](Source.fromFile(file).mkString))
    } else {
      println(s"conf file ${file} no exist ")
      None
    }
  }

  def save(path: String): Unit = {

    /*
        //这个方法不能正确的存储utf8编码的文字
        implicit val formats = DefaultFormats+ FieldSerializer[this.type]()
        val file = new java.io.File(path)
        val bw = new BufferedWriter(new FileWriter(file))
        log.trace(writePretty(this))
        log.trace(write(this))
        bw.write(writePretty(this))
        bw.close()
        */

    val file = new java.io.File(path)
    val mapper = new ObjectMapper()
    mapper.registerModule(DefaultScalaModule)
    mapper.writerWithDefaultPrettyPrinter().writeValue(file, this)
    println(mapper.writeValueAsString(this))
  }

  def toJson(): String = {
    val mapper = new ObjectMapper()
    mapper.registerModule(DefaultScalaModule)
    mapper.writerWithDefaultPrettyPrinter().writeValueAsString(this)

  }

  def toYaml(): String = {
    val mapper = new ObjectMapper(new YAMLFactory())
    mapper.registerModule(DefaultScalaModule)
    mapper.writerWithDefaultPrettyPrinter().writeValueAsString(this)
  }

  def loadYaml(fileName: File): CrawlerConf = {
    val mapper = new ObjectMapper(new YAMLFactory())
    mapper.registerModule(DefaultScalaModule)
    mapper.readValue(fileName, classOf[CrawlerConf])
  }

  def loadYaml(content: String): Unit = {
    val mapper = new ObjectMapper(new YAMLFactory())
    mapper.registerModule(DefaultScalaModule)
    mapper.readValue(content, classOf[CrawlerConf])
  }


  def load(file: String): CrawlerConf = {
    load(new File(file)).get
  }

  def load(file: File): Option[CrawlerConf] = {
    val content = Source.fromFile(file, "UTF-8").getLines().mkString("\n")
    file.getName match {
      case json if json.endsWith(".json") => {
        Some(DataObject.fromJson[CrawlerConf](content))
      }
      case yaml if yaml.endsWith(".yml") || yaml.endsWith(".yaml") => {
        Some(DataObject.fromYaml[CrawlerConf](content))
      }
      case path => {
        println(s"${path} not support")
        None
      }
    }
  }


}


case class TestCase(name:String="", steps:List[Step]=List[Step]())
case class Step(given: List[String], when: When, then:List[String])
case class When(xpath:String, action:String)
#完整的配置文件示例
---
logLevel: "TRACE"
reportTitle: "Keep"
saveScreen: true
screenshotTimeout: 20
currentDriver: "android"
showCancel: true
tagLimitMax: 5
tagLimit:
- xpath: //*[../*[@selected='true']]
  count: 12
maxTime: 10800
resultDir: ""
capability:
  newCommandTimeout: 120
  launchTimeout: 120000
  platformVersion: ""
  platformName: "Android"
  autoWebview: "false"
  autoLaunch: "true"
  noReset: "true"
  androidInstallTimeout: 180000
androidCapability:
  deviceName: "192.168.0.102:5555"
  appPackage: "com.gotokeep.keep"
  appActivity: ".activity.SplashActivity"
  dontStopAppOnReset: true
  app: ""
  appium: "http://127.0.0.1:4723/wd/hub"
#  automationName: uiautomator2
  automationName: uiautomator2
  reuse: 3
#  nativeWebScreenshot: "true"
defineUrl:
- //*[@selected='true' and contains(name(), 'TextView')]/@text
#- //*[contains(@resource-id, 'title')]/@text
appWhiteList:
- android
- com.shafa.market
baseUrl:
- ".*MainActivity"
- ".*SNBHomeView.*"
maxDepth: 20
headFirst: true
enterWebView: true
urlBlackList:
- .*OutdoorSummaryMap.*
- .*PersonalPage.*
- .*Training.*
- .*FriendRank.*
- .*\\.base\\.Container.*
#urlWhiteList:
#- ".*Main.*"
backButton:
- //*[contains(@resource-id, "left_button") and @clickable='true']
#defaultBackAction:
#- import sys.process._;
#- Thread.sleep(5000)
#- val name=Seq("adb", "shell", "dumpsys window windows | grep mCurrentFocus").!!.split(" ")(4).split("/")(0)
#- println(s"kill package ${name}")
#- Seq("adb", "shell", s"am force-stop ${name}").!!
#firstList:
#- //*[contains(@resource-id, "layout_picker_view_container"]
selectedList:
#android非空标签
- //*[@clickable='true']
- //*[@clickable='true']//*[contains(name(), 'Text') and string-length(@text)>0 and string-length(@text)<10 ]
#通用的button和image
- //*[@clickable='true']//*[contains(name(), 'Button')]
- //*[@clickable='true']//*[contains(name(), 'Image')]
#todo:如果多个规则都包含相同控件, 如何排序
#处于选中状态的同级控件最后点击
lastList:
- //*[../*[@selected='true']]
- //*[../../*/*[@selected='true']]
- //*[../../*/*[@selected='true'] and contains(@resource-id, 'tab_')]
- //*[contains(name(), "HorizontalScrollView")]
- //*[@resource-id='com.gotokeep.keep:id/layout_bottom']
blackList:
- ".*\\.[0-9].*"
- ".*[0-9]{2,}.*"
- //*[contains(@resource-id, "wrapper_in_custom_title_bar")]//*[contains(@resource-id, "right_button")]
- //*[contains(@resource-id, "share")]
- //*[contains(@text, "开始第")]
- //*[contains(@resource-id, "lock")]
- //*[contains(@text, "举报")]
triggerActions:
- xpath: //*[contains(@resource-id, "layout_picker_view_container")]//*[@text="确定"]
- xpath: //*[contains(@resource-id, "content-wrapper_dialog")]//*[@text="不发了"]
- xpath: //*[@text="拒绝"]
- xpath: //*[@text="放弃"]
- xpath: //*[@text="结束训练"]
- xpath: //*[contains(@resource-id, "quit_confirm_button")]//*[contains(@text, "确定")]
- xpath: //*[contains(@resource-id, "layout_right_second_button")]//*[contains(@resource-id, "right_second_button")]
  action: yoga
  times: 1
asserts:
- given:
  - //*
  then:
  - //*[@package="com.gotokeep.keep"]
- given:
  - //*[@text="胸部"]
  then:
  - //*[contains(@text, "离心俯卧撑")]
testcase:
  name: demo1
  steps:
  - when:
      xpath: //*[contains(@resource-id, 'text_home_train_collection_title')]
      action: driver.swipe(0.5, 0.8, 0.5, 0.2)
    then: []
  - when:
      xpath: //*[contains(@resource-id, 'text_home_train_collection_title')]
      action: driver.swipe(0.5, 0.2, 0.5, 0.8)
    then: []
  - when:
      xpath: //*[contains(@resource-id, 'text_home_train_collection_title')]
      action: tap
    then:
    - //*[contains(@text, "置顶")]
  - when:
      xpath: //*[contains(@text, '置顶')]
      action: click
    then:
    - //*[contains(@text, "添加训练")]
    - //*[contains(@text, "故意错误")]
#所有view的叶子节点 一般表示游戏
#- action: monkey
#  xpath: //android.view.View[not(*) and contains(@bounds, "[0,0]") ]
#  times: 20
#startupActions:
#- println(driver)
#beforeElementAction:
#- xpath: //*[@resource-id="com.shafa.market:id/nav"]//android.widget.TextView
#  action: MiniAppium.event(21)
#- Thread.sleep(3000)
#- println(driver.getPageSource())
#afterElementAction:
#- println(driver)
#afterUrlFinished:
#- monkey()
在源码该路径下有其他作者测试自家雪球 APP 时候的一些 yml 配置大家也可参考:
https://github.com/seveniruby/AppCrawler/tree/master/src/test/scala/com/testerhome/appcrawler/it
如 keep.yml keep_test.yml xueqiu_private.yml xueqiu_automation.yml
左侧 CrawlerConf 定义源码 右侧 xueqiu_private.yml 对比就知道相应的参数该怎么写了

启动方式保存至 appcrawler/conf/acp4.7.yml
启动相关命令:
appium --session-override -p 4730
java -jar appcrawler-2.1.1.jar -c conf/acp.yml -p android --capability appPackage=com.sinacp.ggaicai,appActivity=com.aicai.pluginhost.activity.MainActivity  -u http://127.0.0.1:4730/wd/hub -o result/
java -jar appcrawler-2.1.1.jar -c conf/acp.yml -p android -a /home/cmd/appcrawler/acp4.7p.apk -u http://127.0.0.1:4730/wd/hub -o result/
java -jar appcrawler-2.1.1.jar  -c conf/acp.yml -p android  -u http://127.0.0.1:4730/wd/hub -o result/
---
#插件列表
#pluginList:
#- "com.testerhome.appcrawler.plugin.FlowDiff"
#- "com.testerhome.appcrawler.plugin.ProxyPlugin"
#- "com.testerhome.appcrawler.plugin.TagLimitPlugin"
#- "com.testerhome.appcrawler.plugin.ReportPlugin"
reportTitle: AppCrawler-acp4.7
logLevel: "TRACE"
#是否截图
saveScreen: true
screenshotTimeout: 20
showCancel: true
#特定元素的tag布局层级完全一样时的遍历最大值
tagLimitMax: 2
currentDriver: "android"
# 最大运行时间
maxTime: 10800
# 结果目录
resultDir: ""
# appium的capability通用配置
capability:
  newCommandTimeout: 120
  launchTimeout: 120000
  platformVersion: ""
# Appium是否需要自动安装和启动应用。默认值true
  autoLaunch: "true"
# 直接转换到 WebView 上下文。 默认值 false
  autoWebview: "false"
# 不要在会话前重置应用状态。默认值false。
  noReset: "false"

# android专属配置 最后会和capability合并
androidCapability:
  deviceName: "192.168.58.101:5555"
  appPackage: "com.sinacp.ggaicai"
  appActivity: "com.aicai.pluginhost.activity.MainActivity"
  app: "/home/cmd/appcrawler/acp4.7p.apk"
  # 你想使用的自动化测试引擎 可以是 uiautomator2  macaca 等 默认appium
  automationName: appium
  appium: "http://127.0.0.1:4730/wd/hub"
  macaca: "http://127.0.0.1:3456/wd/hub"
  fullReset: false
  noReset: true
  reuse: 3
  #以下为重置手机输入法为appium输入法
  unicodeKeyboard: true
  resetKeyboard: true

iosCapability:
  deviceName: "iPhone 6 Plus"
  bundleId: "com.xueqiu"
  screenshotWaitTimeout: "10"
  platformVersion: "9.3"
  autoAcceptAlerts: "true"
  app: "/home/cmd/appcrawler/acp4.7p.apk"
  appium: "http://127.0.0.1:4730/wd/hub"

# 用来确定url的元素定位xpath 他的text会被取出当作url因素
defineUrl:
- "//*[@selected='true']/@text"
- "//*[@selected='true']/@text"
- "//*[contains(name(), 'NavigationBar')]/@label"
#appWhiteList:
#- android
#- com.shafa.market

# 设置一个起始url和maxDepth, 用来在遍历时候指定初始状态和遍历深度
#baseUrl:
# 默认的最大深度10, 结合baseUrl可很好的控制遍历的范围
maxDepth: 10

# 是否是前向遍历或者后向遍历
headFirst: true
# 是否遍历WebView控件
enterWebView: true

# url黑名单.用于排除某些页面
#urlBlackList:

#urlWhiteList:
#- ".*Main.*"

# 后退按钮标记, 主要用于iOS, xpath
#backButton:

# 优先遍历元素特征列表
#firstList:

# 默认遍历元素特征列表 需要注意的是firstList和lastList指定的元素必须包含在selectedList中
#selectedList:

# 最后遍历元素特征列表
#lastList:

# 黑名单列表 matches风格, 默认排除内容是2个数字以上的控件
#blackList:

# 引导规则. name, value, times三个元素组成
#triggerActions:
