系统要求及说明:
brew需要最新版本的 Xcode 或Xcode Command Line
iOS9.3 及以下使用 Automation 作为底层技术,在 iOS9.3 出现了 XCUITest,并且在 iOS10 时抛弃了 Automation ,所以 Appium 在 iOS9.3 及以下和 iOS10 的配置方法不同。
如果已安装过部分依赖,可直接跳过
强烈推荐所有 macOS 上的软件使用 Homebrew 进行安装,使用 brew 安装过的软件,不再需要 sudo 命令。
打开终端,运行:
/usr/bin/ruby -e "$(curl -fsSL https://raw.githubusercontent.com/Homebrew/install/master/install)"
brew 的使用非常简单,安装一个软件使用
brew install #<package name>
如果 brew 提示 Xcode 版本过低,需要安装新版本的 Xcode(安装时保存两个版本即可)
下载地址:https://developer.apple.com/download/more/
brew install node
检查是否安装成功
node -v
# v6.9.1
npm -v
# 3.10.8
由于 npm 源在国外,我们使用 npm 安装库时会比较慢,可以使用 taobao 的镜像源
npm install -g cnpm --registry=https://registry.npm.taobao.org
检查安装是否成功
cnpm -v
# 4.4.0
以后均使用cnpm 命令代替npm
appium 本质上就是一个 Nodejs 应用,我们可以使用 npm 对其进行安装,安装完毕后就可以使用命令行启动
cnpm install -g appium
可以使用 appium-doctor 来确认安装环境是否完成
cnpm install -g appium-doctor
appium-doctor
使用软件比较简单,拥有图形化界面,并且有 Inspector 工具,帮助检测界面元素
下载地址:https://github.com/appium/appium-desktop/releases
Carthage 是一个管理 iOS 开发库依赖的包
brew install carthage
使用到哪个语言安装哪个
brew install python3
检测安装成功
python3 -V
# Python 3.6.0
pip3 -V
# pip 9.0.1 from /usr/local/lib/python3.6/site-packages (python 3.6)
出现相应代码即成功
macOS 自带有 Python2 版本,默认情况下输入python调用的就是系统的 python2 和pip (建议使用虚拟环境)
此外,如果系统版本之前安装过 python3 导致安装后输入 python3 没有找到命令,可以尝试brew link --overwrite python3重新链接
pip 安装pip3 install Appium-Python-Client
# python3 -> pip3
# python -> pip
详细信息:https://github.com/appium/python-client
安装 JDK
brew tap caskroom/versions
brew cask install java8
使用 Maven 进行依赖
<dependency>
  <groupId>io.appium</groupId>
  <artifactId>java-client</artifactId>
  <version>5.0.0-BETA7</version>
  <scope>test</scope>
</dependency>
详细信息:https://github.com/appium/java-client
包含了记录日志的idevicesyslog和端口转发的iProxy、usbmuxd
brew install libimobiledevice --HEAD #和iOS手机通讯使用
brew install ideviceinstaller # 安装app使用
在 iOS10 需要使用 ios-deploy
cnpm install -g ios-deploy
对真机需要xcpretty
gem install xcpretty
gem 安装速度慢可以更换镜像源
gem sources --add https://gems.ruby-china.org/ --remove https://rubygems.org/
不配置会出现xcodebuild exited with code '65' and signal 'null'错误
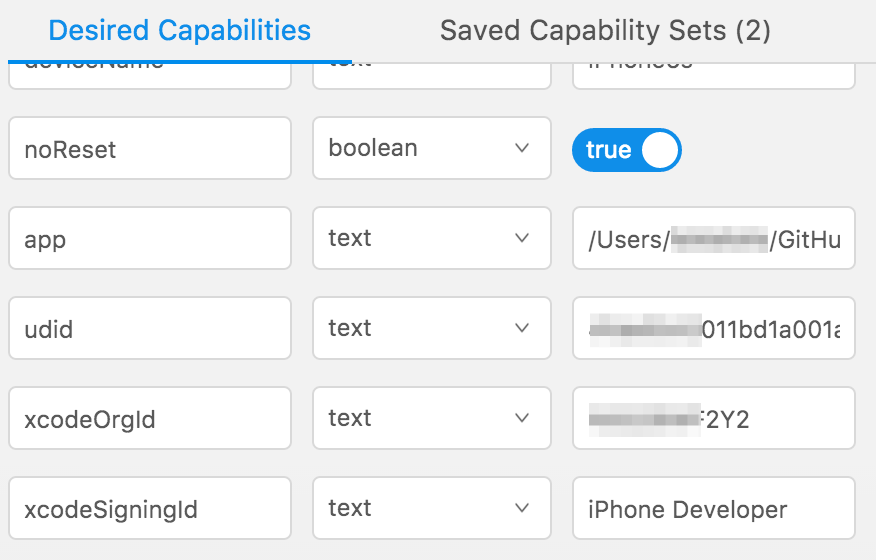
AppiumDesktop 中加入 xcodeOrgId 和 xcodeSigningId 字段
TeamID 在 https://developer.apple.com/account/ 里左侧的 Member ship 中找到
需要 xcodeOrgId 和 xcodeSigningId 写在 desired capabilities 中
{
      "xcodeOrgId": "<Team ID>",
      "xcodeSigningId": "iPhone Developer"
 }
Team ID 在 https://github.com/developer.apple.com/account 中的 Membership
[XCUITest] Using WDA path: '/usr/local/lib/node_modules/appium/node_modules/.2.23.1@appium-xcuitest-driver/WebDriverAgent'
WebDriverAgent 的BundleID ,原来是com.facebook.WebDriverAgentLib,我建议把facebook改为你的名字或公司的名字,这里还有个坑,改完这个之后发现还是提示有错误,最后在Build Settings里的Product Bundle Identifier里再修改一下。
点击上面菜单栏的 Product -> Test 运行
第一次运行会提示没有权限,打开真机上的设置 App,通用 -> 描述文件与设备管理,找到你的邮箱,选择信任,再继续执行 test,成功启动后就说明可以了,执行完毕后点击停止。
没有了,打开 appium 测试吧
从 https://github.com/facebook/WebDriverAgent 克隆, 执行 ./Scripts/bootstrap.sh 命令, 然后打开项目进行签名,
执行方式
- 接着点击上面菜单栏的Product --> test
- xcodebuild -project WebDriverAgent.xcodeproj -scheme WebDriverAgentRunner -destination id='udid' test
# udid 可以使用命令 idevice_id -l 获取
使用 AppiumDesktop
app-inspector
# macaca-cli
npm install macaca-cli -g
# macaca doctor
macaca doctor
# app-inspector
npm install app-inspector -g
# 使用
app-inspector -u 'udid'
如果你运行官方的 TestApp 示例,可能会爆出 253 错误,这时需要对测试 App 重新 build(需要源代码)
project
xcodebuild [-project projectname] [-target targetname ...] [-configuration configurationname]
            [-sdk [sdkfullpath | sdkname]] [buildaction ...] [setting=value ...]
            [-userdefault=value ...]
workspace
xcodebuild -workspace workspacename -scheme schemename [-destination destinationspecifier]
            [-destination-timeout value] [-configuration configurationname]
            [-sdk [sdkfullpath | sdkname]] [buildaction ...] [setting=value ...]
            [-userdefault=value ...]
示例
# xcodebuild -project RobotCalibration.xcodeproj -target RobotCalibration -sdk iphoneos -configuration development
platformVersionbundleIdudid 可以设置为 auto
app 属性也可以调起 App,但需要设置 bundleId
automationName 为 Automation ,其它为 XCUITest
切换 Xcode 版本
sudo xcode-select -s #path /Applications/Xcode.app/
查看设备 udid
idevice_id -l
# 或者使用 ideviceinfo 可以在返回的数据中找到 udid
Xcode7.3.1
iOS8 中需要确定设置中的开发者选项里的 UIAutomation 为打开状态
测试前查看设定的 App 目录是否正确
接着就可以打开 Appium,和测试用例了
如果不牵扯自动安装和卸载 App,可以先手动安装 App 到目标设备,再进行测试
前提需要 ideviceinstaller
ideviceinstaller -u <UDID of device> -i <path of .app/.ipa>
[Instruments] Error launching instruments: Instruments crashed on startup
可能是 App 路径不正确
需要测试模拟器进行此项,使用 npm 安装
cnpm install -g authorize-ios
安装完毕后运行
sudo authorize-ios
注意:需要在安装完新的 Xcode 后再次执行
确认之前authorize-ios运行成功
下载 jenkins
wget https://jenkins.ci.cloudbees.com/jnlpJars/jenkins-cli.jar
接下来定义一个 Jenkins 的 LaunchAgent 来自动登录,请确保其不包含SessionCreate 或 Userkey 防止测试运行
java -jar jenkins-cli.jar \
 -s https://team-appium.ci.cloudbees.com \
 -i ~/.ssh/id_rsa \
 on-premise-executor \
 -fsroot ~/jenkins \
 -labels osx \
 -name mac_appium
最后设置并启动
sudo nano /Library/LaunchAgents/com.jenkins.ci.plist
<?xml version="1.0" encoding="UTF-8"?>
<!DOCTYPE plist PUBLIC "-//Apple//DTD PLIST 1.0//EN" "http://www.apple.com/DTDs/PropertyList-1.0.dtd">
<plist version="1.0">
<dict>
    <key>Label</key>
    <string>com.jenkins.ci</string>
    <key>ProgramArguments</key>
    <array>
        <string>java</string>
        <string>-Djava.awt.headless=true</string>
        <string>-jar</string>
        <string>/Users/appium/jenkins/jenkins-cli.jar</string>
        <string>-s</string>
        <string>https://instructure.ci.cloudbees.com</string>
        <string>on-premise-executor</string>
        <string>-fsroot</string>
        <string>/Users/appium/jenkins</string>
        <string>-executors</string>
        <string>1</string>
        <string>-labels</string>
        <string>mac</string>
        <string>-name</string>
        <string>mac_appium</string>
        <string>-persistent</string>
    </array>
    <key>KeepAlive</key>
    <true/>
    <key>StandardOutPath</key>
    <string>/Users/appium/jenkins/stdout.log</string>
    <key>StandardErrorPath</key>
    <string>/Users/appium/jenkins/error.log</string>
</dict>
</plist>
Finally set the owner, permissions, and then start the agent.
sudo chown root:wheel /Library/LaunchAgents/com.jenkins.ci.plist
sudo chmod 644 /Library/LaunchAgents/com.jenkins.ci.plist

launchctl load /Library/LaunchAgents/com.jenkins.ci.plist
launchctl start com.jenkins.ci
$HOME/Library/Logs/CoreSimulator/
/Library/Caches/com.apple.dt.instruments/
$HOME/Library/Developer/Xcode/DerivedData/
以上目录下的所有文件
brew install maven
下载 JDK
通过 Android Studio 下载 Android SDK,并设置目录
macOS 设置 JavaHome 和 Android SDK 目录,将下列代码放置到用户目录下的 .bashrc 或 .zshrc 中
# 使用Android Studio安装后的路径
# android sdk
export ANDROID_HOME=~/Library/Android/sdk
export PATH="$HOME/.yarn/bin:$PATH"
# java_home
export JAVA_HOME=$(/usr/libexec/java_home)
export PATH=$JAVA_HOME/bin:$PATH
export CLASS_PATH=$JAVA_HOME/lib

# adb等
export PATH=${PATH}:$ANDROID_HOME/tools:$ANDROID_HOME/platform-tools
export PATH=${PATH}:$ANDROID_HOME/tools/bin
appium-doctor
capabilities写清楚platformVersion
appPackage
appActivity
