Macaca macaca+testNG+maven+ReportNG 项目下如何生成美观的测试报告并同时多机执行脚本
使用 macaca 做自动化已经有一段时间了,一直摸索前进,在此社区找了不少好资料。但很少发言。早就有打算总结点东西回馈给社区给我带来的帮助。由于种种原因没有付诸行动。...................................好吧不扯了,回归正题。如何在 macaca 跑完之后自动导出一份比较满意的报告。(好些童鞋私我这个问题,求老司机传授经验。)直接配置步骤走起。。。
配置步骤
我这里是 maven 项目,至于怎么创建 maven 项目,应该都知道,不细说了。(不会的童鞋请自行百度)
1.先来看看官方给的例子的 pom 文件
以下解析都直接在文件内加了对应的注释。
<project xmlns="http://maven.apache.org/POM/4.0.0" xmlns:xsi="http://www.w3.org/2001/XMLSchema-instance"
    xsi:schemaLocation="http://maven.apache.org/POM/4.0.0 http://maven.apache.org/maven-v4_0_0.xsd">
<!-- 项目信息-->
    <modelVersion>4.0.0</modelVersion>
    <groupId>macaca.webdriver.client</groupId>
    <artifactId>macacaclient</artifactId>
    <packaging>jar</packaging>
    <version>1.0.38</version>
    <name>macacaclient</name>
    <url>http://maven.apache.org</url>
    <dependencies>
<!--macaca所需要的依赖包-->
        <dependency>
            <groupId>org.apache.httpcomponents</groupId>
            <artifactId>httpclient</artifactId>
            <version>4.5.2</version>
        </dependency>
        <dependency>
            <groupId>com.alibaba</groupId>
            <artifactId>fastjson</artifactId>
            <version>1.2.15</version>
        </dependency>
<!--官方用的是junit,我们要用testng的报告,同时以后多机测试也会用到testng的多线程配置,所以换掉,换成testng-->
    <!--注释掉   <dependency>
            <groupId>junit</groupId>
            <artifactId>junit</artifactId>
            <version>4.12</version>
            <scope>test</scope>
        </dependency>
       -->
        <dependency>
            <groupId>org.hamcrest</groupId>
            <artifactId>hamcrest-library</artifactId>
            <version>1.2</version>
            <scope>test</scope>
        </dependency>
        <dependency>
            <groupId>com.github.tomakehurst</groupId>
            <artifactId>wiremock</artifactId>
            <version>2.3.1</version>
            <scope>test</scope>
        </dependency>
    </dependencies>
    <distributionManagement>
      <repository>
          <id>central</id>
          <url>https://api.bintray.com/maven/xudafeng/maven/macacaclient/;publish=1;override=1;</url>
      </repository>
    </distributionManagement>
</project>
2.对官方的 pom 文件进行修改添加我们需要的依赖。
主要是为了加入 repertng 插件:reportng 是一个简单的 testng 的生成 html 格式报告插件,是为了取代 testng 默认的 html report.tesng 默认的 report 不容易理解,也不太美观。reportng 提高简单的,多彩的测试结果的视图
<!--把官方的junit换成testng-->
        <dependency>
            <groupId>org.testng</groupId>
            <artifactId>testng</artifactId>
            <version>6.9.10</version>
            <scope>test</scope>
        </dependency>
<!-- reportNg的依赖包 关联testNg ,这个包的主要作用就是对testng原生报告的美化-->
        <dependency>
            <groupId>org.uncommons</groupId>
            <artifactId>reportng</artifactId>
            <version>1.1.4</version>
            <scope>test</scope>
            <exclusions>
                <exclusion>
                    <groupId>org.testng</groupId>
                    <artifactId>testng</artifactId>
                </exclusion>
            </exclusions>
        </dependency>

            <!-- 添加插件,添加ReportNg的监听器,修改最后的TestNg的报告。这个必须要有,而且里面配置了一个参数{xmlFileName},这个是读取res目录下面配置文件用的,也就是用res目录中的配置文件控制脚本执行以及传递端口,udid等信息。 -->
            <plugin>
                <groupId>org.apache.maven.plugins</groupId>
                <artifactId>maven-surefire-plugin</artifactId>
                <version>2.17</version>
                <configuration>
                    <source>1.8</source>  <!--源代码编译版本和目标平台编译版本,不写也可。-->
                    <target>1.8</target>
                    <suiteXmlFiles>
                        <suiteXmlFile>res/${xmlFileName}</suiteXmlFile>
                    </suiteXmlFiles>
                    <properties>
                        <property>
                            <name>usedefaultlisteners</name>
                            <value>false</value>
                        </property>
                        <property>
                            <name>listener</name>
                            <value>org.uncommons.reportng.HTMLReporter,org.uncommons.reportng.JUnitXMLReporter</value>
                        </property>
                    </properties>
                    <workingDirectory>target/</workingDirectory> <!--报告生成之后会在maven项目的target路径下面,打开index.html就可以查看-->
                    <forkMode>once</forkMode><!--生成规则-->
                    <argLine>-Dfile.encoding=UTF-8</argLine>
                </configuration>
            </plugin>
以上添加了 testng 报告生成相关的插件和依赖,如果没有语法错误,应该可以生成测试报告了。当然,这里还缺一个参数,就是我们在 pom 文件中配置的读取 res 目录下的文件来控制测试执行。这个参数如果传递过来呢。在 pom 配置文件中加入:
3.添加指定文件读取
testng.xml 文件(叫什么随意),主要是用来控制脚本执行的。文件内可以配置不同的执行方式,还可以传递参数。等。
<properties>
        <project.build.sourceEncoding>UTF-8</project.build.sourceEncoding>
        <xmlFileName>testng.xml</xmlFileName><!--res目录下的文件名。-->
        <project.reporting.outputEncoding>UTF-8</project.reporting.outputEncoding>
    </properties>
到此,我想整个 pom 文件大概是这样的。
<project xmlns="http://maven.apache.org/POM/4.0.0" xmlns:xsi="http://www.w3.org/2001/XMLSchema-instance"
    xsi:schemaLocation="http://maven.apache.org/POM/4.0.0 http://maven.apache.org/xsd/maven-4.0.0.xsd">
    <modelVersion>4.0.0</modelVersion>
    <!-- maven 项目信息 -->
    <groupId>xxxxxxx.andorid</groupId>
    <artifactId>xxxxxxxx</artifactId>
    <version>0.0.1-SNAPSHOT</version>
    <packaging>jar</packaging>
    <name>xxxxxxx</name>
    <url>http://maven.apache.org</url>
    <!-- maven 参数配置,这里引用不同的testng.xml -->
    <properties>
        <project.build.sourceEncoding>UTF-8</project.build.sourceEncoding>
        <xmlFileName>testng.xml</xmlFileName>
        <project.reporting.outputEncoding>UTF-8</project.reporting.outputEncoding>
    </properties>
    <repositories>
      <repository>
        <id>jcenter</id>
        <name>bintray</name>
        <url>http://jcenter.bintray.com</url>
   </repository>
 </repositories>
    <dependencies>
        <dependency>
            <groupId>org.testng</groupId>
            <artifactId>testng</artifactId>
            <version>6.9.10</version>
            <scope>test</scope>
        </dependency>
        <!-- 数据库Driver依赖 -->
        <dependency>
            <groupId>mysql</groupId>
            <artifactId>mysql-connector-java</artifactId>
            <version>5.1.13</version>
        </dependency>
        <!-- dom4j xml解析依赖 -->
        <dependency>
            <groupId>dom4j</groupId>
             <artifactId>dom4j</artifactId>
            <version>1.6.1</version>
        </dependency>
        <!-- 依赖reportNg 关联testNg -->
        <dependency>
            <groupId>org.uncommons</groupId>
            <artifactId>reportng</artifactId>
            <version>1.1.4</version>
            <scope>test</scope>
            <exclusions>
                <exclusion>
        <groupId>org.testng</groupId>
                <artifactId>testng</artifactId>
                </exclusion>
            </exclusions>
        </dependency>
        <!-- 依赖Guice -->
        <dependency>
            <groupId>com.google.inject</groupId>
            <artifactId>guice</artifactId>
            <version>3.0</version>
            <scope>test</scope>
        </dependency>
        <!-- macaca相关远程资源库 -->
        <dependency>
        <groupId>macaca.webdriver.client</groupId>
            <artifactId>macacaclient</artifactId>
            <version>1.0.38</version>
        </dependency>
        <dependency>
            <groupId>com.alibaba</groupId>
            <artifactId>fastjson</artifactId>
            <version>1.2.15</version>
        </dependency>
        <dependency>
            <groupId>org.apache.httpcomponents</groupId>
            <artifactId>httpclient</artifactId>
            <version>4.5.2</version>
        </dependency>
        <dependency>
            <groupId>log4j</groupId>
            <artifactId>log4j</artifactId>
            <version>1.2.17</version>
        </dependency>
        <dependency>
            <groupId>junit</groupId>
            <artifactId>junit</artifactId>
            <version>4.12</version>
            <scope>test</scope>
        </dependency>
        <dependency>
            <groupId>org.hamcrest</groupId>
            <artifactId>hamcrest-library</artifactId>
            <version>1.2</version>
            <scope>test</scope>
        </dependency>
    </dependencies>
    <build>
        <plugins>
            <!-- 添加插件,添加ReportNg的监听器,修改最后的TestNg的报告 -->
    <plugin>
        <groupId>org.apache.maven.plugins</groupId>
                <artifactId>maven-surefire-plugin</artifactId>
                <version>2.17</version>
                <configuration>
                    <source>1.8</source>
                    <target>1.8</target>
                    <suiteXmlFiles>
        <suiteXmlFile>res/${xmlFileName}</suiteXmlFile>
                    </suiteXmlFiles>
                    <properties>
                        <property>
                            <name>usedefaultlisteners</name>
                            <value>false</value>
                        </property>
                        <property>
                            <name>listener</name>
                            <value>org.uncommons.reportng.HTMLReporter,org.uncommons.reportng.JUnitXMLReporter</value>
                        </property>
                    </properties>
                    <workingDirectory>target/</workingDirectory>
                    <forkMode>once</forkMode>
                    <argLine>-Dfile.encoding=UTF-8</argLine>
                </configuration>
            </plugin>
        </plugins>
    </build>
</project>
当然,这个是我直接复制我自己项目的 pom 文件,其中还有些你可能没有到的依赖,不添加也行。(比如 sysql 数据库连接依赖,xml 文件解析依赖等。)
这样,pom 文件配置好了,按照里面配置要求,在项目中新建个 res 文件夹,然后新建一个 testng 的 xml 文件。
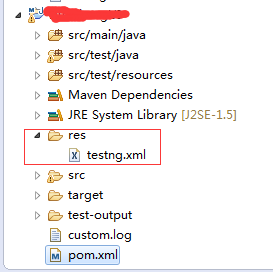
4. 在 testng 文件中写入执行逻辑控制脚本执行
<?xml version="1.0" encoding="UTF-8"?>
<!DOCTYPE suite SYSTEM "http://testng.org/testng-1.0.dtd">
<suite name="xxxxxxxxxx1.2.0版本测试报告" parallel="tests" thread-count="2">
    <test name="4.x修改密码">
        <parameter name="port" value="3456" />
        <parameter name="udid" value="192.168.88.101:5555" />
        <classes>
            <class name="huasheng.UITest.TestCase.XiuGaiMiMaTest" />
        </classes>
    </test>

    <test name="6.x修改密码">
            <parameter name="port" value="3457" />
            <parameter name="udid" value="192.168.88.102:5555" />
        <classes>
            <class name="huasheng.UITest.TestCase.XiuGaiMiMaTest" />
        </classes>
    </test>
</suite>
这里必须对这个文件做一下解释,这个文件是如何控制 一个脚本(或者多个)脚本,在不同的手机上执行的。
首先,根据项目要求,要实现同一套脚本在不同版本的机器上并行测试,我首先就想到了 testng 的多线程。因为 testng 本身就提供了很多方式来实现并行测试。
具体方式,我就不一一细表了,以前看过一个写的很细的帖子,大家可以参考看看。http://www.importnew.com/14508.html(这样贴不知道会不会违反社区规则)
我这里只对上面这个 testng 文件做一下解释,为什么要配置成那样。
这里不需要过多解释了,大意就是启动 2 个线程以 test 套件为单位来执行整个 suite
参数传递,这两个参数是传给初始化方法 setUP 对连接请求进行初始化的。稍后我讲贴出具体怎么传参过程和初始化方法的语法、
这里值得注意的是:
传输都配置在 test 套件内,这样的目的是为了,每个 classes 类都能使用不同的参数去参数化,这样,当两个线程去执行 2 个 test 套件时,因为端口不一样和 udid 不一样,这样才能各行其道,相互不干扰。当然,启动 2 个 macaca 服务是必须的。(macaca server --verbose 默认第一个启动的端口是 3456,第二个默认 3457 。)连接好两个手机也是必须的。
每个测试类对应一个 test 套件,这样对 test 套件定义一个中文名,生成的报告可读性更好,而且,如果一个测试类里面如果包含多个方法,这样生成出的报告会有目录层次。结构清晰,定位问题也方便。
test 套件内,可以调用同一个(或者不同的)测试类同时在不同的手机上执行,相互并不会干扰,唯一要考虑的就是测试类里面用到的参数。因为同样的参数同一个时间在不同手机上操作 APP,可能业务上不允许。这个应该能理解。比如:很多系统不允许同一账号同时在不同的端口登入。(这句话有点绕。我故意标注一下。)
5. 测试类内部如何获取参数
 String udid,port;  //////---------------定义这两个参数

    @BeforeTest
    @Parameters({ "port", "udid" })  /////-------从testng文件读取值
      public void getpara(String port, String udid) {
          this.port = port;
          this.udid = udid;
      }
@BeforeClass
    public void setUp() throws Exception {


        Reporter.log("|PORT IS "+port+"|UDID is "+udid);
        Logger logger = Logger.getLogger(getClass());
        JSONObject porps = new JSONObject();
        porps.put("autoAcceptAlerts", true);
        porps.put("javascriptEnabled", true);

      //porps.put("deviceName", "iPhone 6s"); //ios 需要指定设备名
        porps.put("platformName", "Android"); // Android or ios
        porps.put("version", ""); //系统版本 ios需要指定系统版本
       porps.put("udid", udid); //ios udid唯一设备识别符
      //porps.put("bundleId", "zx.ios-app-bootstrap"); //ios bundleId App应用标识符
      //porps.put("app", "/jk/workspace/huashengandroid/app/huasheng-stock-local-0909.apk");
        porps.put("package", "com.huasheng.stock");//appPackage
        porps.put("activity", ".Loading");//aappActivity
        JSONObject desiredCapabilities = new JSONObject();
        desiredCapabilities.put("desiredCapabilities", porps);
        desiredCapabilities.put("host", "127.0.0.1"); // custom remote host
        desiredCapabilities.put("port", Integer.parseInt(port)); // custom remote port
        if(port.equals("3457")){
            driver.sleep(1000);
        }
        driver.initDriver(desiredCapabilities);
}
对这两个方法简单做一下解析:首先设置取值方法为@BeforeTest,setUp 初始化方法为@Beforeclass, 这样。当这个脚本执行时,看了上面那个连接那篇文章的同学应该就清楚。
####
- 一个 suite(套件) 由一个或多个测试组成。
- 一个 test(测试) 由一个或多个类组成
- 一个 class(类) 由一个或多个方法组成。 ####
- @BeforeSuite/@AfterSuite 在某个测试套件开始之前/在某个套件所有测试方法执行之后
- @BeforeTest/@AfterTest 在某个测试开始之前/在某个测试所有测试方法执行之后
- @BeforeClass/@AfterClass 在某个测试类开始之前/在某个类的所有测试方法执行之后
- @BeforeMethod/@AfterMethod 在某个测试方法之前/在某个测试方法执行之后
-
@BeforeGroup/@AfterGroup 在某个组的所有测试方法之前/在某个组的所有测试方法执行之后
而,我们刚在 testng 文件中定义了 2 个 test(测试)套件。并且参数都定义在 test 测试套件内,因此,取值方法 getpara() 要在 test 执行前来执行。而且必须在 setUp 方法执行前执行。所以,才有将 getpara()定义成@BeforeTest 而 setUp() 定义成@BeforeClass 。这样才能保证先取值,在初始化,再执行@test具体用例的步骤。这个步骤不能乱。
另外有些同学可能会说直接传值给 setUp 方法就好了,比如这样:
@Parameters({"port","udid"})
@BeforeClass
public void setUp(String port, String udid) throws Exception {
    // platform: android or ios
    String platform = "android";
    JSONObject porps = new JSONObject();
    porps.put("platformName", platform);
    porps.put("udid", udid);
    JSONObject desiredCapabilities = new JSONObject();
    desiredCapabilities.put("host", "127.0.0.1"); // custom server  host
    desiredCapabilities.put("port", Integer.parseInt(port)); // custom server  port
    desiredCapabilities.put("desiredCapabilities", porps);
    if(port.equals("3457")){
        driver.sleep(1000);
    }
    driver = driver.initDriver(desiredCapabilities);
}
这样也是可以的,前提是,你需要测试的类(testng 里面配置的要执行的 classes)里面有 setUp 方法。我之所以不这样是因为我把初始化方法独立成一个基础类了。所有测试方法都是继承的这个基础类。XiuGaiMiMaTest.class 里面没有在写 setUp 方法。这也会灵活点。
6. 运行测试,查看报告结果
配置好了 pom 文件和 testng 文件之后,只要你的 macaca 环境没有问题,那么直接执行 maven test 命令或者右键项目 run as ---Maven test 执行。执行之后项目下面会有个 target 文件夹,找到路径 target\surefire-reports\html 里面,打开 index.html 就报告结果了。

左边的是导航栏,点开左边的回归测试第一轮,会显示具体执行的用例。其实理解起来就是,左边每行代表一个 test 套件。
点开之后代表的是测试套件里面配置的类,以及具体的@test标记的测试方法。

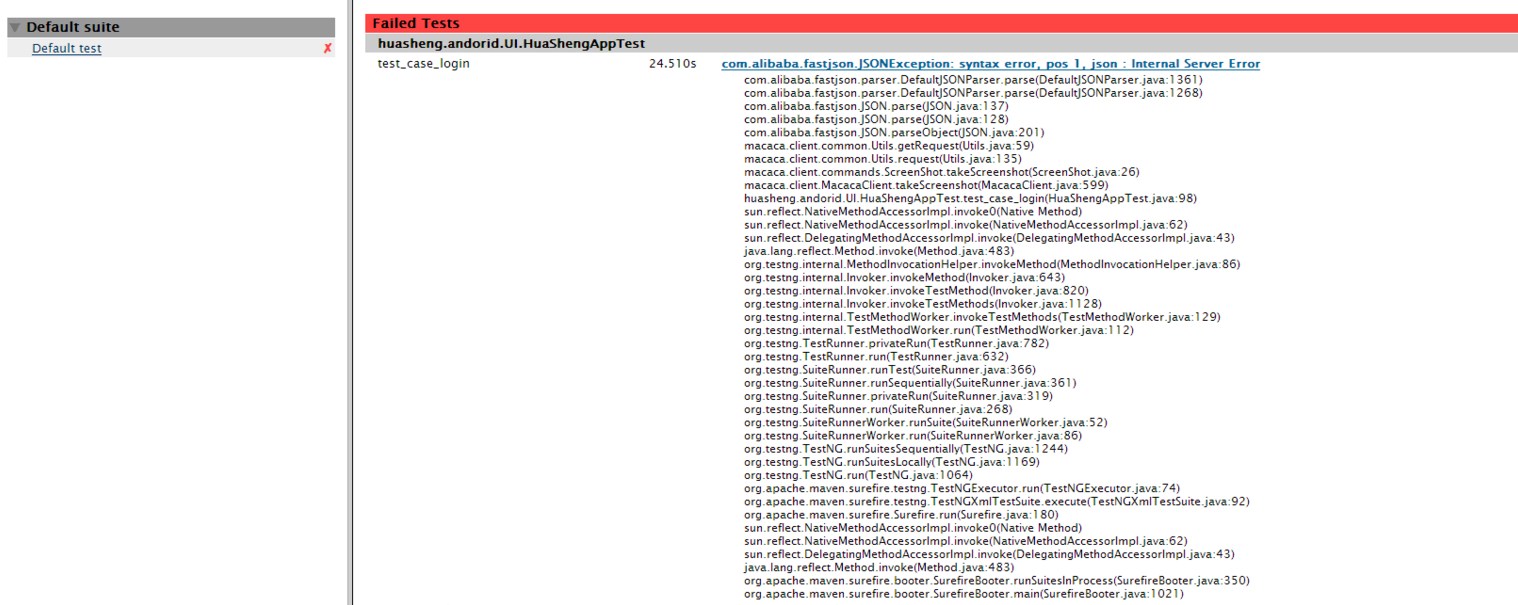
其实我一个 test 套件里只配置了一个类,但是一个测试类里面包含了对应业务的多个方法,所以右边展示的是具体的测试方法执行情况。(截图是 2 个多月前试验的结果报告。)如果有报错的话,则会展示成

点开这个错误可以看到具体的详情
除此之外,还可以对每个具体的测试方法加一点说明,以方便阅读,知道哪个测试方法是测试什么业务,什么测试项的。
@Test
public void TestCase_DengRu_LoginWithoutUserName() throws Exception {
    Reporter.log("测试项:空账号登入");
    //校验欢迎页面是否存在:com.xxxxxxxx.xxxxxx:id/guideItemBody
    login.huaDong(driver);

    driver
        .elementById(inputUserID);
        login.allClear(driver);
        //直接输入任意密码

        driver
        .elementById(inputPasswordID)
        .clear()
        .sendKeys("a123456")
        .sleep(3000)
        //点击登入按钮
        .elementById(loginBtn)
        .click()
        .sleep(1000);
        //截图验证空账号登入提示
        //ResultGenerator.findElementFail(targetElement);
        driver.takeScreenshot()
            .saveScreenshot(ShotPath+"空账号登入.png")
            .sleep(5000);
        jspE.compareImage(ShotPath+"空账号登入.png", ShotPathExpress+"空账号登入.png");
}
Reporter.log("测试项:空账号登入");这一行代码,会直接把输出项输出至报告栏。像这样。(大家千万不要以为这个是报错的提示信息,只是说明这个测试方法测试的业务,例子是测试注册,但是输入的手机号已经被注册过的情况。)

