从上面的调试信息我们可以看到 AppiumBootstrap.jar 是通过 uiautomator 这个命令作为一个测试包,它指定的测试类是 io.appium.android.bootstrap.Bootstrap 这个类。大家如果看了本人之前的文章《UIAutomator 源码分析之启动和运行》的话应该对 uiautomator 的启动原理很熟悉了。
通过前面的两篇文章《Appium Android Bootstrap 源码分析之控件 AndroidElement》和《Appium Android Bootstrap 源码分析之命令解析执行》我们了解到了 Appium 从 pc 端发送过来的命令是如何定位到命令相关的控件以及如何解析执行该命令。那么我们剩下的问题就是 bootstrap 是怎么启动运行的,我们会通过本篇文章的分析来阐述这个问题,以及把之前学习的相关的类给串起来看它们是怎么互动的。
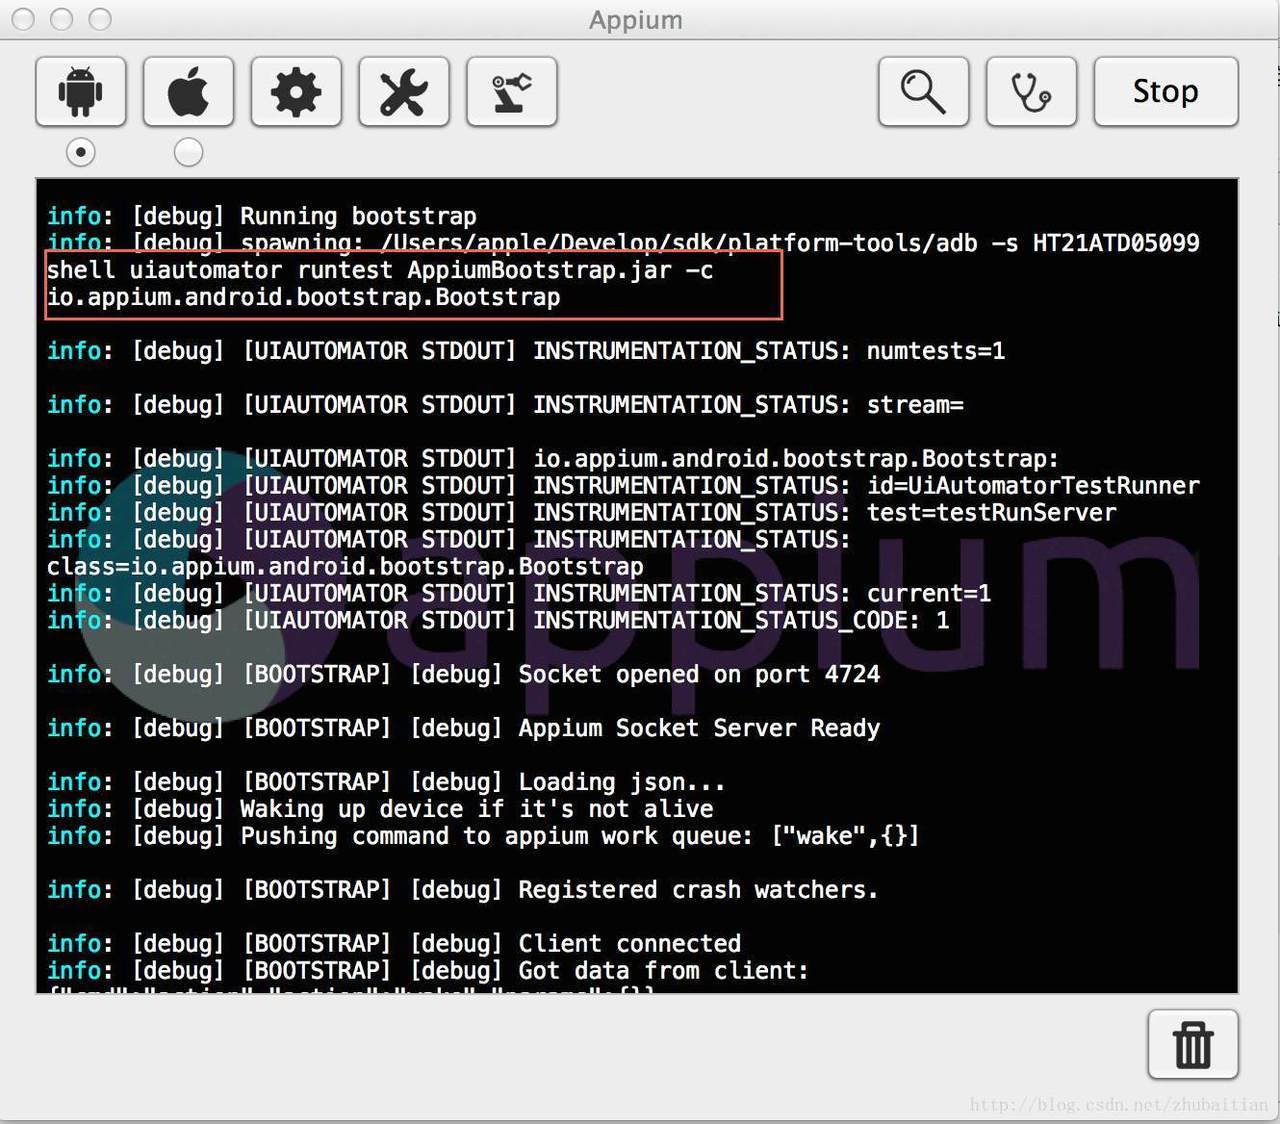
Bootstrap 的启动是由 Appium 从 pc 端通过 adb 发送命令来控制的:
从上面的调试信息我们可以看到 AppiumBootstrap.jar 是通过 uiautomator 这个命令作为一个测试包,它指定的测试类是 io.appium.android.bootstrap.Bootstrap 这个类。大家如果看了本人之前的文章《UIAutomator 源码分析之启动和运行》的话应该对 uiautomator 的启动原理很熟悉了。
启动命令: uiautomator runtest AppiumBootstrap.jar -c io.appium.android.bootstrap.Bootstrap
那么我们进入到 Bootstrap 这个类看下它是怎么实现的:
public class Bootstrap extends UiAutomatorTestCase {

  public void testRunServer() {
    SocketServer server;
    try {
      server = new SocketServer(4724);
      server.listenForever();
    } catch (final SocketServerException e) {
      Logger.error(e.getError());
      System.exit(1);
    }

  }
}
从代码中可以看到,这个类是继承与 UiAutomatorTestCase 的,这样它就能被 uiautomator 作为测试用例类来执行了。
这个类只有一个测试方法 testRunServer,所有事情发生的源头就在这里:
创建一个 socket 服务器并监听 4724 端口,Appium 在 pc 端就是通过连接这么端口来把命令发送过来的循环监听获取 Appium 从 pc 端发送过来的命令数据,然后进行相应的处理
我们先看下 SocketServer 的构造函数:
public SocketServer(final int port) throws SocketServerException {
  keepListening = true;
  executor = new AndroidCommandExecutor();
  try {
    server = new ServerSocket(port);
    Logger.debug("Socket opened on port " + port);
  } catch (final IOException e) {
    throw new SocketServerException(
        "Could not start socket server listening on " + port);
  }

}
它做的第一个事情是先去创建一个 AndroidCommandExecutor 的实例,大家应该还记得上一篇文章说到的这个类里面保存了一个静态的很重要的 action 到命令处理类 CommandHandler 的实例的映射表吧?如果没有看过的请先去看下。
建立好这个静态映射表之后,构造函数下一步就似乎去创建一个 ServerSocket 来给 Appium 从 PC 端进行连接通信了。
Bootstrap 在创建好 socket 服务器后,下一步就是调用 SocketServer 的 listenForever 的方法去循环读取处理 appium 发送出来的命令数据了:
  public void listenForever() throws SocketServerException {
    Logger.debug("Appium Socket Server Ready");
    ...
    try {
      client = server.accept();
      Logger.debug("Client connected");
      in = new BufferedReader(new InputStreamReader(client.getInputStream(), "UTF-8"));
      out = new BufferedWriter(new OutputStreamWriter(client.getOutputStream(), "UTF-8"));
      while (keepListening) {
        handleClientData();
      }
      in.close();
      out.close();
      client.close();
      Logger.debug("Closed client connection");
    } catch (final IOException e) {
      throw new SocketServerException("Error when client was trying to connect");
    }
    ...
}
首先调用 server.accept 去接受 appium 的连接请求,连接上后就去初始化用于读取 socket 的 BufferedReader 和 BufferredWriter 这两个类的实例,最后进入到 handleClicentData 来进行真正的数据读取和处理
private void handleClientData() throws SocketServerException {
   try {
     input.setLength(0); // clear

     String res;
     int a;
     // (char) -1 is not equal to -1.
     // ready is checked to ensure the read call doesn't block.
     while ((a = in.read()) != -1 && in.ready()) {
       input.append((char) a);
     }
     String inputString = input.toString();
     Logger.debug("Got data from client: " + inputString);
     try {
       AndroidCommand cmd = getCommand(inputString);
       Logger.debug("Got command of type " + cmd.commandType().toString());
       res = runCommand(cmd);
       Logger.debug("Returning result: " + res);
     } catch (final CommandTypeException e) {
       res = new AndroidCommandResult(WDStatus.UNKNOWN_ERROR, e.getMessage())
           .toString();
     } catch (final JSONException e) {
       res = new AndroidCommandResult(WDStatus.UNKNOWN_ERROR,
           "Error running and parsing command").toString();
     }
     out.write(res);
     out.flush();
   } catch (final IOException e) {
     throw new SocketServerException("Error processing data to/from socket ("
         + e.toString() + ")");
   }
 }
通过刚才建立的 socket 读取对象去读取 appium 发送过来的数据把获得的的 json 命令字串发送给 getCommand 方法来实例化我们的 AndroidCommand 这个类,然后我们就可以通过这个解析器来获得我们想要的 json 命令项了
private AndroidCommand getCommand(final String data) throws JSONException,
    CommandTypeException {
  return new AndroidCommand(data);
}
调用 runCommand 方法来使用我们在第二节构造 ServerSocket 的时候实例化的 AndroidComandExecutor 对象的 execute 方法来执行命令,这个命令最终会通过上面的 AndroidCommand 这个命令解析器的实例来获得 appium 发送过来的 action,然后根据 map 调用对应的 CommandHandler 来处理命令。而如果命令是控件相关的,比如获取一个控件的文本信息 GetText,处理命令类又会继续去 AndroidElementHash 维护的控件哈希表获取到对应的控件,然后再通过 UiObject 把命令发送出去等等..不清楚的请查看上篇文章
private String runCommand(final AndroidCommand cmd) {
  AndroidCommandResult res;
  if (cmd.commandType() == AndroidCommandType.SHUTDOWN) {
    keepListening = false;
    res = new AndroidCommandResult(WDStatus.SUCCESS, "OK, shutting down");
  } else if (cmd.commandType() == AndroidCommandType.ACTION) {
    try {
      res = executor.execute(cmd);
    } ...
}
通过上面建立的 socket 写对象把返回信息写到 socket 发送给 appium
大家可能奇怪,怎么整个运行流程都说完了,提到了怎么去控件哈希表获取一个控件,但怎么没有看到把一个控件加入到控件哈希表呢?其实大家写脚本的时候给一个控件发送 click 等命令的时候都需要先取找到这个控件,比如:WebElement el = driver.findElement(By.name("Add note")); 这里的 finElement 其实就是一个命令,获取控件并存放到控件哈希表就是由它对应的 CommandHandler 实现类 Find 来完成的。
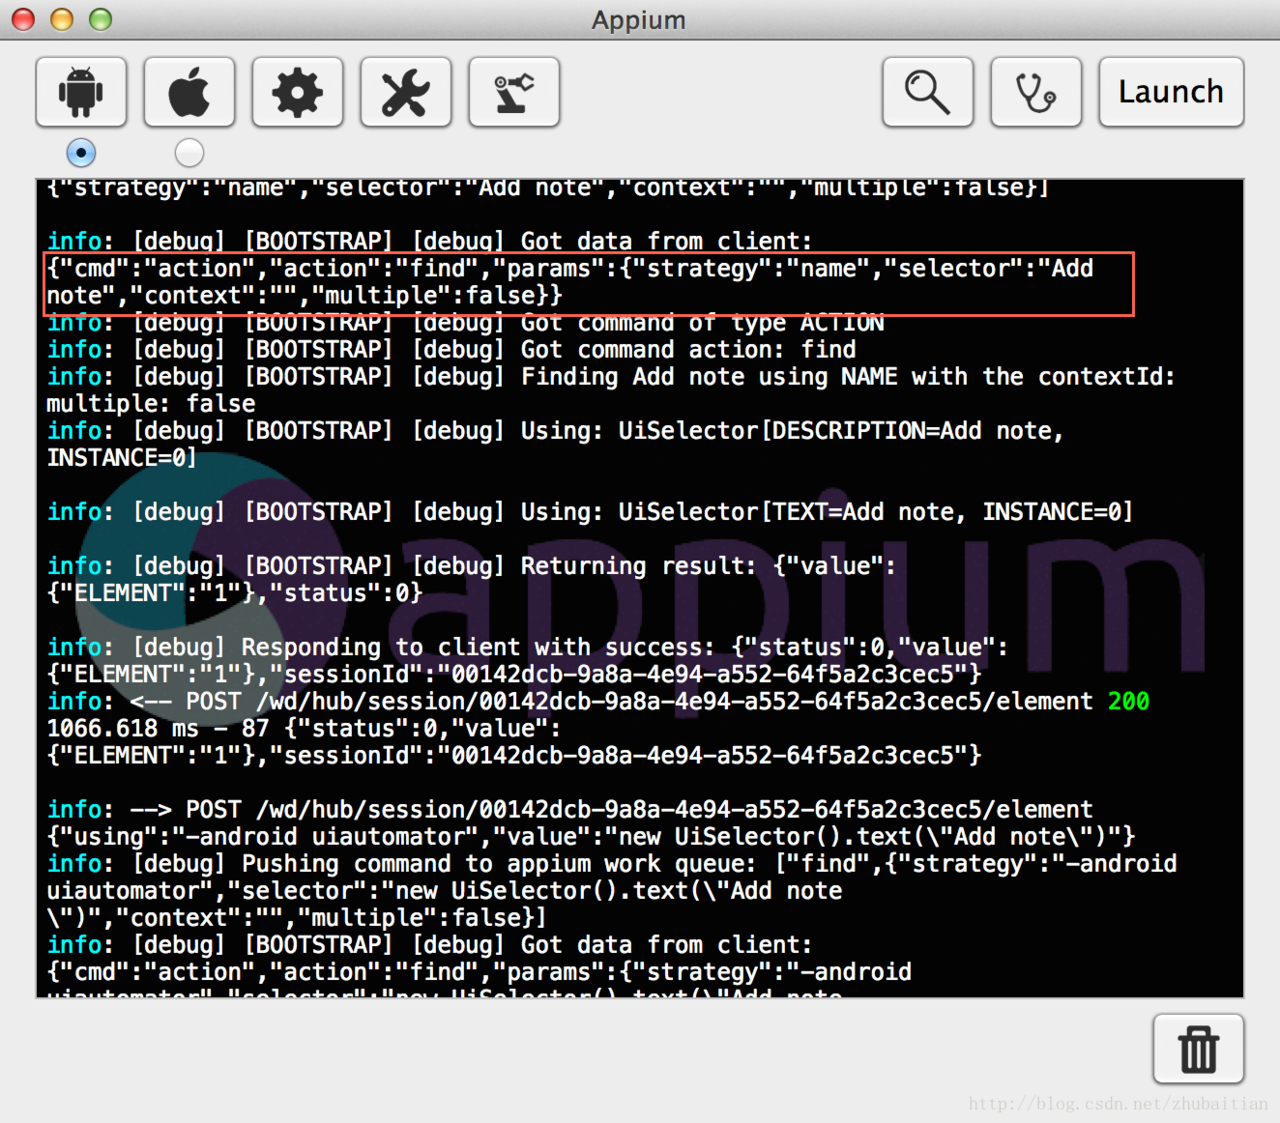
可以看到 appium 过来的命令包含几项,有我们之间碰到过的,也有没有碰到过的:
params
Find 重写父类的 execute 方法有点长,我们把它 breakdown 一步一步来看.
第一步:获得控件的选择子策略,以便跟着通过该策略来建立 uiautomator 的 UiSelector
  public AndroidCommandResult execute(final AndroidCommand command)
      throws JSONException {
    final Hashtable<String, Object> params = command.params();

    // only makes sense on a device
    final Strategy strategy;
    try {
      strategy = Strategy.fromString((String) params.get("strategy"));
    } catch (final InvalidStrategyException e) {
      return new AndroidCommandResult(WDStatus.UNKNOWN_COMMAND, e.getMessage());
    }
   ...
}
appium 支持的策略有以下几种,这其实在我们写脚本中 findElement 经常会指定:
public enum Strategy {
  CLASS_NAME("class name"),
  CSS_SELECTOR("css selector"),
  ID("id"),
  NAME("name"),
  LINK_TEXT("link text"),
  PARTIAL_LINK_TEXT("partial link text"),
  XPATH("xpath"),
  ACCESSIBILITY_ID("accessibility id"),
  ANDROID_UIAUTOMATOR("-android uiautomator");
第二步:获取 appium 发过来的选择子的其他信息如内容,控件哈希表键值,是否是符合选择子等
  public AndroidCommandResult execute(final AndroidCommand command)
      throws JSONException {
    final Hashtable<String, Object> params = command.params();
   ...

    final String contextId = (String) params.get("context");
    final String text = (String) params.get("selector");
    final boolean multiple = (Boolean) params.get("multiple");
   ...
}
第三步,在获得一样的选择子的信息后,就可以根据该选择子信息建立真正的 UiSelector 选择子列表了,这里用列表应该是考虑到今后的复合选择子的情况,当前我们并没有用到,整个列表只会有一个 UiSelector 选择子
  public AndroidCommandResult execute(final AndroidCommand command)
      throws JSONException {
   ...
    try {
      Object result = null;
      List<UiSelector> selectors = getSelectors(strategy, text, multiple);
       ...
      }

   ...
}
第四步:组建好选择子 UiSelector 列表后,Find 会根据你是 findElement 还是 findElement,也就是说是查找一个控件还是多个控件来查找控件,但是无论是多个还是一个,最终都是调用 fetchElement 这个方法来取查找的
  public AndroidCommandResult execute(final AndroidCommand command)
      throws JSONException {
   ...
    try {
      Object result = null;
      List<UiSelector> selectors = getSelectors(strategy, text, multiple);

      if (!multiple) {
        for (final UiSelector sel : selectors) {
          try {
            Logger.debug("Using: " + sel.toString());
            result = fetchElement(sel, contextId);
          } catch (final ElementNotFoundException ignored) {
          }
          if (result != null) {
            break;
          }
        }
      }else {
        List<AndroidElement> foundElements = new ArrayList<AndroidElement>();
        for (final UiSelector sel : selectors) {
          // With multiple selectors, we expect that some elements may not
          // exist.
          try {
            Logger.debug("Using: " + sel.toString());
            List<AndroidElement> elementsFromSelector = fetchElements(sel, contextId);
            foundElements.addAll(elementsFromSelector);
          } catch (final UiObjectNotFoundException ignored) {
          }
        }
        if (strategy == Strategy.ANDROID_UIAUTOMATOR) {
          foundElements = ElementHelpers.dedupe(foundElements);
        }
        result = elementsToJSONArray(foundElements);
      }
   ...
}
而 fetchElement 最终调用的控件哈希表类的 getElements:
private ArrayList<AndroidElement> fetchElements(final UiSelector sel, final String contextId)
    throws UiObjectNotFoundException {

  return elements.getElements(sel, contextId);
}
AndroidElementHash 的这个方法我们在前一篇文章《Appium Android Bootstrap 源码分析之控件 AndroidElement》已经分析过,我们今天再来温习一下.
从 Appium 发过来的控件查找命令大方向上分两类:
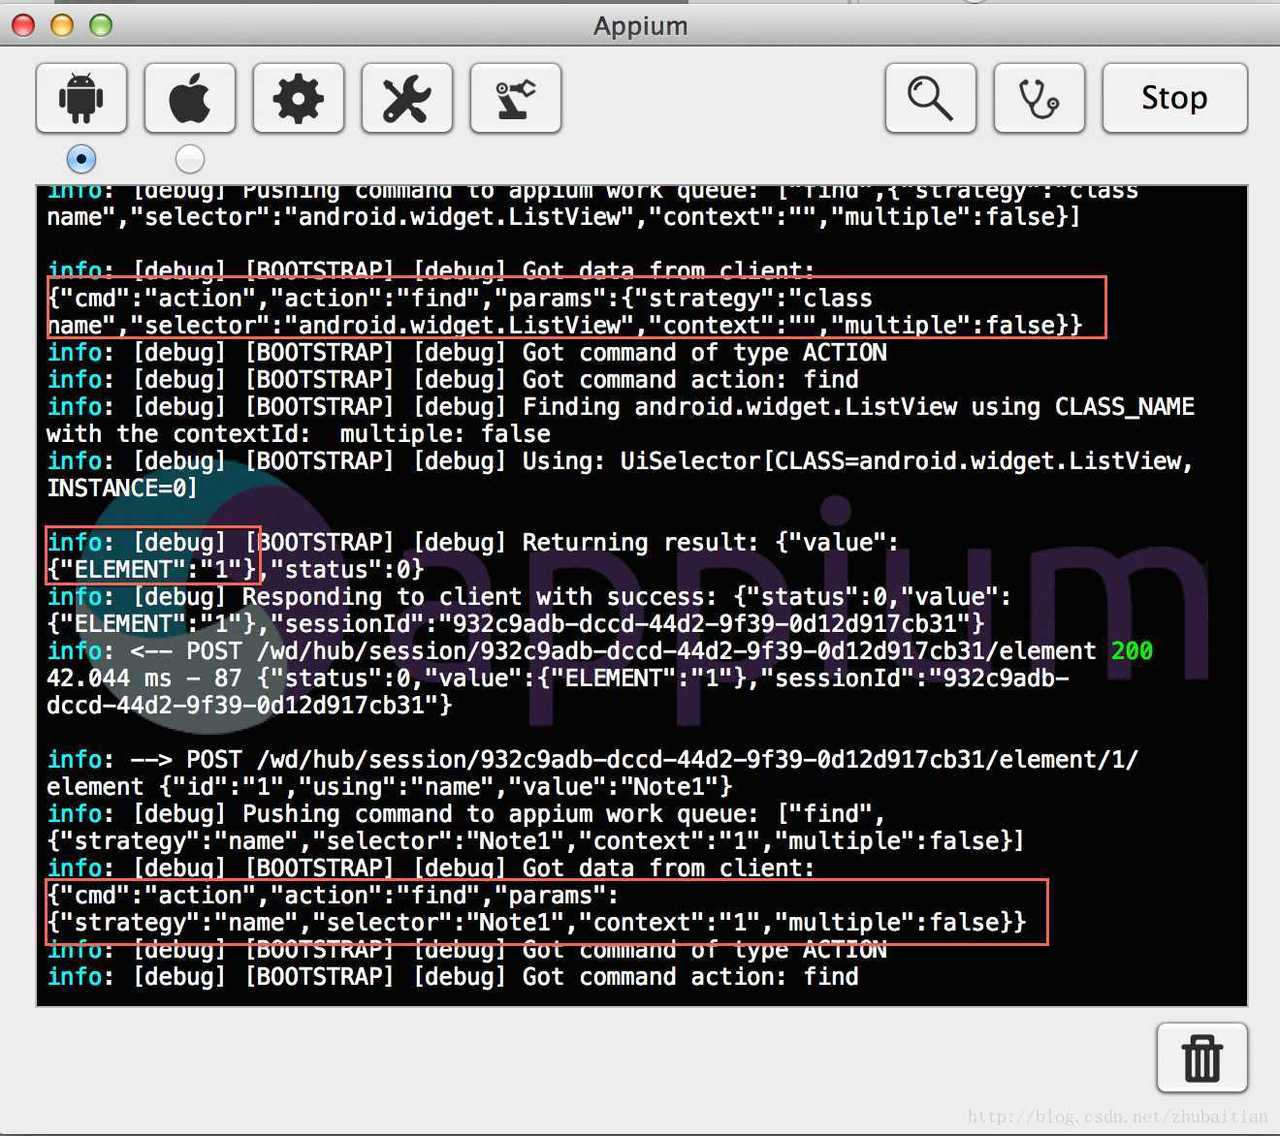 AndroidElementHash 的这个 getElement 命令要做的事情就是针对这两点来根据不同情况获得目标控件的
/**
 * Return an elements child given the key (context id), or uses the selector
 * to get the element.
 *
 * @param sel
 * @param key
 *          Element id.
 * @return {@link AndroidElement}
 * @throws ElementNotFoundException
 */
public AndroidElement getElement(final UiSelector sel, final String key)
    throws ElementNotFoundException {
  AndroidElement baseEl;
  baseEl = elements.get(key);
  UiObject el;

  if (baseEl == null) {
    el = new UiObject(sel);
  } else {
    try {
      el = baseEl.getChild(sel);
    } catch (final UiObjectNotFoundException e) {
      throw new ElementNotFoundException();
    }
  }

  if (el.exists()) {
    return addElement(el);
  } else {
    throw new ElementNotFoundException();
  }
}
如果是第 1 种情况就直接通过选择子构建 UiObject 对象,然后通过 addElement 把 UiObject 对象转换成 AndroidElement 对象保存到控件哈希表
如果是第 2 种情况就先根据 appium 传过来的控件哈希表键值获得父控件,再通过子控件的选择子在父控件的基础上查找到目标 UiObject 控件,最后跟上面一样把该控件通过 addElement 把 UiObject 控件转换成 AndroidElement 控件对象保存到控件哈希表
以下就是把控件添加到控件哈希表的 addElement 方法
public AndroidElement addElement(final UiObject element) {
  counter++;
  final String key = counter.toString();
  final AndroidElement el = new AndroidElement(key, element);
  elements.put(key, el);
  return el;
}
Appium 的 bootstrap 这个 jar 包以及里面的 o.appium.android.bootstrap.Bootstrap 类是通过 uiautomator 作为一个 uiautomator 的测试包和测试方法类启动起来的。
Bootstrap 测试类继承于 uiautomator 可以使用的 UiAutomatorTestCase。bootstrap 会启动一个 socket server 并监听来自 4724 端口的 appium 的连接。
一旦 appium 连接上来,bootstrap 就会不停的去获取该端口的 appium 发送过来的命令数据进行解析和执行处理,然后把结果写到该端口返回给 appium。 bootstrap 获取到 appium 过来的 json 字串命令后,会通过 AndroidCommand 这个命令解析器解析出命令 action,然后通过 AndroidCommandExecutor 的 action 到 CommandHandler 的 map 把 action 映射到真正的命令处理类,这些类都是继承与 CommandHandler 的实现类,它们都要重写该父类的 execute 方法来最终通过 UiObject,UiDevice 或反射获得 UiAutomator 没有暴露出来的 QueryController/InteractionController 来把命令真正的在安卓系统中执行。
appium 获取控件大概有两类,一类是直接通过 Appium/Android Driver 获得,这一种情况过来的 appium 查找 json 命令字串是没有带控件哈希表的控件键值的;另外一种是根据控件的父类控件在控件哈希表中的键值和子控件的选择子来获得,这种情况过来的 appium 查找 json 命令字串是既提供了父控件在控件哈希表的键值又提供了子控件的选择子的。一旦获取到的控件在控件哈希表中不存在,就需要把这个 AndroidElement 控件添加到该哈希表里面
作者:天地会珠海分舵
http://techgogogo.com
http://blog.csdn.net/zhubaitian
