在 iOS 设备上要通过 Appium 执行自动化用例或查看页面元素时,都必须在真机上安装WebDriverAgent
)(点开看介绍)
模拟器上轻松跑,一旦遇到真机,稀奇古怪的问题就来了,整个过程其实没多复杂。本文适应人群:已经配好了 appium 环境,卡在 WebDriverAgent 真机调试中的同学们
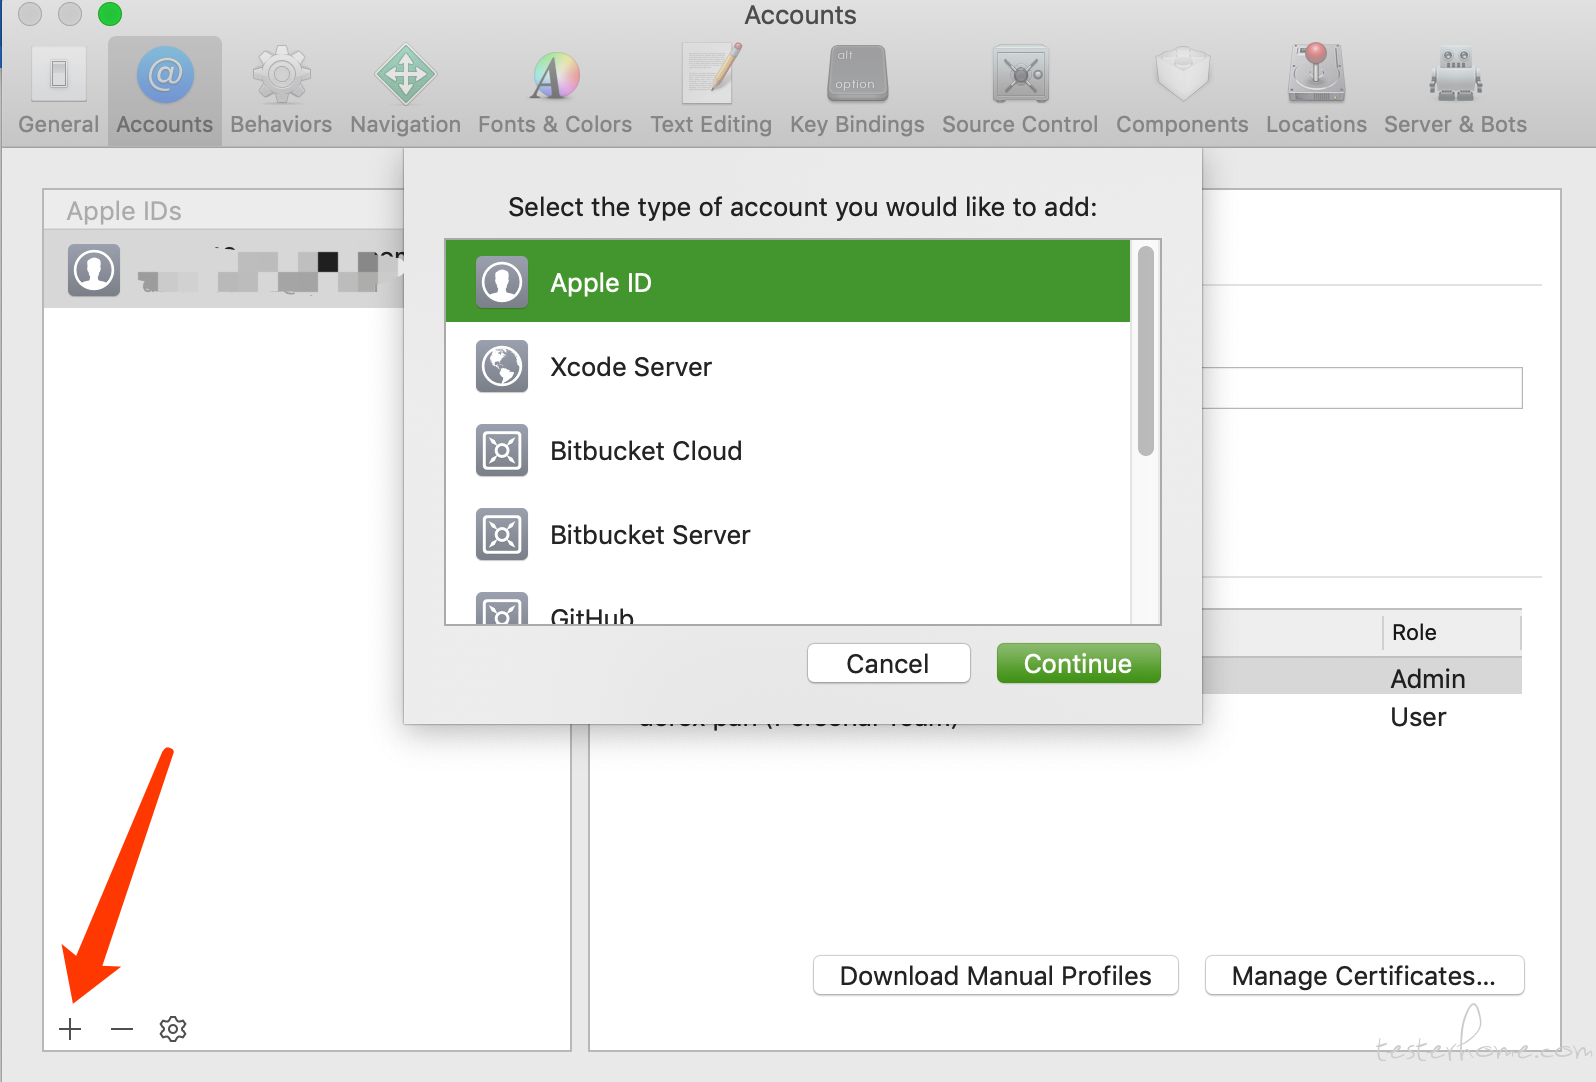
1.首先需要登陆 Apple ID
-打开 Xcode > Preferences > Accounts: Add developer's Apple ID
进入命令行工具(1.command+ space 2.输入终端),依次输入以下内容:
cd /usr/local/lib/node_modules/appium/node_modules/appium-xcuitest-driver/WebDriverAgent
mkdir -p Resources/WebDriverAgent.bundle
sudo sh ./Scripts/bootstrap.sh -d    #输入电脑登陆密码
方式 1:命令行打开
open WebDriverAgent.xcodeproj
方式 2:finder 内打开
打开 finder(访达)> command + shift + G > 粘贴地址(/usr/local/lib/node_modules/appium/node_modules/appium-xcuitest-driver/WebDriverAgent )> 双击 WebDriverAgent.xcodeproj
常见问题
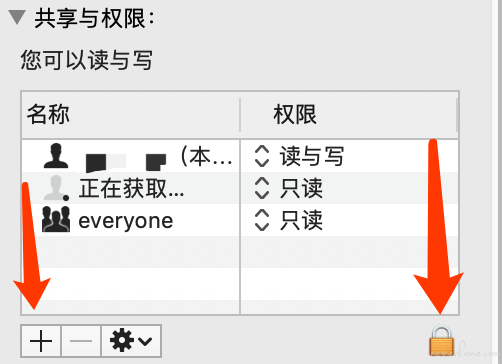
打开工程后可能因为权限问题,提示你无法解锁该工程,也就是你没有读写权限提示:The file "project.xcworkspace" could not be unlocked. Could not add write permission to the file because you do not own it. Try modifying the permissions of the file in the Finder or Terminal.
解决:通过 finder 打开工程目录,回到上一级(command + ↑) > 右键 “WebDriverAgent” > 显示简介 > 右下角解锁🔐 > 共享与权限 > + > 添加自己的账户 > 权限一栏下选择 “读与写”
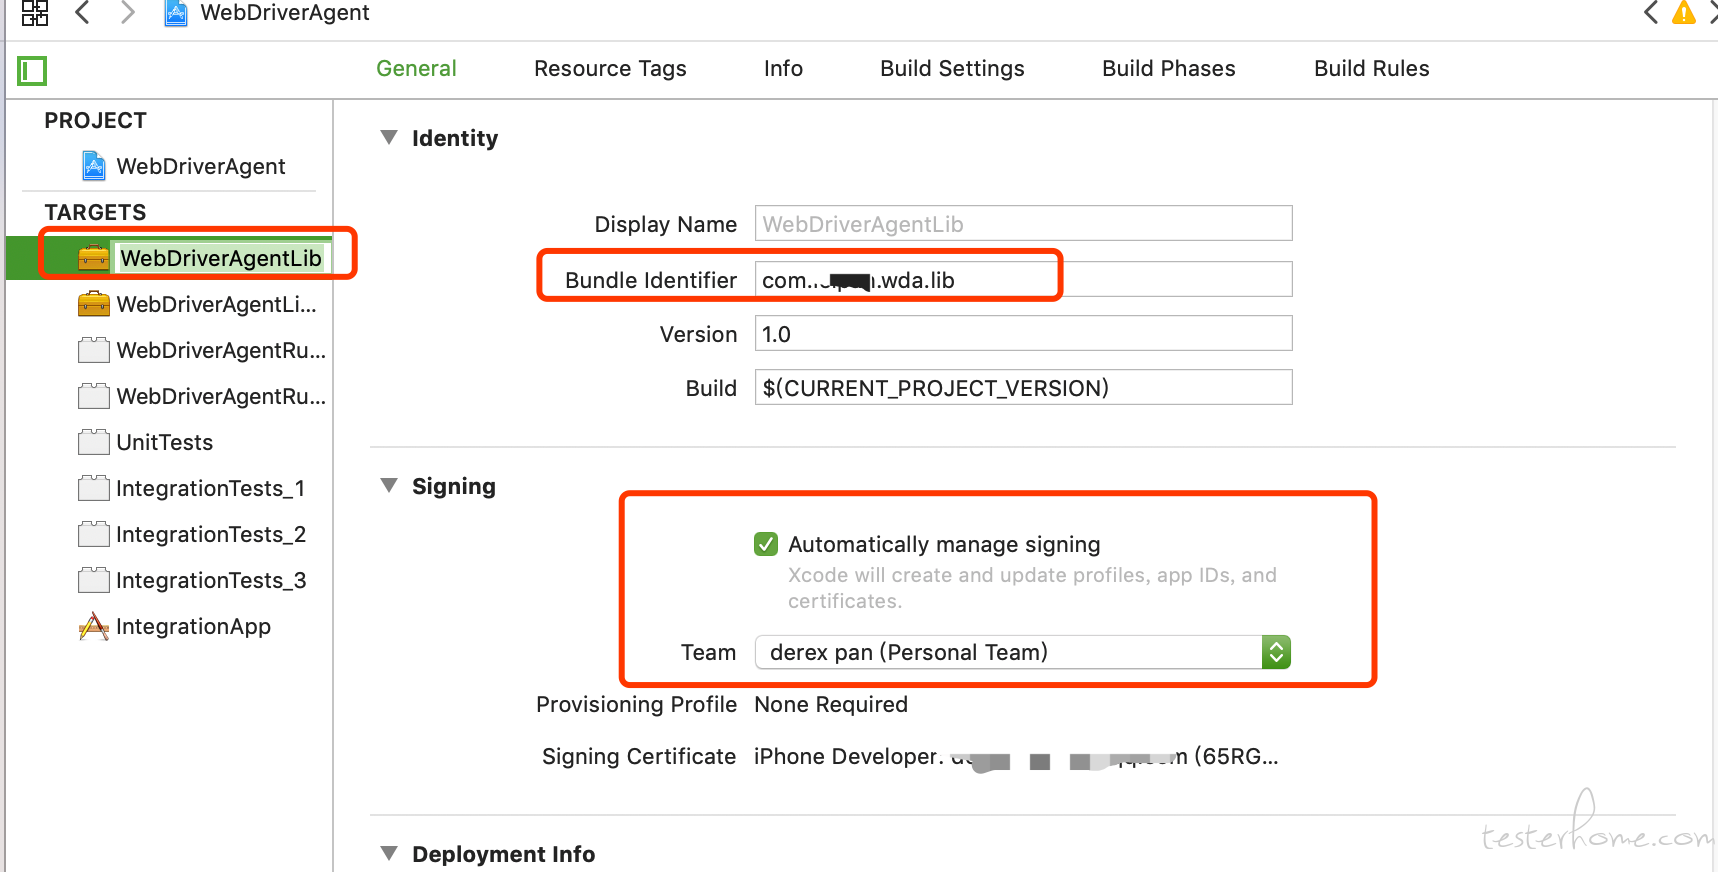
target 选择 WebDriverAgentLib,在 Signing 区域,勾选 Automatically manage signing,选择一个 team,最后改下 Bundle identifier,你可以把 facebook 改成你的名字
工具栏 > Product > Build 或者 command + B
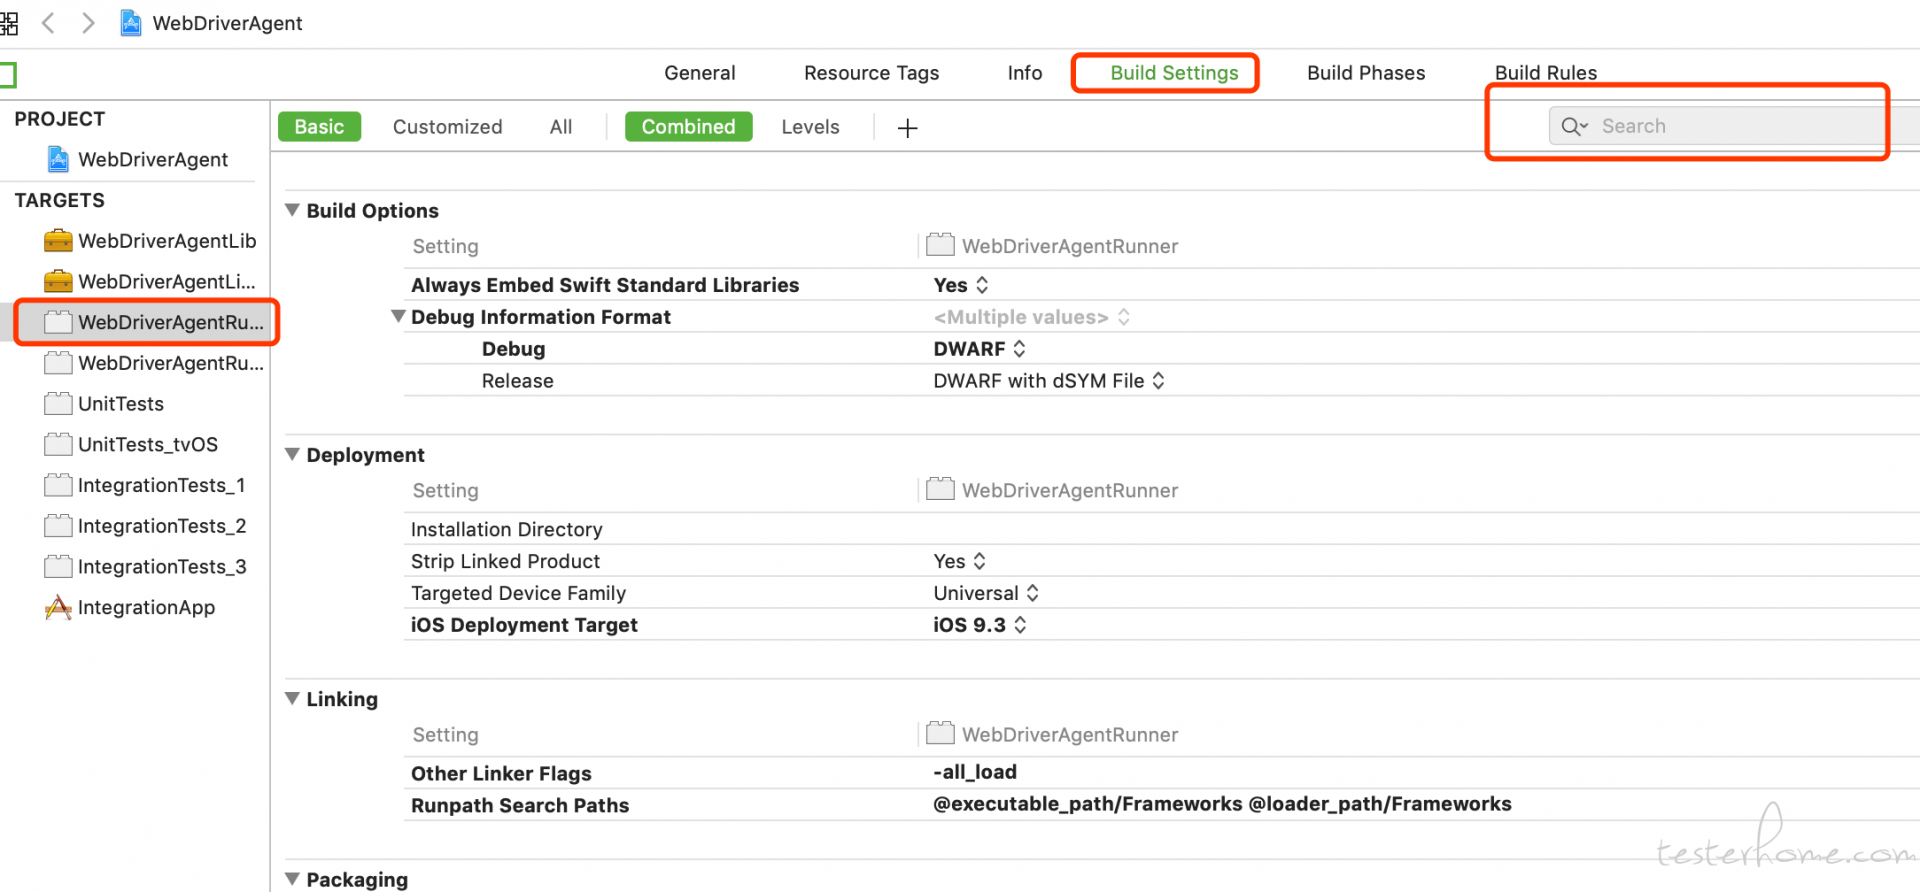
选择 WebDriverAgentRunner,并重复步骤 4 和 5
改 Bundle identifier 的步骤和上面不一样: >Build Settings > 搜索 facebook >改成和上面一样的 Bundle identifier
xcodebuild -project WebDriverAgent.xcodeproj -scheme WebDriverAgentRunner -destination 'id=<udid>' test
udid 替换成你真机的 udid
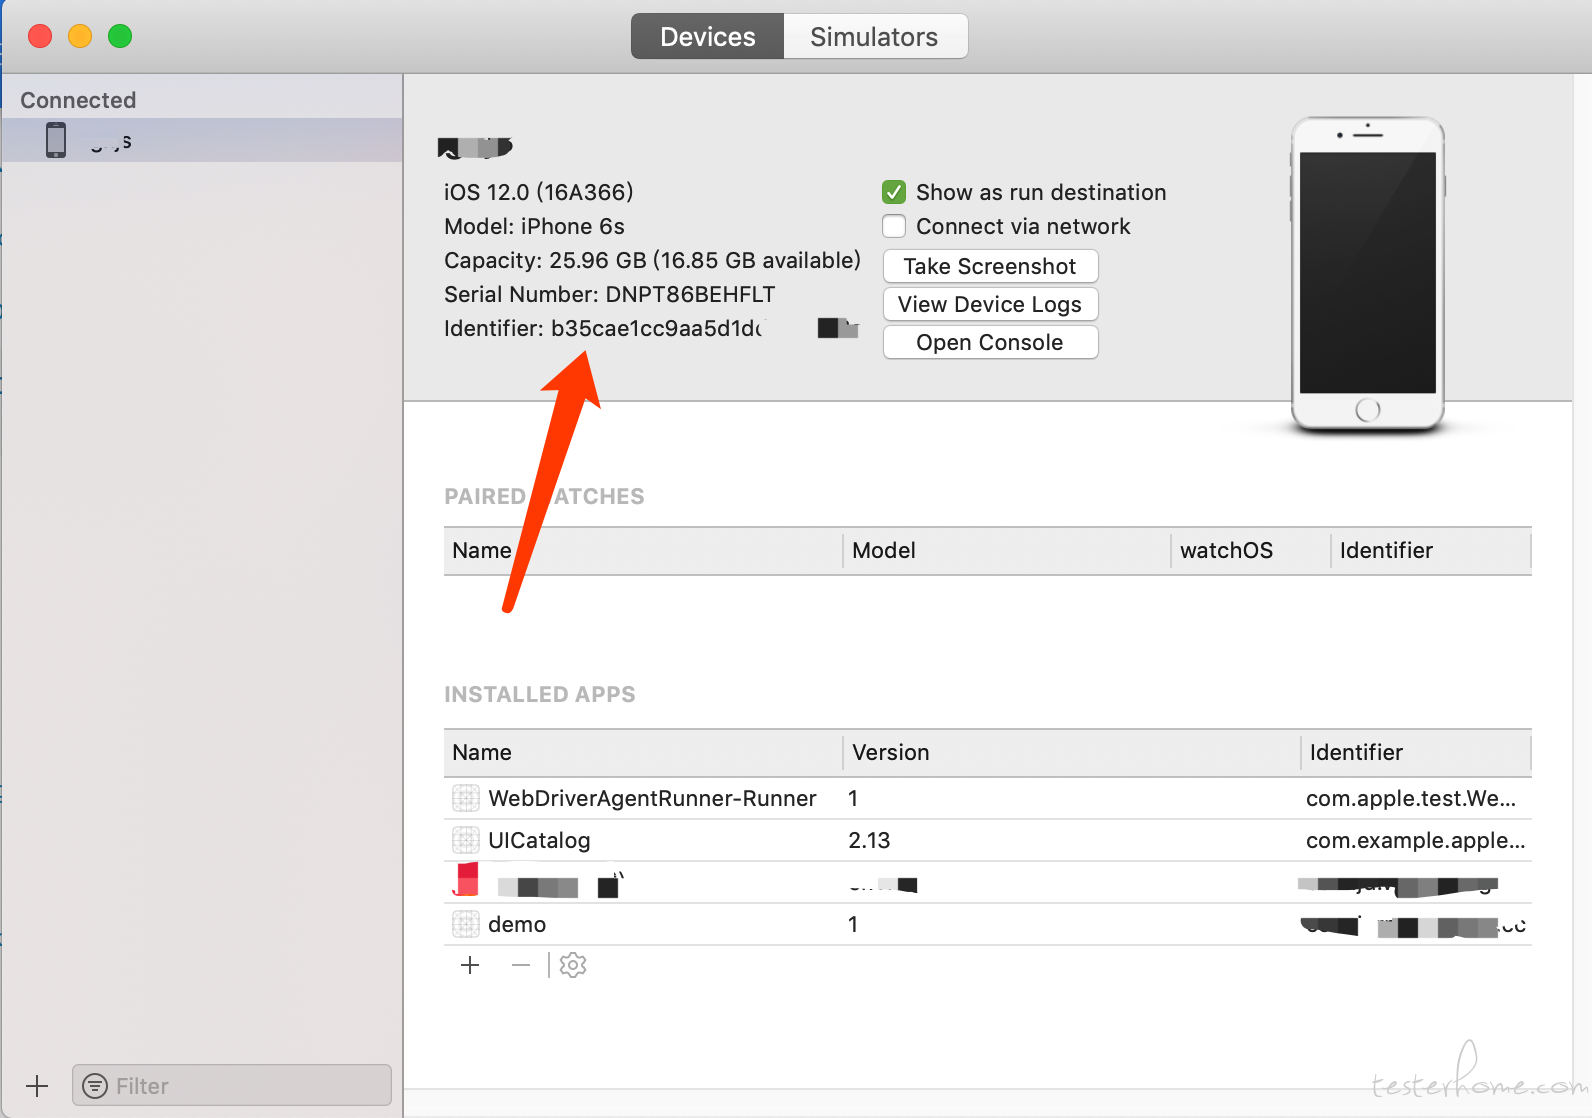
查看 udid 方法:
打开 xcode > Window > Devices and Simulators > Identfier 后面的字符串就是 udid
弹这个提示栏,选择 Always Allow

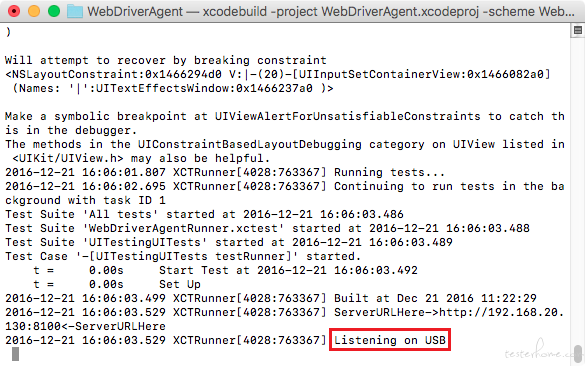
如果 build 成功了,终端中会以这些 log 信息结尾
Test Suite 'All tests' started at 2017-01-23 15:49:12.585
   Test Suite 'WebDriverAgentRunner.xctest' started at 2017-01-23 15:49:12.586
   Test Suite 'UITestingUITests' started at 2017-01-23 15:49:12.587
   Test Case '-[UITestingUITests testRunner]' started.
       t =     0.00s     Start Test at 2017-01-23 15:49:12.588
       t =     0.00s     Set Up
以上步骤适用于命令行运行 Appium 跑 case。如果要在 Appium 桌面端应用中查看页面元素,需要在以下地址中重复上面的步骤
cd /Applications/Appium.app/Contents/Resources/app/node_modules/appium/node_modules/appium-xcuitest-driver/WebDriverAgent
个别版本的 appium 内置的 WebDriverAgent 可能有问题,编译会报错,在 git 上下载最新版本(地址:https://github.com/appium/WebDriverAgent
),替换了再执行上述操作即可。
参考文章:https://docs.katalon.com/katalon-studio/docs/installing-webdriveragent-for-ios-devices.html