最近在学习 OSGi,其实就是这两天。很久以前我曾经是一个 Java 开发工程师,后来做了测试就再也没有碰过 Java 了。重新开始学习服务端,还是很有意思。
OSGi 是什么呢?
百度提供了一个搜索功能,一搜一大把。
OSGi(Open Service Gateway Initiative) 技术是面向 Java 的动态模型系统。这个框架实现了一个优雅、完整和动态地组价模型。应用程序(称为 bundle )无序重新引导可以被远程安装、启动、升级和卸载。
OSGi 服务平台提供在多种网络设备上无需重启的动态改变构造的功能。为了最小化耦合度和促使这些耦合度可管理,OSGi 技术提供一种面向服务的架构,它能使这些组件动态地发现对方。
OSGi 联盟已经开发了例如像 HTTP 服务器、配置、日志、安全、用户管理、XML 等很多公共功能标准组件接口。这些组件的兼容性插件实现可以从进行了不同优化和使用代价的不同计算机服务提供商得到。然而,服务接口能够基于专有权基础上开发。
OSGi 的主要职责就是为了让开发者能够创建动态化、模块化的 Java 系统。
这篇文章讲的比较好:https://www.cnblogs.com/jingmoxukong/p/4546947.html。不过感觉没有长时间写过 Java 企业开发的同学,理解 OSGI 还是比较困难的,反正我还是一知半解。
OSGi 的框架
OSGi 的框架有很多,Equinox 看上去资料比较多,而且工作中也会有关系,所以就选择了 Equinox 来入门。Equinox 项目是 Eclipse 开源组织提供的 OSGi 框架的实现。Equinox 项目包括 OSGi R4 版本规范核心框架的实现,一系列 OSGi 标准服务 Bundle 及运行基于 OSGi 的系统的一些基础构件。用户可以直接访问该项目在 Eclipse 的网址 Equinox 获取概括性的信息。目前,关于 Equinox 的进展大部分资料及项目进展存在于 Eclipse Wiki 上。
目前,Equinox 项目包括 OSGi 核心框架的实现,OSGi 标准服务 Bundle 实现,OSGi 的服务器端(J2EE 实现)应用,Equinox 部署更新框架及一些研究方向(未成熟发布的构想如 JMX 管理,安全管理,面向方面的设计与应用等)。
IntelliJ IDEA + Equinox
概念太难懂,不如直接实操。我的环境是:
- IntelliJ IDEA ULTIMATE 2019.1
- jdk 9
- equinox-SDK-4.11
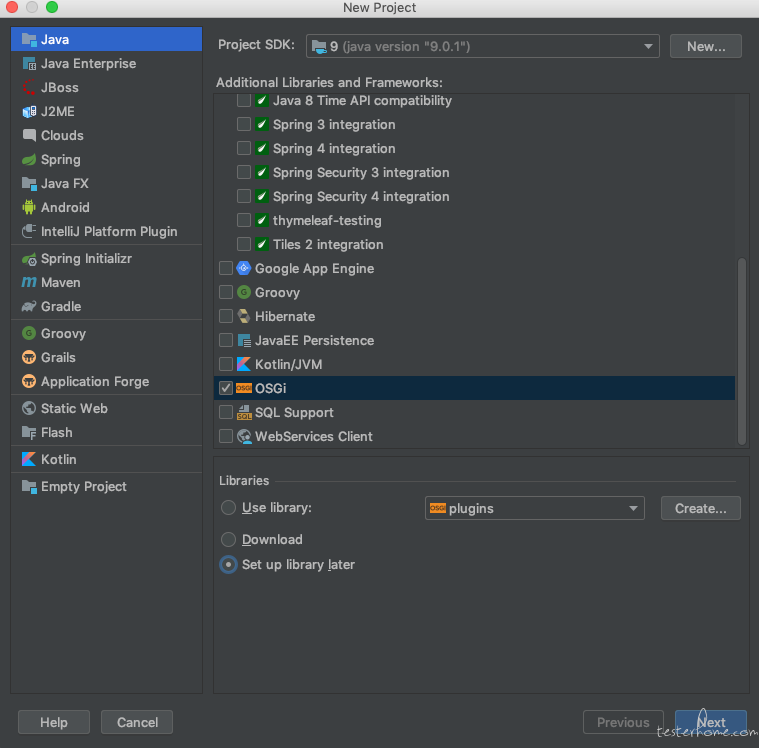
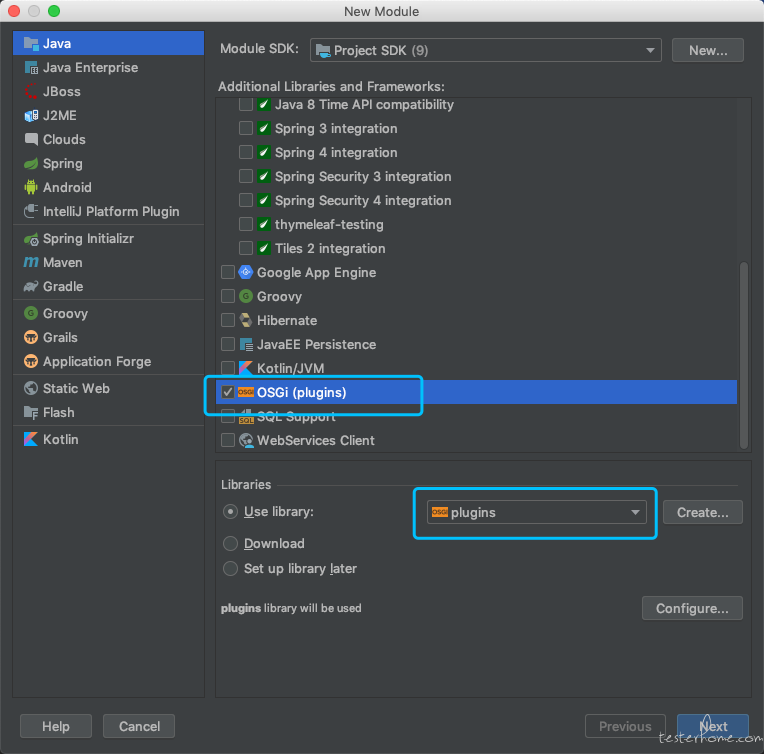
首先创建一个空的 OSGi 项目, Library 这里先选择 Set up library later
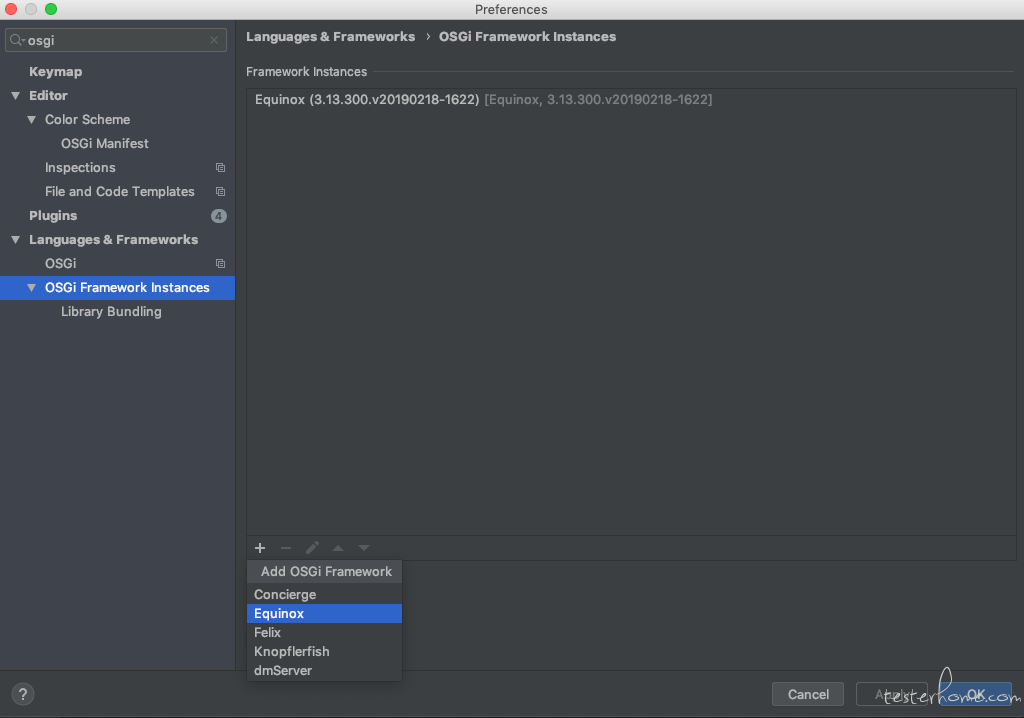
在 ide 的设置里,配置 Equinox
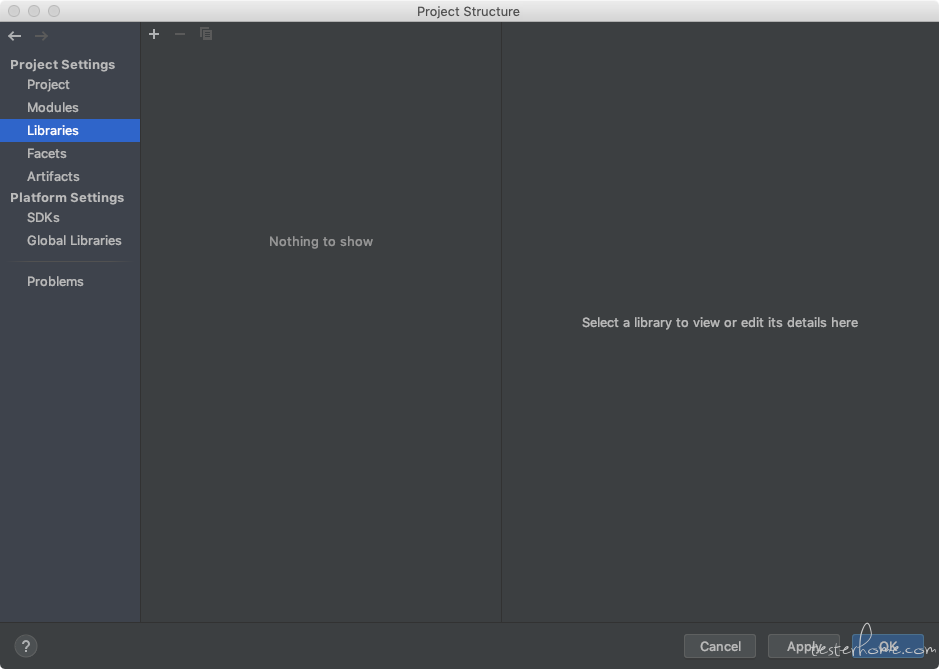
在你的空项目里添加 Equinox 的依赖
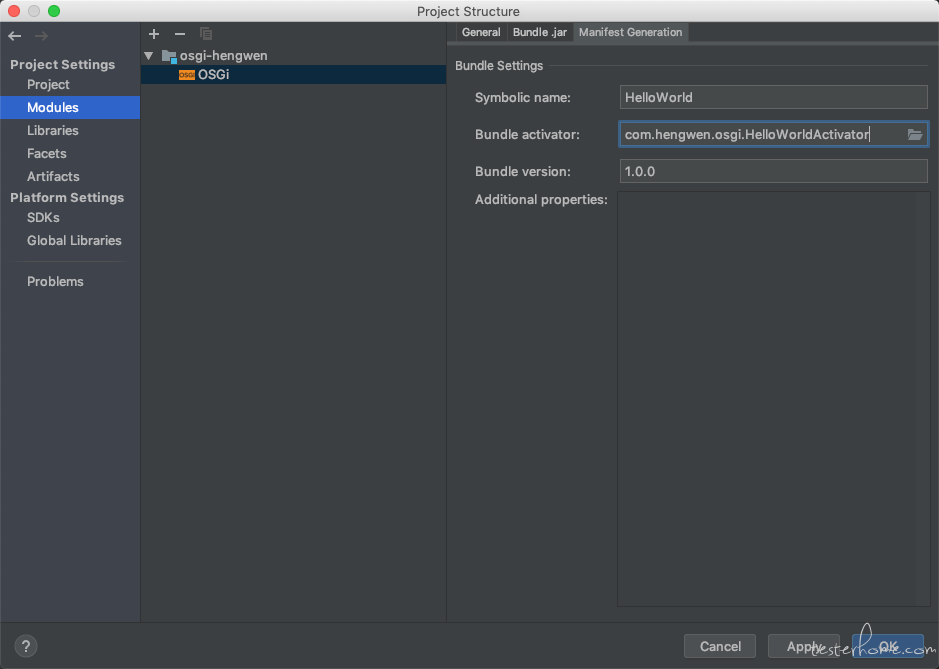
接下来我们创建一个 HelloWorldActivator.java,
package com.hengwen.osgi;

import org.osgi.framework.BundleActivator;
import org.osgi.framework.BundleContext;

public class HelloWorldActivator implements BundleActivator {
    @Override
    public void start(BundleContext context) throws Exception {
        System.out.println("Hello, World!");
    }

    @Override
    public void stop(BundleContext context) throws Exception {
        System.out.println("Goodbye, World!");
    }
}
这里会提示 Bundle activator is not registered in manifest。我们在 Module Setting 里设置下 Manifest。一般来说应该会把 Manifest 文件放在项目里编辑,不过 idea 可以通过 ide 设置,然后会打到 Jar 包中去。
然后,添加一个自定义运行:
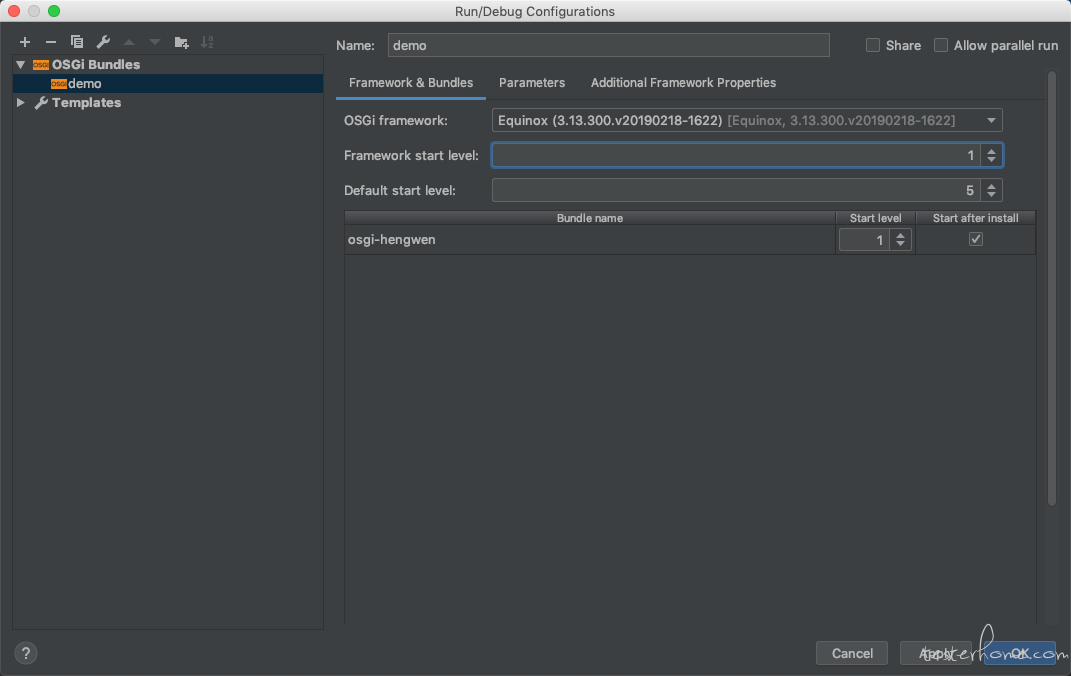

运行之后,会在终端输出信息,可以看到我 start 209 stop 209。209 是我们这个 HelloWorld bundle 的序号。到这里一个简单的 HelloWorld 模块就完成了。接下来,我们再添加一个新的 Bundle,给前面这个 Bundle 使用。在项目目录上右击添加新的 module。
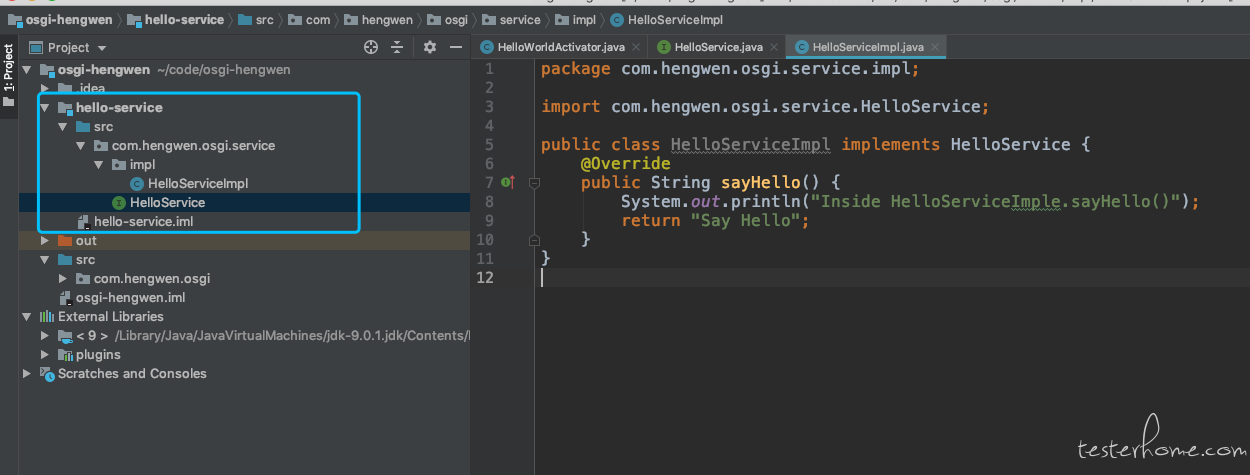
我们创建一个接口 HelloService,一个实现类 HelloServiceImpl,目录结构就如下:
package com.hengwen.osgi.service;

public interface HelloService {
    public String sayHello();
}
package com.hengwen.osgi.service.impl;

import com.hengwen.osgi.service.HelloService;

public class HelloServiceImpl implements HelloService {
    @Override
    public String sayHello() {
        System.out.println("Inside HelloServiceImple.sayHello()");
        return "Say Hello";
    }
}
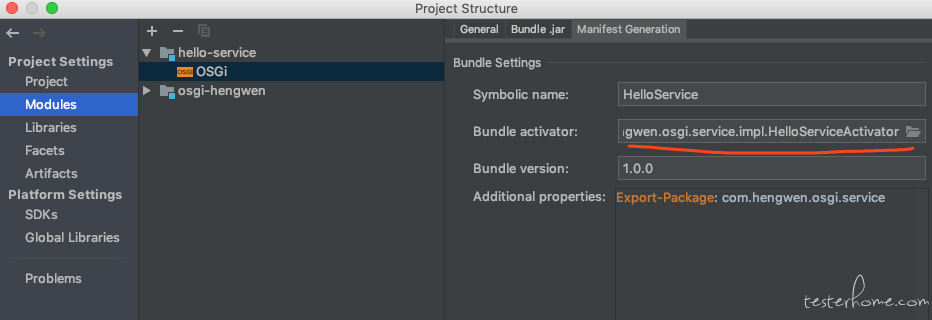
现在,我们为它配置 Manifest,因为目前它没有 activator,所以就简单配置下。
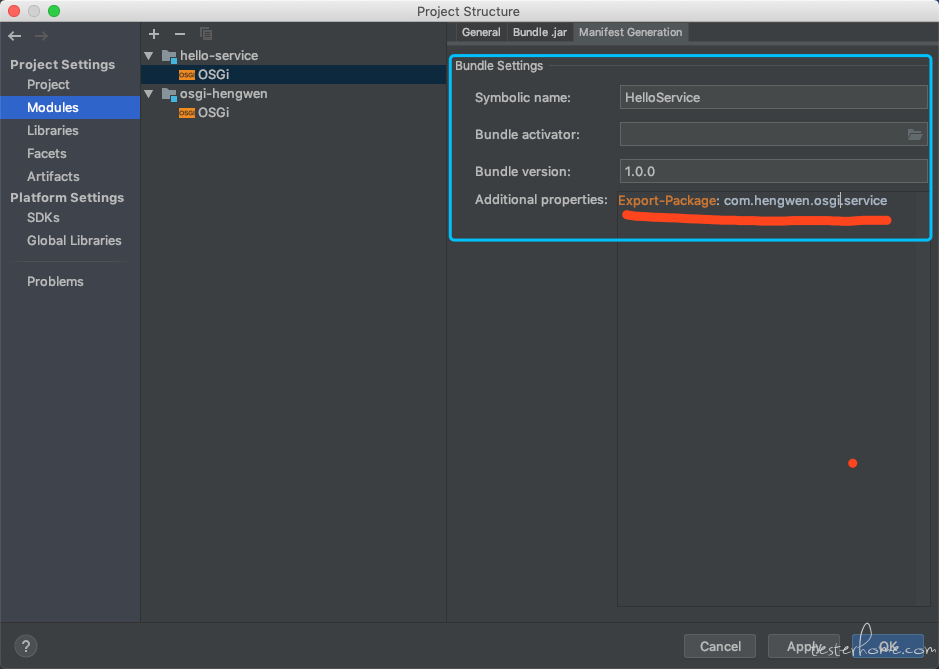
注意这里配置了一个:Export-Package: com.hengwen.osgi.service,是为了其他的 bundle 能调用它,否则下面的代码就会报 HelloService not exported
到目前为止,代码还是无法运行,虽然编译都正常(因为可见性已经解决),但是在 OSGi 的容器中,HelloServiceImpl 不能直接使用。我们需要注册服务,使用服务。我们再创建一个 activator
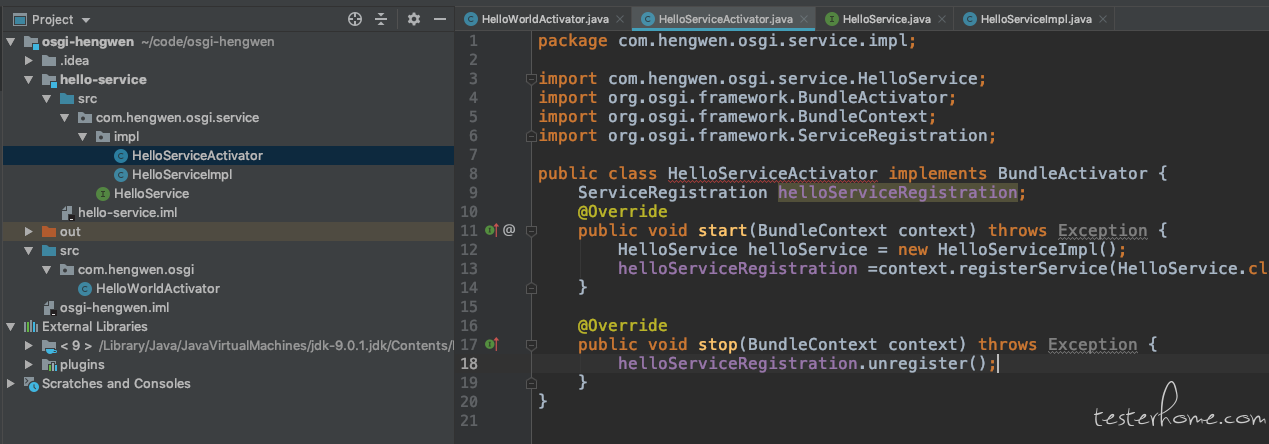
package com.hengwen.osgi.service.impl;

import com.hengwen.osgi.service.HelloService;
import org.osgi.framework.BundleActivator;
import org.osgi.framework.BundleContext;
import org.osgi.framework.ServiceRegistration;

public class HelloServiceActivator implements BundleActivator {
    ServiceRegistration helloServiceRegistration;
    @Override
    public void start(BundleContext context) throws Exception {
        HelloService helloService = new HelloServiceImpl();
        helloServiceRegistration =context.registerService(HelloService.class.getName(), helloService, null);
    }

    @Override
    public void stop(BundleContext context) throws Exception {
        helloServiceRegistration.unregister();
    }
}
我们把 HelloServiceActivator 配置到 Manifest 里
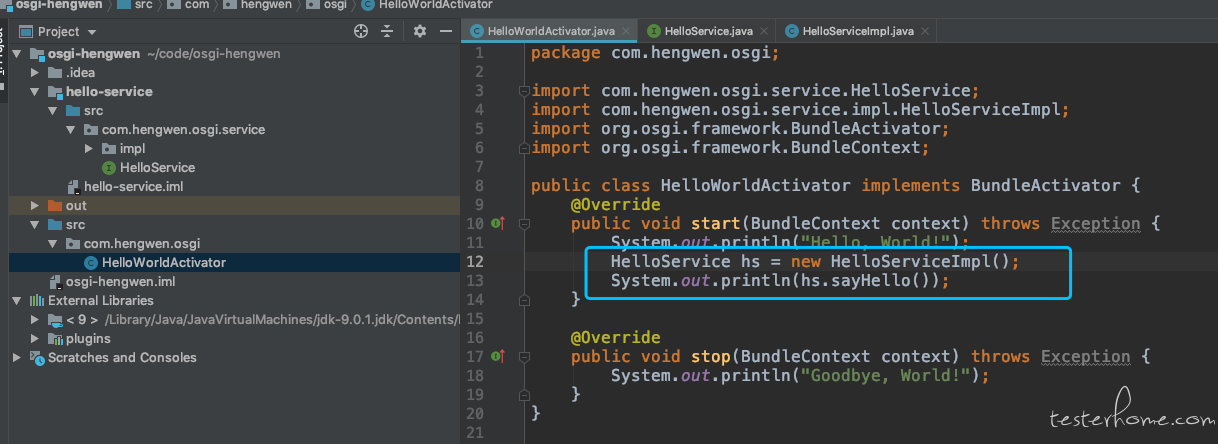
这样服务就注册好了。我们接下来就使用服务,修改前面那个 bundle 的 HelloWorldActivator,
package com.hengwen.osgi;

import com.hengwen.osgi.service.HelloService;
import org.osgi.framework.BundleActivator;
import org.osgi.framework.BundleContext;
import org.osgi.framework.ServiceReference;

public class HelloWorldActivator implements BundleActivator {

    ServiceReference helloServiceReference;

    @Override
    public void start(BundleContext context) throws Exception {
        System.out.println("Hello World!!");
        helloServiceReference= context.getServiceReference(HelloService.class.getName());
        HelloService helloService =(HelloService)context.getService(helloServiceReference);
        System.out.println(helloService.sayHello());
    }

    @Override
    public void stop(BundleContext context) throws Exception {
        System.out.println("Goodbye World!!");
        context.ungetService(helloServiceReference);
    }
}
现在我们再来运行一次,需要把新的这个 bundle 加到 osgi 的运行配置中去。

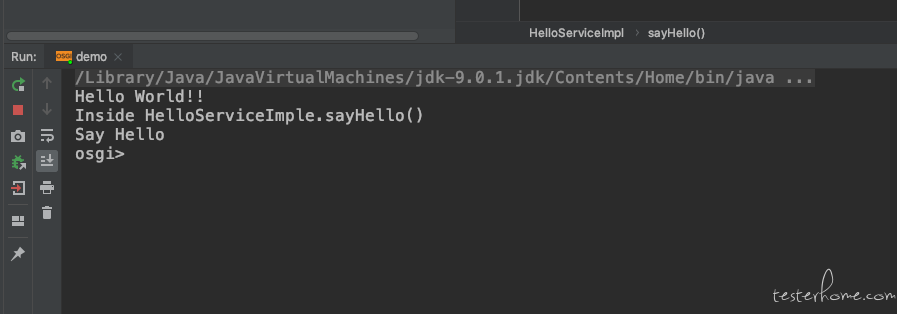
调用就成功了。这样差不多一个简单的 Hello, IntelliJ IDEA + OSGi + Equinox 就完成了。大家有兴趣可以自己试试看。
参考文档
- https://www.javaworld.com/article/2077837/java-se-hello-osgi-part-1-bundles-for-beginners.html —— Hello, OSGi, Part 1: Bundles for beginners
- https://www.cnblogs.com/garfieldcgf/p/6378443.html —— 深入理解 OSGI:Java 模块化之路
- https://blog.csdn.net/afandaafandaafanda/article/details/43083957 —— Equinox 和 OSGI 介绍
- http://osgi.com.cn/article/7289219
- https://www.jianshu.com/p/2c0c8091e3de