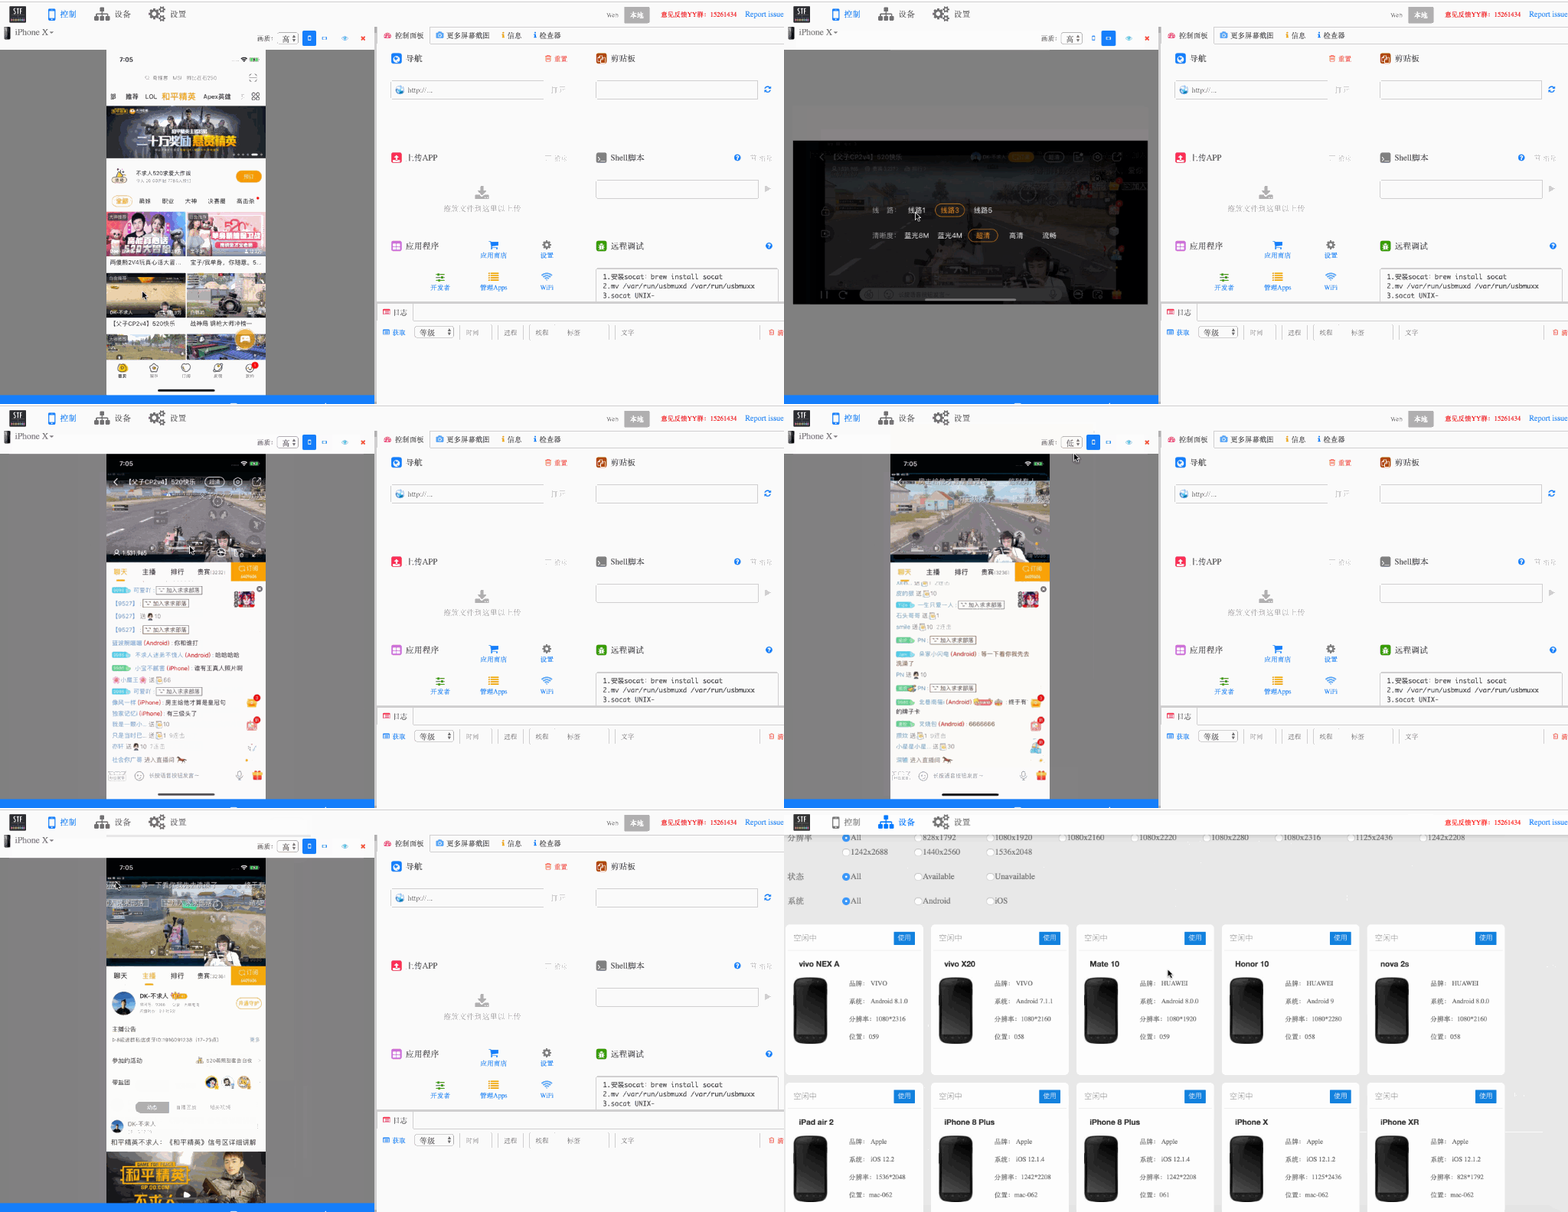
Android 端的远程控制,主要是依靠 minicap 和 minitouch,minicap 用于实现截图,minitouch 用于完成操作,具体源码分析可以看这篇文章STF 实时显示设备截图功能源码分析,这里不在多说。
首先来看下 iOS 设备的屏幕图像获取都有哪些方案,对比下各种技术的优缺点。
| 方案 | 优点 | 缺点 |
|---|---|---|
| AirPlay | 实时、高帧率 | 私有协议,无法上 AppStore;不支持多开,会和手游开播冲突 |
| replaykit | 实时、高帧率 | 不支持多开,会和手游开播冲突 |
| ios-minicap | 实时、高帧率 | 一台 mac 只能带一台手机 |
| idevicescreenshot | 使用简单 | 帧率低、延时大 |
| appium-WebDriverAgent | 可直接使用,无需二次开发 | 私有 api 方式,无法上 AppStore |
前两种需要额外的开发工作,且不支持多开,目前的手游直播工具都是基于这两种方式。也就是说如果使用这两种方式来实现屏幕图像获取,那么就无法远程在该设备上使用手游开播工具。
ios-minicap 方式,一台 mac 只能带一台手机,成本会很高。
idevicescreenshot 就不用说了,我们追求的是流畅且延时低。
appium 在 WebDriverAgent 加入了一个 mjpegServer,通过是有 api 的方式获取屏幕截图。真机实测,在大屏幕手机上,帧率可达到 25 帧左右,而在小屏幕手机上,可达到 40fps 以上,且延时在 100ms 左右。这个帧率和延时肉眼基本看不出差异了。
综上,我们选择 appium 的 WebDriverAgent 来提供截图服务,WDA 默认监听 9100 端口,我们使用 iproxy 将手机的 9100 端口映射到本机的端口,这样手机和主机之间的屏幕传输走 usb,不会因为手机的网络导致延时和卡顿。
确定了图像获取方案后,接下来就是将获取的图像传输到前端。首先,我们需要接收 WDA 传输过来的图像
打开文件 stf/lib/units/device/plugins/screen/stream.js,修改如下
FrameProducer.prototype._startService = function() {
      log.info('Launching screen service')
        this.socket = net.connect({
          port: screenOptions.devicePort
        })
    }
 FrameProducer.prototype._readFrames = function(socket) {
      this.needsReadable = true
      this.socket.on('readable', this.readableListener)

      // We may already have data pending. Let the user know they should
      // at least attempt to read frames now.
      this.readableListener()
    }
FrameProducer.prototype._disconnectService = function(socket) {
      log.info('Disconnecting from minicap service')
      this.socket.removeListener('readable', this.readableListener)
      return Promise.resolve(true)
    }
FrameProducer.prototype._stopService = function(output) {
      log.info('Stopping minicap service')
      this.socket.destroy()
      return Promise.resolve(true)
    }
先与 WDA 的 mjepgServer 建立连接,然后监听 readable 事件,读取数据,最后是断开连接。
数据读取出来之后,需要做解析,打开文件 stf/lib/units/device/plugins/screen/util/frameparser.js,修改 FrameParser.prototype.nextFrame 函数
FrameParser.prototype.nextFrame = function() {
  if (!this.chunk) {
    return null
  }
  if (this.chunk.indexOf(Buffer.from('Server: WDA MJPEG Server'))!=-1){
    this.chunk= null
    return null
  }
  if(this.chunk.indexOf(this.startByte)!=-1){
    var startPos = this.startLen+3
    var rostr = this.chunk.slice(this.startLen,startPos+3).toString('utf8')
    this.rotation = parseInt(rostr.split('=')[1],10)
    if(this.frameBody){
      this.chunk = this.chunk.slice(startPos)
      completeBody = this.frameBody
      this.frameBody = null
      return completeBody
    }
    else{
      this.frameBody = this.chunk.slice(startPos)
      this.chunk = null
    }
  }
  else{
    if(this.frameBody){
      this.frameBody = Buffer.concat([this.frameBody,this.chunk])
      this.chunk = null
    }
    else{
      this.frameBody = this.chunk
      this.chunk = null
    }
  }
  this.chunk = null

  return null
}
因为我修改了 WDA mjpegServer 发送的数据,大家根据各自情况解析就好。解析完成后通过 websocket 发送到前端,在文件 stf/lib/units/device/plugins/screen/stream.js 如下代码
function createServer() {
      log.info('Starting WebSocket server on port %d', screenOptions.publicPort)

      var wss = new WebSocket.Server({
        port: screenOptions.publicPort
      , perMessageDeflate: false
      })
  ......
}
 return createServer()
     .then(function(wss) {
        var frameProducer = new FrameProducer(
        new FrameConfig(display.properties, display.properties))
        var broadcastSet = frameProducer.broadcastSet = new BroadcastSet()
        ......
        wss.on('connection', function(ws) {
          var id = uuid.v4()
          var pingTimer
          function send(message, options) {
            return new Promise(function(resolve, reject) {
              switch (ws.readyState) {
              case WebSocket.OPENING:
                // This should never happen.
                log.warn('Unable to send to OPENING client "%s"', id)
                break
              case WebSocket.OPEN:
                // This is what SHOULD happen.
                //log.info('send image data to web')
                ws.send(message, options, function(err) {
                  return err ? reject(err) : resolve()
                })
                break
              case WebSocket.CLOSING:
                // Ok, a 'close' event should remove the client from the set
                // soon.
                break
              case WebSocket.CLOSED:
                // This should never happen.
                log.warn('Unable to send to CLOSED client "%s"', id)
                clearInterval(pingTimer)
                broadcastSet.remove(id)
                break
              }
            })
          }
        ......
     }
  ......
}
这里先创建一个 WebSocket.Server,当用户使用手机的时候,会连接到此 server,之后就是通过这个 ws 发送图像数据了。
这里需要注意的是 mjpegServer 参数的设置,WDA 默认压缩质量是 25,帧率是 10,缩放因子是 100 即不做缩放。
static NSUInteger FBMjpegServerScreenshotQuality = 25;
static NSUInteger FBMjpegServerFramerate = 10;
static NSUInteger FBScreenshotQuality = 1;
static NSUInteger FBMjpegScalingFactor = 100;
帧率我们可以直接设置到最大 60,记住千万别修改 FBMjpegScalingFactor 的值,一旦在 WDA 做了缩放,帧率就会下降到 5 帧左右,甚至更低。至于压缩质量 FBMjpegServerScreenshotQuality ,太低了延时会比较大,太高了帧率会降低,建议设置 40-60 之间。
远程操作使用 WDA 来驱动,只是 WDA 中的点击/滑动是与控件关联的,而我们的使用场景无需关联控件,直接通过坐标来实现,所以这里我们需要重写或者增加点击和滑动的接口,代码如下:
+ (id<FBResponsePayload>)handleClick_Control:(FBRouteRequest *)request
{
  CGPoint tapPoint = CGPointMake((CGFloat)[request.arguments[@"x"] doubleValue], (CGFloat)[request.arguments[@"y"] doubleValue]);
  double duration = [request.arguments[@"duration"] doubleValue];
  [[XCEventGenerator sharedGenerator] pressAtPoint:tapPoint forDuration:duration orientation:0 handler:^(XCSynthesizedEventRecord *record, NSError *error) {} ];
  return FBResponseWithOK();
}

+ (id<FBResponsePayload>)handleSwipe_Control:(FBRouteRequest *)request
{
  CGPoint startPoint = CGPointMake((CGFloat)[request.arguments[@"fromX"] doubleValue], (CGFloat)[request.arguments[@"fromY"] doubleValue]);
  CGPoint endPoint = CGPointMake((CGFloat)[request.arguments[@"toX"] doubleValue], (CGFloat)[request.arguments[@"toY"] doubleValue]);
  NSTimeInterval duration = [request.arguments[@"duration"] doubleValue];
  [[XCEventGenerator sharedGenerator] pressAtPoint:startPoint forDuration:duration liftAtPoint:endPoint velocity:500 orientation:0 name:@"drag" handler:^(XCSynthesizedEventRecord *record,NSError *error){}];
  return FBResponseWithOK();
}
打开文件 stf/lib/units/device/plugins/touch/index.js,修改如下
TouchConsumer.prototype.longTap = function() {
      var dur = Date.now()-touchTime
      if(dur>2000){
        if(bIsTouch){
          wda.click(startX,startY,1)
        }
        clearInterval(touchTimer)
        touchTimer = null
        bIsTouch = false
      }
    }

    TouchConsumer.prototype.touchDown = function(point) {
      startX = point.x* this.width
      startY = point.y* this.height
      touchTime = Date.now()
      bIsTouch = true
      this.bIsMove = false
      touchTimer = setInterval(this.longTap,500)
    }

    TouchConsumer.prototype.touchMove = function(point) {
      bIsTouch = false
      this.bIsMove = true
      endX = point.x* this.width
      endY = point.y* this.height
    }

    TouchConsumer.prototype.touchUp = function(point) {
      if(this.bIsMove){
        wda.swipe(startX,startY,endX,endY,0)
      }
      else if(bIsTouch){
        wda.click(startX,startY,0)
       }
      this.touchReset()
    }
longTap 主要是为了实现长按效果。这里需要注意的是屏幕分辨率和逻辑坐标的对应关系,需要使用逻辑坐标进行操作。

最开始是采用轮询的方式,即每隔一段时间向 WDA 请求横竖屏状态,但是这种方式一是会有一定的延时,二是占用资源。最后改用在每一帧图片数据前加入横竖屏状态,在解析图片数据的时候,把状态解析出来即可。
最后上个效果图

[藏经阁] iOS 多机远程控制技术
STF 实时显示设备截图功能源码分析
