
昨天了解了 uiautoamtorviewer 新增功能 dump --compressed,是一个直接发送到设备端的命令,那么这个命令发送到设备端后,设备端是如何操作的呢?我又成了 10 万个为什么了?继续源码研究......
这个 jar 包最新的版本只到了 4.4.2。说明 5.0 后的 uiautomator 设备端是没有改变的,那么说明 dump --compressed 之前就有,只是我不知道罢鸟。结论:
dump --compressed 命令 4.4.2 时代就有,只是年少无知没发现
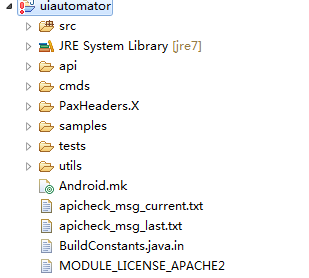
解压以后项目结果如下所示:
直接用 eclipse 的 import 功能导入,整体导入。导入 eclipse 后,如下图所示,感叹号是因为没有添加android.jar造成的,加上就好了。
当我们在命令行下输入下面命令的时候,android 系统就会调用cmds目录下的Launcher类中的main方法中
/system/bin/uiautomator dump --compressed /data/local/tmp/uidump.xml
所以我们从 main 开始我们的大餐:
public static void main(String[] args) {
        // show a meaningful process name in `ps`
        Process.setArgV0("uiautomator");
        if (args.length >= 1) {
            Command command = findCommand(args[0]);
            if (command != null) {
                String[] args2 = {};
                if (args.length > 1) {
                    // consume the first arg
                    args2 = Arrays.copyOfRange(args, 1, args.length);
                }
                command.run(args2);
                return;
            }
        }
        HELP_COMMAND.run(args);
    }
下面一步一步解释上面的代码的意思:
1.首先在进程信息中添加上uiautomator信息,这样你在命令行中敲adb shell ps就能查看到uiautomator进程的信息了。
2.判断参数数量是否大于 0,其中要了解的是上面的命令中 dump 算第一个参数。不要把 system/bin/uiautmator 当成了第一个参数。
3.当参数数量大于 0 时,获得第一个参数的值 args[0],其中 findCommand() 方法根据命令的名称得到命令的类型。总共有四个命令:help、events、runtest、dump,你如果想知道各个命令是干什么的,你可以在命令行下敲一下看看输出就知道了。
private static Command[] COMMANDS = new Command[] {
        HELP_COMMAND,
        new RunTestCommand(),
        new DumpCommand(),
        new EventsCommand(),
    };
4.如果命令不为空,就要执行相应的命令,但是还要将剩下的参数 (可能为空的参数,但不是 null 值) 传入run方法中,让各个类型自己处理。我们的命令是 dump 命令,所以下一步进入DumpCommand中。
5.如果不带参数的话,直接执行help命令。
public void run(String[] args) {
        File dumpFile = DEFAULT_DUMP_FILE;
        boolean verboseMode = true;

        for (String arg : args) {
            if (arg.equals("--compressed"))
                verboseMode = false;
            else if (!arg.startsWith("-")) {
                dumpFile = new File(arg);
            }
        }

        UiAutomationShellWrapper automationWrapper = new UiAutomationShellWrapper();
        automationWrapper.connect();
        if (verboseMode) {
            // default
            automationWrapper.setCompressedLayoutHierarchy(false);
        } else {
            automationWrapper.setCompressedLayoutHierarchy(true);
        }

        // It appears that the bridge needs time to be ready. Making calls to the
        // bridge immediately after connecting seems to cause exceptions. So let's also
        // do a wait for idle in case the app is busy.
        try {
            UiAutomation uiAutomation = automationWrapper.getUiAutomation();
            uiAutomation.waitForIdle(1000, 1000 * 10);
            AccessibilityNodeInfo info = uiAutomation.getRootInActiveWindow();
            if (info == null) {
                System.err.println("ERROR: null root node returned by UiTestAutomationBridge.");
                return;
            }

            Display display =
                    DisplayManagerGlobal.getInstance().getRealDisplay(Display.DEFAULT_DISPLAY);
            int rotation = display.getRotation();
            Point size = new Point();
            display.getSize(size);
            AccessibilityNodeInfoDumper.dumpWindowToFile(info, dumpFile, rotation, size.x, size.y);
        } catch (TimeoutException re) {
            System.err.println("ERROR: could not get idle state.");
            return;
        } finally {
            automationWrapper.disconnect();
        }
        System.out.println(
                String.format("UI hierchary dumped to: %s", dumpFile.getAbsolutePath()));
    }
run 方法执行的步骤有点长,没关系,慢慢来。
1.首先创建文件用来保存 dump 下来的信息,这个时候需要注意getLegacyExternalStorageDirectory是个隐藏的方法,官网上的 api 没有这个方法的解释,可以在源码上找到,我贴在这里,帮助理解,该文件的路径为/storage/emulated/legacy/window_dump.xml
/** {@hide} */
    public static File getLegacyExternalStorageDirectory() {
        return new File(System.getenv(ENV_EXTERNAL_STORAGE));
    }
2.然后解析传入的参数得到保存的路径以及是否压缩。
3.然后创建UiAutomationShellWrapper对象,启动 Handler 线程,创建 Uiautomation 对象,并建立连接。然后设置了压缩属性。这个UiAutomationShellWrapper也是隐藏的,也只能到源码环境下查看。
4.然后我们得到了 Uiautomation 的对象实例
UiAutomation uiAutomation = automationWrapper.getUiAutomation();
            uiAutomation.waitForIdle(1000, 1000 * 10);
            AccessibilityNodeInfo info = uiAutomation.getRootInActiveWindow();
等待 UI 界面处于稳定后 (idle 状态),然后我们调用getRootInActiveWindow方法获得结果的根节点。这个时候我们整个流程差不多结束了,我们 care 的--compressed 还没看到。
经过一路追踪,发现 compressed 属性在整个过程中的作用是给AccessibilityServiceInfo对象添加了一个 FLAG_INCLUDE_NOT_IMPORTANT_VIEWS 标志位。其他的就是正常获取 dump 信息流程,这个标志位对获取信息时候的影响有多大,留到以后来解释 (没有源码环境,不好调试啊,头疼......)。
