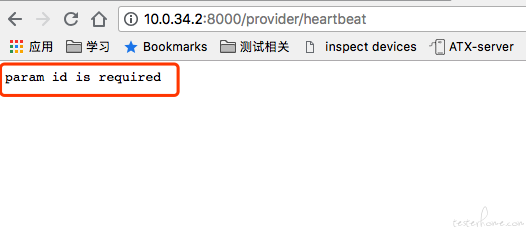
10.0.0.1:8000/provider/heartbeat看到下面的内容就 ok 了如果是 404 page not found 那就是 atx-server 没更新成功.
还在为 atx uiautomator2 每次设备重复的 init 设备而烦恼吗?
在搭建完 atx-server 之后,设备接入到 atx-server 需要将设备通过 usb 连接到电脑,然后执行命令python -m uiautomator2 init 10.0.0.1:8000来实现 init 设备,是不是觉得很麻烦?
现在给大家介绍个解放双手,自动实现 init 设备连接 atx-server 的方法。
项目地址:https://github.com/openatx/u2init
在安装部署完成之后,以后只要手机插上电脑 ,就可以自动连接上 atx-server 了
注意:步骤 2 的./init-resources.sh在 windows 上貌似不能执行,下面的操作都是在 mac 上操作的,在 Linux 上应该也没问题。
注意 2:需要将 atx-server 更新一下,更新 2018-7-27 之后的最新代码就行
删掉go/src/github.com/openatx/下的atx-server文件夹,然后根据atx-server 安装运行及自动化的实践的步骤重新装一下 atx-server 就好啦
更新完 atx-server 启动成功, 如果你的 server 地址是 10.0.0.1:8000 浏览器访问 10.0.0.1:8000/provider/heartbeat看到下面的内容就 ok 了如果是 404 page not found 那就是 atx-server 没更新成功.

下面介绍具体的安装的步骤:
之前安装过 atx-server 的 可以忽略这一步
安装 Golang 环境
下载地址:https://golang.org/dl/
安装说明:http://www.runoob.com/go/go-environment.html
$ go get -v github.com/openatx/u2init
$ cd go/src/github.com/openatx/u2init
$ go build
build 完之后,下载相关的文件 stf stuffs(minitouch, minicap), atx-agent, uiautomator.apk(two apk actually)
$ cd go/src/github.com/openatx/u2init
$ ./init-resources.sh
下载可能要等一段时间,如果没反应就多试几次 (.sh 好像在 windows 上没法直接执行)
Mac 上操作这部提示了一个错误wget command not found解决的办法如下
$ brew install wget
安装完wget之后再执行上面的./init-resources.sh就可以下载成功了
如果你的 mac 上没有安装brew的话,那就先装一下 brew 官网
windows 上的话就直接手动下载解压文件吧
https://codeload.github.com/openatx/stf-binaries/zip/0.1
将下载的 zip 文件解压后 放到go/src/github.com/openatx/u2init/resources目录下面,并重命名为stf-binaries-master
其他需要下载的文件,根据init-resources.sh写的一个个手动下完了,扔到resources目录下面
如果你的 atx-server 是 10.0.0.1:8000,直接下面的命令启动就好了
$ cd go/src/github.com/openatx/u2init
$ ./u2init --server 10.0.0.1:8000
在这里又会遇到一个问题,报错信息如下
2018/07/30 23:03:41 main.go:186: Init error: mini(cap|touch): open resources/stf-binaries-master/node_modules/minicap-prebuilt/prebuilt/armeabi-v7a/lib/android-23/minicap.so: no such file or directory
看了下目录go/src/github.com/openatx/u2init/resources下没有stf-binaries-master这个文件夹,但是存在一个stf-binaries-0.1的文件夹
解决的办法就是把这个文件夹重命名为stf-binaries-master就好了
或者单独启动 u2init 不依赖 atx-server
$ ./u2init
# 已经不支持单独启动u2init  后面随便填一个地址就好了
# 例如 ./u2init --server 10.0.0.1:8000
成功启动 u2init 之后 正确的 log 信息应该是这样的
linpengchengdeMac-mini:u2init linpengcheng$ ./u2init -server 10.0.34.2:8000
adb server version: 39
u2init version 20180330
2018/07/30 23:49:48 main.go:226: Add adb.exe to PATH += /Users/linpengcheng/go/src/github.com/openatx/u2init/resources
2018/07/30 23:49:48 main.go:240: MachineID: 0E1693D6-8AEE-53CF-86F7-C72F06D42DC9
2018/07/30 23:49:48 main.go:242: u2init listening on port 61020
2018/07/30 23:49:48 main.go:257: Watch and init
2018/07/30 23:49:48 main.go:182: Device ce051715b2ef600802 came online
2018/07/30 23:49:48 main.go:184: ce051715b2ef600802%!(EXTRA string=Init device)
2018/07/30 23:49:49 main.go:48: product model: SM-G950F
2018/07/30 23:49:49 main.go:53: Install minicap and minitouch
2018/07/30 23:49:49 main.go:57: Install app-uiautomator[-test].apk
2018/07/30 23:49:49 main.go:138: APK already installed, Skip. Uninstall apk manually if you want to reinstall apk
2018/07/30 23:49:49 main.go:61: Install atx-agent
ce051715b2ef600802 server started, listening on 10.0.30.152:7912
2018/07/30 23:49:51 main.go:196: ce051715b2ef600802 Get http://127.0.0.1:57567/info: read tcp 127.0.0.1:61045->127.0.0.1:57567: read: connection reset by peer
2018/07/30 23:49:51 main.go:182: Device 0642f8d6f0ec9d1a came online
2018/07/30 23:49:51 main.go:184: 0642f8d6f0ec9d1a%!(EXTRA string=Init device)
2018/07/30 23:49:51 main.go:48: product model: Nexus 5
2018/07/30 23:49:51 main.go:53: Install minicap and minitouch
2018/07/30 23:49:52 main.go:57: Install app-uiautomator[-test].apk
2018/07/30 23:49:52 main.go:138: APK already installed, Skip. Uninstall apk manually if you want to reinstall apk
2018/07/30 23:49:52 main.go:61: Install atx-agent
0642f8d6f0ec9d1a server started, listening on 10.0.30.26:7912
2018/07/30 23:49:55 main.go:199: 0642f8d6f0ec9d1a UDID 0642f8d6f0ec9d1a-cc:fa:00:c8:ce:d8-Nexus_5
2018/07/30 23:49:55 main.go:200: 0642f8d6f0ec9d1a 7912 forward to 58982
2018/07/30 23:49:55 main.go:206: 0642f8d6f0ec9d1a Init Success
两台安卓设备插在电脑上,就自动连接到了 atx-server 了
如果你还有其他的设备,用 usb 往这台电脑上插一下,就 ok 了。
平时手机重复执行python -m uiautomator2 init 10.0.0.1:8000的操作基本上就用不到了
附上 atx 相关的基础链接
小白入门篇:python uiautomator2 的代码示例
浅谈自动化测试工具 python-uiautomator2
atx 安卓集群管理 安装运行及自动化的实践
ATX QQ 交流群:499563266
