识别 6 次,成功 5 次,第 3 次识别失败
目前只是用来好玩的,因为适用范围太窄了。比如只是数字验证码识别率高;验证码颜色一复杂,这个脚本也需要调,难度更高。

识别 6 次,成功 5 次,第 3 次识别失败
1.获取整个网页的截图
2.获取验证码的截图
3.对验证码图片处理,只保留其中的数字
4.用工具识别验证码图,转为文本
5.登录
这个代码只适用于我的测试网站。自己的网站需要自己修改 rgb 值。
# coding:utf-8
from selenium import webdriver
from PIL import Image
import os
import time

def get_captcha(driver,captcha_id='kaptchaImage',full_screen_img_path='c:/web.png',
                  captcha_img_path='c:/captcha.png',captcha_final_path='c:/captcha_final.png',
                  txt_path='c:/captcha.txt'):
    '''
    自动获取验证码
    :param driver:
    :param captcha_id:网页中验证码图片的id
    :param full_screen_img_path:整个网页截屏保存的路径
    :param captcha_img_path:验证码图片的路径
    :param captcha_final_path:最终处理的验证码的路径
    :param txt_path:保存验证码的txt文本路径
    :return:验证码 or fail
    '''

    # 浏览器界面截图
    driver.save_screenshot(full_screen_img_path)
    #找到验证码图片,得到它的坐标
    element = driver.find_element_by_id(captcha_id)
    left = element.location['x']
    top = element.location['y']
    right = element.location['x'] + element.size['width']
    bottom = element.location['y'] + element.size['height']
    left, top, right, bottom = int(left), int(top), int(right), int(bottom)
    img = Image.open(full_screen_img_path)
    img = img.crop((left, top, right, bottom))
    #得到验证码图片
    img.save(captcha_img_path)
    #打开验证码图片
    img = Image.open(captcha_img_path)
    # 新建一张图片(大小和原图大小相同,背景颜色为255白色)
    img_new = Image.new('P', img.size, 255)
    for x in range(img.size[1]):
        for y in range(img.size[0]):
            # 遍历图片的xy坐标像素点颜色
            pix = img.getpixel((y, x))
            # print(pix)
            #自己调色,r=0,g=0,b>0为蓝色
            if (pix[0] < 120 and pix[1] < 120 and pix[2] > 200) or (pix[0] < 40 and pix[1] < 40 and pix[2] > 100):
                #把遍历的结果放到新图片上,0为透明度,不透明
                img_new.putpixel((y, x), 0)
    img_new.save(captcha_final_path, format = 'png')

    #通过tesseract工具解析验证码图片,生成文本
    # cmd = 'tesseract '+captcha_final_path+' '+txt_path[0:-4]
    cmd = 'tesseract '+captcha_final_path+' '+txt_path[0:-4] + ' -psm 7 digits'
    os.system(cmd)

    #读取txt文件里面的验证码
    with open(txt_path, 'r') as f:
        #去掉左右空格
        t = f.read().strip()
        #去掉中间空格
        if ' ' in t:
            t = t.replace(' ', '')
        #如果是数字且长度为4,就返回数字,如果不是就返回 fail
        if t.isdigit() and len(t) == 4:
            return t
        else:
            return 'fail'

def log_in_eshop(driver,username,password):
    '''
    通过URL判定是否登录成功,比判定元素快,如果网速较慢可能会判定失败
    :param driver:
    :param username: 账号
    :param password: 密码
    :return:
    '''
    driver.find_element_by_name("userName").clear()
    driver.find_element_by_name("userName").send_keys(username)
    driver.find_element_by_name("password").clear()
    driver.find_element_by_name("password").send_keys(password)
    code = get_captcha(driver)
    driver.find_element_by_name("kaptcha").clear()
    driver.find_element_by_name('kaptcha').send_keys(code)
    time.sleep(2)
    driver.find_element_by_class_name("loginBt").click()
    time.sleep(3)
    #统计识别次数
    n = 0
    #识别5次验证码,如果5次都没识别出来,测试fail
    while driver.current_url == '你的登录网站' and n < 5:
        driver.find_element_by_name("userName").clear()
        driver.find_element_by_name("userName").send_keys(username)
        driver.find_element_by_name("password").clear()
        driver.find_element_by_name("password").send_keys(password)
        code = get_captcha(driver)
        driver.find_element_by_name("kaptcha").clear()
        driver.find_element_by_name('kaptcha').send_keys(code)
        time.sleep(1)
        driver.find_element_by_class_name("loginBt").click()
        time.sleep(4)
        n=n+1
    if n==5:
        print(u'输入验证码失败')
        return False
    else:
        return True

if __name__ == '__main__':
    url = '你的登录网站'
    driver = webdriver.Chrome()
    driver.maximize_window()
    driver.get(url)
    time.sleep(2)
    usename = '你的账号'
    password = '你的密码'
    log_in_eshop(driver, usename, password)
1.pix[0],pix[1],pix[2] 是什么意思?
pix[0],pix[1],pix[2] 分别对应 r,g,b 三种颜色。
2.pix[0],pix[1],pix[2] 怎么取值的?
比如 if (pix[0] < 120 and pix[1] < 120 and pix[2] > 200) or (pix[0] < 40 and pix[1] < 40 and pix[2] > 100): 这个是什么意思?
以下图为例

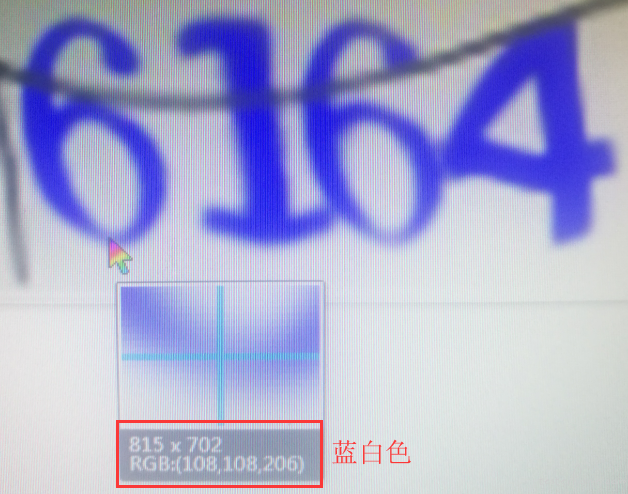
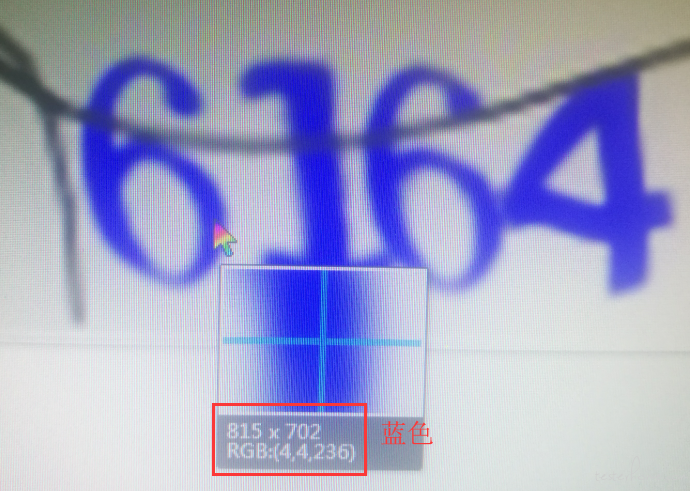
这张图片中,验证码的数字主要为 3 种颜色,蓝色、蓝白色、以及干扰线的黑色。
现在我们要获取这 3 种颜色的 rgb 值。
首先打开 QQ,用老马给你的截图键,对验证码图片截图,鼠标放到蓝色上面,然后你就看到蓝色的 rgb 值。蓝白色和黑色同理。


不同的地方肉眼,看起来是一个颜色,实际上 rgb 会有所偏差。
所以代码没有直接写成
if (pix[0] = 4 and pix[1] = 4 and pix[2] = 236) or (pix[0] = 108 and pix[1] = 108 and pix[2] = 206) or (pix[0] = 5 and pix[1] = 7 and pix[2] = 128):
而是写成了
if (pix[0] < 120 and pix[1] < 120 and pix[2] > 200) or (pix[0] < 40 and pix[1] < 40 and pix[2] > 100):
处理后的结果:

验证码图片处理参考资料:https://www.shiyanlou.com/courses/364/labs/1165/document
3.tesseract 是什么?
tesseract 是一款开源的 ocr 工具。更多资料可以网上搜索下。
网上下载这样一个工具,安装,配置环境变量,然后使用基础语法就可以识别图片了。
基础语法:tesseract imagename outputbase
Usage:tesseract imagename outputbase [-l lang] [-psm pagesegmode] [configfile...]
pagesegmode values are:
0 = Orientation and script detection (OSD) only.
1 = Automatic page segmentation with OSD.
2 = Automatic page segmentation, but no OSD, or OCR
3 = Fully automatic page segmentation, but no OSD. (Default)
4 = Assume a single column of text of variable sizes.
5 = Assume a single uniform block of vertically aligned text.
6 = Assume a single uniform block of text.
7 = Treat the image as a single text line.
8 = Treat the image as a single word.
9 = Treat the image as a single word in a circle.
10 = Treat the image as a single character.
-l lang and/or -psm pagesegmode must occur before anyconfigfile.
代码中是使用的:
cmd = 'tesseract '+captcha_final_path+' '+txt_path[0:-4] + ' -psm 7 digits'
这条命令是使用模式 7,读取/tessdata/configs/digits 文件,digits 文件我改了下,里面全是数字,那么 ocr 工具只会匹配数字
参考资料:https://blog.csdn.net/xiaochunyong/article/details/7193744
https://github.com/tesseract-ocr/tesseract/wiki/Command-Line-Usage
