2.23 更新:添加 “可能遇到的问题及解决办法”
今天看到恒温发的链接,加上最近项目在做 iOS 自动化框架的调研,赶紧尝鲜了下。
框架主页:https://github.com/google/EarlGrey
框架简介
EarlGrey is a native iOS UI automation test framework that enables you to write clear, concise tests.
With the EarlGrey framework, you have access to enhanced synchronization features. EarlGrey automatically synchronizes with the UI, network requests, and various queues, but still allows you to manually implement customized timings, if needed.
EarlGrey’s synchronization features help ensure that the UI is in a steady state before actions are performed. This greatly increases test stability and makes tests highly repeatable.
EarlGrey works in conjunction with the XCTest framework and integrates with Xcode’s Test Navigator so you can run tests directly from Xcode or the command line (using xcodebuild).
特性:
- Synchronization
Typically, you shouldn’t be concerned about synchronization as EarlGrey automatically synchronizes with the UI, network requests, main Dispatch Queue, and the main NSOperationQueue. To support cases where you want to wait for some event to occur before the next UI interaction happens, EarlGrey provides Synchronization APIs that allow you to control EarlGrey's synchronization behavior. You can use these APIs to increase the stability of your tests.
- Visibility Checks
EarlGrey uses screenshot differential comparison (also known as 'screenshot diffs') to determine the visibility of UI elements before interacting with them. As a result, you can be certain that a user can see and interact with the UI that EarlGrey interacts with.
Note: Out-of-process (i.e. system generated) alert views and other modal dialogs that obscure the UI can interfere with this process.
- User-Like Interaction
Taps and swipes are performed using app-level touch events, instead of using element-level event handlers. Before every UI interaction, EarlGrey asserts that the elements being interacted with are actually visible (see Visibility Checks) and not just present in the view hierarchy. EarlGrey's UI interactions simulate how a real user would interact with your app's UI, and help you to find and fix the same bugs that users would encounter in your app.
简而言之,是一个内嵌式框架(以 framework 形式内嵌至应用中),用例继承 XCTestCase ,本质上是 iOS 的 Unit test 。比较类似的框架是 KIF 。
主要特性是:
- 同步性:需要等待的操作自动等待,妈妈不用担心我的 wait 和 sleep 写错了
- 可见性检测:因为是直接对应用内对象操作,所以有可能给一个用户看不到的元素发送触控事件了。这个可以防止出现这种情况,浏览器使用的 Webdriver 里面也有类似特性
- 模拟用户操作:使用 app 级别的触控对象,而非元素级别的事件触发。简而言之,屏幕上不可见的元素都操作不了了。
尝鲜准备
因为它的 Prerequisites 略复杂,所以直接用了官方 Example 。
环境需求:
- Xcode
- CocoaPod(1.0.0 beta 或者 0.39 stable 均可)
1、 git clone https://github.com/google/EarlGrey.git
2、 在EarlGrey/Demo/EarlGreyExample执行 pod install 安装依赖库。如果你的 Pod 是 1.0.0 beta ,恭喜你,直接运行即可。如果是 0.39 stable ,请改成下面的内容:
#
#  Copyright 2016 Google Inc.
#
#  Licensed under the Apache License, Version 2.0 (the "License");
#  you may not use this file except in compliance with the License.
#  You may obtain a copy of the License at
#
#       http://www.apache.org/licenses/LICENSE-2.0
#
#  Unless required by applicable law or agreed to in writing, software
#  distributed under the License is distributed on an "AS IS" BASIS,
#  WITHOUT WARRANTIES OR CONDITIONS OF ANY KIND, either express or implied.
#  See the License for the specific language governing permissions and
#  limitations under the License.

# EarlGreyExample
platform :ios, '8.0'

source 'https://github.com/CocoaPods/Specs.git'

PROJECT_NAME = 'EarlGreyExample'
TEST_TARGET = 'EarlGreyExampleTests'
SCHEME_FILE = 'EarlGreyExampleTests.xcscheme'
TEST_TARGET_SWIFT = 'EarlGreyExampleSwiftTests'
SCHEME_FILE_SWIFT = 'EarlGreyExampleSwiftTests.xcscheme'

xcodeproj PROJECT_NAME
target TEST_TARGET, :exclusive => true do
  pod 'EarlGrey'
end

target TEST_TARGET_SWIFT, :exclusive => true do
  pod 'EarlGrey'
end

# target TEST_TARGET do
#  project PROJECT_NAME
#
#  inherit! :search_paths
#  pod 'EarlGrey'
#end
#
#target TEST_TARGET_SWIFT do
#  project PROJECT_NAME
#
#  inherit! :search_paths
#  pod 'EarlGrey'
#end

post_install do |installer|
  load('configure_earlgrey_pods.rb')
  # For each test target, you need to call the EarlGrey script's edit method once.
  # For the 'EarlGreyExampleTests' target.
  configure_for_earlgrey(installer, PROJECT_NAME, TEST_TARGET, SCHEME_FILE)
  # For the 'EarlGreyExampleSwiftTests' target.
  configure_for_earlgrey(installer, PROJECT_NAME, TEST_TARGET_SWIFT, SCHEME_FILE_SWIFT)
end
3、 打开 EarlGreyExample.xcworkspace 就可以 run 了。
示例用例执行及解析
应用支持模拟器,直接在模拟器上 Test 了一遍,全部通过。
官方给了两套用例,一套是 OC 写的,另一套是 swift 写的。内容一样。里面的写法很有学习价值。这里以 OC 为例,简单记录一下。
- (void)testBasicSelection {
  // Select the button with Accessibility ID "clickMe".
  [EarlGrey selectElementWithMatcher:grey_accessibilityID(@"ClickMe")];
}

- (void)testBasicSelectionAndAction {
  // Select and tap the button with Accessibility ID "clickMe".
  [[EarlGrey selectElementWithMatcher:grey_accessibilityID(@"ClickMe")]
      performAction:grey_tap()];
}

- (void)testBasicSelectionAndAssert {
  // Select the button with Accessibility ID "clickMe" and assert it's visible.
  [[EarlGrey selectElementWithMatcher:grey_accessibilityID(@"ClickMe")]
      assertWithMatcher:grey_sufficientlyVisible()];
}

- (void)testBasicSelectionActionAssert {
  // Select and tap the button with Accessibility ID "clickMe", then assert it's visible.
  [[[EarlGrey selectElementWithMatcher:grey_accessibilityID(@"ClickMe")]
      performAction:grey_tap()]
      assertWithMatcher:grey_sufficientlyVisible()];
}
循序渐进,从找元素、对元素操作、找元素 + 断言、对元素操作 + 断言四个阶段编写。从这些用例看出,EarlGrey 的 API 中找元素与元素操作是分离的,而非像 KIF 那样合并在一起。
- (void)testSelectionOnMultipleElements {
  // This test will fail because both buttons are visible and match the selection.
  // We add a custom error here to prevent the Test Suite failing.
  NSError *error;
  [[EarlGrey selectElementWithMatcher:grey_sufficientlyVisible()]
      performAction:grey_tap() error:&error];
  if (error) {
    NSLog(@"Test Failed with Error : %@",[error description]);
  }
}
展示了如何捕获 ERROR(写法和一些老的 UIKit 函数类似,返回的是 error 的地址而非内容)。这里的 error 原因是有不止一个匹配的元素。
- (void)testCollectionMatchers {
  id<GREYMatcher> visibleSendButtonMatcher =
      grey_allOf(grey_accessibilityID(@"ClickMe"), grey_sufficientlyVisible(), nil);
  [[EarlGrey selectElementWithMatcher:visibleSendButtonMatcher]
      performAction:grey_doubleTap()];
}
展示了如何使用多条件获取元素。例子中的 grey_allOf(grey_accessibilityID(@"ClickMe"), grey_sufficientlyVisible(), nil) 是指这个 matcher 的获取条件为:AccessibilityID = "ClickMe" AND visible 。最后的 nil 应该只是展示支持 nil 。
- (void)testWithInRoot {
  // Second way to disambiguate: use inRoot to focus on a specific window or container.
  // There are two buttons with accessibility id "Send", but only one is inside SendMessageView.
  [[[EarlGrey selectElementWithMatcher:grey_accessibilityID(@"Send")]
      inRoot:grey_kindOfClass([SendMessageView class])] performAction:grey_doubleTap()];
}
展示 inRoot 父 view 筛选器。视图中有两个元素有相同的 AccessibilityId,但其中一个父 view 是 SendMessageView 类型的。
// Define a custom matcher for table cells that contains a date for a Thursday.
- (id<GREYMatcher>)matcherForThursdays {
  MatchesBlock matches = ^BOOL(UIView *cell) {
    if ([cell isKindOfClass:[UITableViewCell class]]) {
      NSDateFormatter *formatter = [[NSDateFormatter alloc] init];
      formatter.dateStyle = NSDateFormatterLongStyle;
      NSDate *date = [formatter dateFromString:[[(UITableViewCell *)cell textLabel] text]];
      NSCalendar *calendar = [NSCalendar currentCalendar];
      NSInteger weekday = [calendar component:NSCalendarUnitWeekday fromDate:date];
      return weekday == 5;
    } else {
      return false;
    }
  };
  DescribeToBlock describe = ^void(id<GREYDescription> description) {
    [description appendText:@"Date for a Thursday"];
  };

  return [[GREYElementMatcherBlock alloc] initWithMatchesBlock:matches
                                              descriptionBlock:describe];
}

- (void)testWithCustomMatcher {
  // Use the custom matcher.
  [[EarlGrey selectElementWithMatcher:[self matcherForThursdays]]
      performAction:grey_doubleTap()];
}
自定义 matcher 。有两个部分。matcherBlock 部分如果 block return true 就匹配,false 就不匹配。descriptionBlock 则是这个 matcher 的描述。用于 GREYBaseMatcher::describeTo:
- (void)testTableCellOutOfScreen {
  // Go find one cell out of the screen.
  [[[EarlGrey selectElementWithMatcher:grey_accessibilityID(@"Cell30")]
      usingSearchAction:grey_scrollInDirection(kGREYDirectionDown, 50)
   onElementWithMatcher:grey_accessibilityID(@"table")]
      performAction:grey_doubleTap()];

  // Move back to top of the table.
  [[[EarlGrey selectElementWithMatcher:grey_accessibilityID(@"Cell1")]
      usingSearchAction:grey_scrollInDirection(kGREYDirectionUp, 500)
   onElementWithMatcher:grey_accessibilityID(@"table")]
      performAction:grey_doubleTap()];
}
获取屏幕外部元素。usingSearchAction:onElementWithMatcher 可以在父元素内通过指定 action(例子中用的是滑动)遍历元素来查找指定元素。
- (void)testCatchErrorOnFailure {
  // TapMe doesn't exist, but the test doesn't fail because we are getting a pointer to the error.
  NSError *error;
  [[EarlGrey selectElementWithMatcher:grey_accessibilityID(@"TapMe")]
      performAction:grey_tap() error:&error];
  if (error) {
    NSLog(@"Error: %@", [error localizedDescription]);
  }
}
同样是捕获 Error ,只是为了说明当元素找不到时也会产生 error 。
// Fade in and out an element.
- (void)fadeInAndOut:(UIView *)element {
  [UIView animateWithDuration:1.0
                        delay:0.0
                      options:UIViewAnimationOptionCurveEaseOut
                   animations: ^{
                       element.alpha = 0.0;}
                   completion: ^(BOOL finished) {
                       [UIView animateWithDuration:1.0
                                             delay:0.0
                                           options:UIViewAnimationOptionCurveEaseIn
                                        animations: ^{
                                            element.alpha = 1.0;}
                                        completion: nil];
                   }];

}

// Define a custom action that applies fadeInAndOut to the selected element.
- (id<GREYAction>)tapClickMe {
  return [GREYActionBlock actionWithName:@"Fade In And Out"
                             constraints:nil
                            performBlock: ^(id element, NSError *__strong *errorOrNil) {
                              // First make sure element is attached to a window.
                              if ([element window] == nil) {
                                NSDictionary *errorInfo = @{
                                    NSLocalizedDescriptionKey:
                                    NSLocalizedString(@"Element is not attached to a window", @"")};
                                *errorOrNil = [NSError errorWithDomain:kGREYInteractionErrorDomain
                                                                  code:1
                                                              userInfo:errorInfo];
                                return NO;
                              } else {
                                [self fadeInAndOut:[element window]];
                                return YES;
                              }
                            }];
}

- (void)testCustomAction {
  // Test using the custom action tapClickMe.
  [[EarlGrey selectElementWithMatcher:grey_accessibilityID(@"ClickMe")]
      performAction:[self tapClickMe]];
}
代码略多,主要是为了展示封装能力。GREYActionBlock 能把元素传到 performBlock 的 element 参数,用于对元素执行指定操作。
// Write a custom assertion that checks if the alpha of an element is equal to the expected value.
- (id<GREYAssertion>)alphaEqual:(CGFloat)expectedAlpha {
  return [GREYAssertionBlock assertionWithName:@"Assert Alpha Equal"
                       assertionBlockWithError:^BOOL(UIView *element,
                                                     NSError *__strong *errorOrNil) {
                         // Assertions can be performed on nil elements. Make sure view isn’t nil.
                         if (element == nil) {
                           *errorOrNil =
                               [NSError errorWithDomain:kGREYInteractionErrorDomain
                                                   code:kGREYInteractionElementNotFoundErrorCode
                                               userInfo:nil];
                           return NO;
                         }
                         return element.alpha == expectedAlpha;
                        }];
}


- (void)testWithCustomAssertion {
  [[EarlGrey selectElementWithMatcher:grey_accessibilityID(@"ClickMe")]
      assert:([self alphaEqual:1.0])];
自定义 assert 。类型必须是 id ,返回值为 GREYAssertionBlock 类型,包含 assert 的描述及实际 assert 的 block 。
- (void)handleException:(GREYFrameworkException *)exception details:(NSString *)details {
  NSLog(@"Test Failed With Reason : %@ and details : %@", [exception reason], details);
}
...
- (void)testWithCustomFailureHandler {
  // This test will fail and use our custom handler to handle the failure.
  // The custom handler is defined at the beginning of this file.
  PrintOnlyHandler *myHandler = [[PrintOnlyHandler alloc] init];
  [EarlGrey setFailureHandler:myHandler];
  [[EarlGrey selectElementWithMatcher:grey_accessibilityID(@"TapMe")]
      performAction:(grey_tap())];
}
自定义 FailtureHandler 。这个是全局的 handler ,很适合用来做 fail 后截图 + 保存日志等操作。要注意 exception 类型为 GREYFrameworkException 。
- (void)testLayout {
  // Define a layout constraint.
  GREYLayoutConstraint *onTheRight =
      [GREYLayoutConstraint layoutConstraintWithAttribute:kGREYLayoutAttributeLeft
                                                relatedBy:kGREYLayoutRelationGreaterThanOrEqual
                                     toReferenceAttribute:kGREYLayoutAttributeRight
                                               multiplier:1.0
                                                 constant:0.0];

  [[EarlGrey selectElementWithMatcher:grey_accessibilityLabel(@"SendForLayoutTest")]
      assertWithMatcher:grey_layout(@[onTheRight], grey_accessibilityID(@"ClickMe"))];
}
可以封装自动布局的 constraint 断言。这是一个不错的功能,实际上更偏向于 Unit Test 。
- (void)testWithCondition {
  GREYCondition *myCondition = [GREYCondition conditionWithName: @"Example condition" block: ^BOOL {
    int i = 1;
    while (i <= 100000) {
      i++;
    }
    return YES;
  }];
  // Wait for my condition to be satisfied or timeout after 5 seconds.
  BOOL success = [myCondition waitWithTimeout:5];
  if (!success) {
    // Just printing for the example.
    NSLog(@"Condition not met");
  } else {
    [[EarlGrey selectElementWithMatcher:grey_accessibilityID(@"ClickMe")]
        performAction:grey_tap()];
  }
}
最后一个用例。估计作者写不下去了,condition 竟然直接就是 i++ 。。。这个纯粹用来演示 GREYCondition + waitWithTimeout 的封装,实际用途应该是用于网络请求超时检测什么的。
可能遇到的问题及解决方法
1、 下载不了 EarlGray:

原因:在无** 网络、shadowsocks 自动代理网络及 ** 纯网络下进行测试。对应结果如下:
无网络:
[!] Error installing EarlGrey
[!] /usr/bin/curl -f -L -o /var/folders/_c/j72s8y7x1cld6t7mvpvtxtnh0000gn/T/d20160223-39900-w5mwqg/file.zip http://www.github.com/google/EarlGrey/releases/download/1.0.0/EarlGrey-1.0.0.zip --create-dirs

  % Total    % Received % Xferd  Average Speed   Time    Time     Time  Current
                                 Dload  Upload   Total   Spent    Left  Speed
  0     0    0     0    0     0      0      0 --:--:-- --:--:-- --:--:--     0
curl: (52) Empty reply from server
shadow socks 自动代理:
同 无 *** 网络
*** 纯 *** 网络:
第一次:
[!] Error installing EarlGrey
[!] /usr/bin/curl -f -L -o /var/folders/_c/j72s8y7x1cld6t7mvpvtxtnh0000gn/T/d20160223-39940-1qw3wx6/file.zip http://www.github.com/google/EarlGrey/releases/download/1.0.0/EarlGrey-1.0.0.zip --create-dirs

  % Total    % Received % Xferd  Average Speed   Time    Time     Time  Current
                                 Dload  Upload   Total   Spent    Left  Speed
  0     0    0     0    0     0      0      0 --:--:--  0:00:02 --:--:--     0
  0     0    0     0    0     0      0      0 --:--:--  0:00:03 --:--:--     0
100   595    0   595    0     0    106      0 --:--:--  0:00:05 --:--:--   554
  0     0    0     0    0     0      0      0 --:--:--  0:00:07 --:--:--     0curl: (56) SSLRead() return error -9806
第二次:成功下载及安装:
$ /usr/bin/curl -f -L -o /var/folders/_c/j72s8y7x1cld6t7mvpvtxtnh0000gn/T/d20160223-40009-1if7m2w/file.zip http://www.github.com/google/EarlGrey/releases/download/1.0.0/EarlGrey-1.0.0.zip --create-dirs
     % Total    % Received % Xferd  Average Speed   Time    Time     Time  Current
                                    Dload  Upload   Total   Spent    Left  Speed
     0     0    0     0    0     0      0      0 --:--:-- --:--:-- --:--:--     0
     0     0    0     0    0     0      0      0 --:--:--  0:00:02 --:--:--     0
   100   595    0   595    0     0     78      0 --:--:--  0:00:07 --:--:--   142
   100 1768k  100 1768k    0     0  68583      0  0:00:26  0:00:26 --:--:--  179k
   $ /usr/bin/unzip /var/folders/_c/j72s8y7x1cld6t7mvpvtxtnh0000gn/T/d20160223-40009-1if7m2w/file.zip -d /var/folders/_c/j72s8y7x1cld6t7mvpvtxtnh0000gn/T/d20160223-40009-1if7m2w
...
经过使用 wget http://www.github.com/google/EarlGrey/releases/download/1.0.0/EarlGrey-1.0.0.zip 命令,发现最终下载服务器地址为:github-cloud.s3.amazonaws.com,估计是被墙了。
解决方法:***。
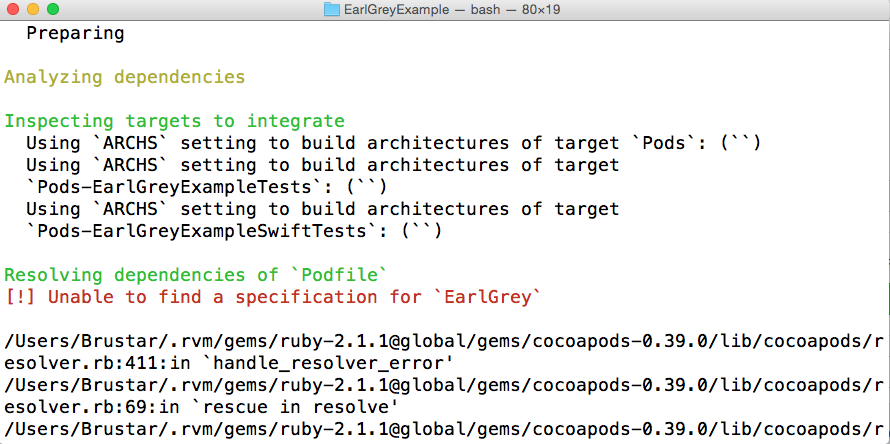
2、运行 pod install 报错:
...
NoMethodError - undefined method `to_ary' for #<Pod::Specification name="EarlGrey">
Did you mean?  to_query
...
原因:cocoapods 与 ruby 2.3.0 之间有兼容性问题。参考https://github.com/CocoaPods/CocoaPods/issues/4391
解决方法:改成使用 mac 自带的 2.0.0 后问题解决。
感受
一个不小心把示例用例全部看了个遍,感受还是比较深的。简单地说,这个 API 的 Exception 、 condition、 matcher 都封装了 description ,对于测试报告和记录比较友好。同时它本身提到的三个特点对于 UI 测试也比较实用。只是只能向后兼容到 iOS 8.0 这个有点悲催。
不过目前还没有尝试把它加入到一个实际项目中,待晚些尝试一下,看看它的 Prerequisites 是否不那么容易满足,pod 集成是否有坑。